















2784528811 Kenmore Range - Instructions
Keep searches simple. Use keywords, e.g. "leaking", "pump", "broken" or "fit".
Light burnt out.
Turned the wire protector to the side. Turned out the old bulb and replaced it with the new. Turned the wire protector back in place and I'm like new.
Parts Used:

-
Roscoe G from ROCHESTER, NY
-
Difficulty Level:Very Easy
-
Total Repair Time:Less than 15 mins
2 of 6 people
found this instruction helpful.
Was this instruction helpful to you?
Thank you for voting!
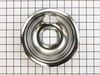
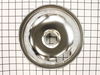
Live in an apartment and they had generic drip pans on the stove causing pots to tilt when cooking.
Replaced drip pans that the apartment Superintendent had in place with the correct drip pans and now cooking is beautiful again! No more uneven cooking on the stove top.
Parts Used:
-
Jennifer from Cleveland, OH
-
Difficulty Level:Really Easy
-
Total Repair Time:Less than 15 mins
0 of 1 people
found this instruction helpful.
Was this instruction helpful to you?
Thank you for voting!
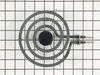
metal "Y",shape metal long arm attached to burner came loose.holding the coil to burner
just plugged in the two prings into burner into outlet. Very simple and quick.
Parts Used:
-
Audret K, from San Diego, CA
-
Difficulty Level:Really Easy
-
Total Repair Time:Less than 15 mins
1 of 4 people
found this instruction helpful.
Was this instruction helpful to you?
Thank you for voting!
burner broke apart under a pot
Pulled out the burner. Just pulled and out it came. Looked you up online. Crawled around on the floor trying to find the model number. (This was the hardest part of the whole process.) Ordered the part; it came the very next day despite the fact that I didn't order special shipping. Unpacked the part, plugged it in. And it worked!!!!
FABULOUS service. Thank you so much.
FABULOUS service. Thank you so much.
Parts Used:
-
Mary from south bristol, ME
-
Difficulty Level:Really Easy
-
Total Repair Time:Less than 15 mins
0 of 1 people
found this instruction helpful.
Was this instruction helpful to you?
Thank you for voting!
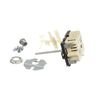
Burner not heating properly
1. The infinite switch had several knobs which would fit the switch shaft. Read the directions included with the switch in order to have the shaft fit the proper knob. You can break the shaft with two pairs of pliers. 2. Move the stove away from the wall and unplug it. 3. Remove the 1/4 screws from the back side of the stove and remove the back panel, exposing the switch. 4. Remove the wires one at a time and put them on the new switch. The terminals are L1, L2, P, H1 & H2. The Pilot (p) has a smaller terminal so you don't get it mixed up. Generally L1 is black, L1 is red, P is yellow, H1 and H2 can be blue, brown, yellow, orange or one of these colors striped on a white wire. 5. Remove the old switch from the stove and be sure to save the two mounting screws. 6. Position the new switch so that the side of the switch marked "top" is on top. 7. Install the screws on the new switch and put the knob on it. 8. Carefully test the burner. 9. Unplug the stove and put the back cover on.
Parts Used:
-
Stephen from Kokomo, IN
-
Difficulty Level:Easy
-
Total Repair Time:30 - 60 mins
-
Tools:Nutdriver, Pliers, Screw drivers
0 of 1 people
found this instruction helpful.
Was this instruction helpful to you?
Thank you for voting!
The control knob stem broke off when I moved the stove.
I located and removed 2 sets of hex-head screws under the front lip of the cooktop, then lifted the entire cooktop to access the burner controls. Removed the wires and taped them, and took out the old control after removing 2 phillips head screws. Installed replacement part easily. Only tricky part is that the various shaft adapters don't quite work with my knob. I'll fix it completely with a bit of epoxy and the adapters they sent.
Parts Used:
-
Jonathan from Harvard, MA
-
Difficulty Level:Easy
-
Total Repair Time:15 - 30 mins
-
Tools:Nutdriver, Pliers, Screw drivers
3 of 10 people
found this instruction helpful.
Was this instruction helpful to you?
Thank you for voting!
Finish coming off of bowls
Removed burner from each one. removed drip bowl. Inserted new bowl. Replaced burner. Excellent help from order people so I got the correct bowl was irreplacable.
Parts Used:
-
Robert from Ledyard, CT
-
Difficulty Level:Really Easy
-
Total Repair Time:Less than 15 mins
0 of 2 people
found this instruction helpful.
Was this instruction helpful to you?
Thank you for voting!
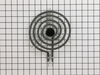
The Heating Element's Contacts Were Burnout
-
Manuel from Quakertown, PA
-
Difficulty Level:Really Easy
-
Total Repair Time:Less than 15 mins
0 of 5 people
found this instruction helpful.
Was this instruction helpful to you?
Thank you for voting!
instructions could be better
it was hard to figure out the instructions from A switch to B switch to my switch. The first switch was no good the second one was good. prayer book didn't hurt.thank
Parts Used:
-
WILLARD from GLOVERSVILLE, NY
-
Difficulty Level:A Bit Difficult
-
Total Repair Time:30 - 60 mins
-
Tools:Pliers, Screw drivers
0 of 6 people
found this instruction helpful.
Was this instruction helpful to you?
Thank you for voting!
Burners would not lay flat
Removed the burner elements, removed and disposed of old drip pans, cleaned the area, relaced with new drip pans and replaced the burner elements. Verified all burners were level - good as the day it was new!
Parts Used:
-
Alfred from Forest, VA
-
Difficulty Level:Really Easy
-
Total Repair Time:Less than 15 mins
8 of 36 people
found this instruction helpful.
Was this instruction helpful to you?
Thank you for voting!
rht. front element would not heat properly
I read parts select instructions and i was done in less than 30 minutes. Since 1988, this is the 1st. part that I had to replace. I now have parts select on my favorites list.
Parts Used:
-
Rod from Huron, OH
-
Difficulty Level:Really Easy
-
Total Repair Time:15 - 30 mins
-
Tools:Screw drivers
Was this instruction helpful to you?
Thank you for voting!
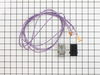
Burner was unreliable...would stop working...I had already replaced the burner
I did as the video suggested.....I cut the old wires and spliced new ones already attached to the new terminal block. It would have been nice to have some instructions with the parts as I expected one piece but had to connect the wires to the new block and the new metal cover. I was guessing a bit. Also, I needed to use the holder strip off my old part so that it displaced the new part back far enough to insert the burner connections. That meant finding a screw and nut small enough to allow the metal cover to fit on the block. But the burner works great. I've learned that any repair requires some ingenuity.
Parts Used:
-
Lelia from Vienna, VA
-
Difficulty Level:A Bit Difficult
-
Total Repair Time:15 - 30 mins
-
Tools:Pliers, Screw drivers
Was this instruction helpful to you?
Thank you for voting!
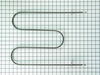
burnt out element
turn off power, remove 2 screws, lift off of hanger , slide out far enough to unplug wires. remove brackets from old element, I did have to use a screw driver to open up bracket to slide over new element(new element a little larger diameter coil) reverse removal. DONE !! Thank You Part Select !
Parts Used:
-
chuck from battle creek, MI
-
Difficulty Level:Really Easy
-
Total Repair Time:15 - 30 mins
-
Tools:Nutdriver, Screw drivers
Was this instruction helpful to you?
Thank you for voting!
Right Front [surface burner terminal block kit]
We did the repair by following the inclosed instructions. we are elderly retired average ages 82. This was our first repair and it went very well. We are so pleased to have saved over $80.00 compared with hired labor 3 yre. ago for the same part. Thanks so much for your good service.
Parts Used:
-
Wayne from Montoursville, PA
-
Difficulty Level:Really Easy
-
Total Repair Time:Less than 15 mins
-
Tools:Nutdriver, Screw drivers
Was this instruction helpful to you?
Thank you for voting!
broiler element burned out
shut off power to range, removed old element, looked up part on line, shopped for best price, Part select was $30 less than sears replacement part, ordered part, part arrived in 4 days, installed new part and I was broling again.
Parts Used:
-
daniel from fort mill, SC
-
Difficulty Level:Really Easy
-
Total Repair Time:Less than 15 mins
-
Tools:Pliers
Was this instruction helpful to you?
Thank you for voting!