


 My Orders




1720 - Overview
Models starting with 1720
Click on the best match to narrow your results.
- 1720 (Type 1) Black and Decker Miter Saw (Miter Saw)
- 1720 SprayTECH Paint Sprayer (Airless Sprayer)
- 1720 Bissell Carpet Cleaner (Little Green Machine)
- 1720 Weed Eater Trimmer (Gas Trimmer)
- 1720 (126001-147087,138-271-100) Cub Cadet Lawn Mower (Lawn Tractor)
- 1720 (147088-207400,139-272-100,130-272-100,131-) Cub Cadet Lawn Mower (Lawn Tractor)
- 1720 ( 138-272-100 147088 - 207400 ) Cub Cadet Lawn Mower (Garden Tractor)
- 1720-1 Bissell Carpet Cleaner (Little Green Portable Deep Cleaner)
- 1720-2 Bissell Carpet Cleaner (Little Green Portable Deep Cleaner)
- 1720-3 Bissell Carpet Cleaner (Little Green Portable Deep Cleaner)
- 1720-6 Bissell Carpet Cleaner (Little Green Machine)
- 1720-Q Bissell Carpet Cleaner (Little Green Portable Deep Cleaner)
- 17200 Honeywell Air Purifier (Air Purifier Filter)
- 1720000 Whirlpool Microwave
- 17201 (9000001-9999999 - 1969) Toro Lawn Mower (Lawn Mower)
- 17201 Wilton Bench Grinder (6" Bench Grinder)
- 17201 (9000001 - 9999999) Toro Lawn Mower (Whirlwind Lawnmower)
- 17202002 (2017) Char-Broil Smoker (Vertical Smoker, Electric, Digital, 725, 2017)
- 17202002-A1 (2017) Char-Broil Smoker (Vertical Smoker, Electric, Digital, 725, Brown Kraft, 2017)
- 17202004 (2017) Char-Broil Smoker (Vertical Smoker, Electric, Digital, Deluxe, 725, 2017)
- 17202004-A1 (2017) Char-Broil Smoker (Vertical Smoker, Electric, Digital, Deluxe, 725, Brown Kraft, 2017)
- 17202004-A1 Char-Broil Smoker (Deluxe Digital Electric Smoker)
- 17202005 Char-Broil Smoker (Deluxe Xl Digital Electric Smoker)
- 17202005 (2017) Char-Broil Smoker (Vertical Smoker, Electric, Digital, 1000, 2017)
- 17202005-A1 (2017) Char-Broil Smoker (Vertical Smoker, Electric, Digital, 1000, Brown Kraft, 2017)
- 17202052 (2019) Char-Broil Smoker (Highland Reverse Flow Offset Smok)
- 17202053 (2019) Char-Broil Smoker (Longhorn Reverse Flow Offset Smok)
- 1720305K Powermatic Table Saw (Table Saw)
- 1720B1 Ingersoll Rand Wrench (Impact Wrench)
- 1720B3 Ingersoll Rand Wrench (Impact Wrench)
- 1720H Simplicity Lawn Mower (Simplicity Lawn Mower Model 1720H Parts)
- 1720P1 Ingersoll Rand Wrench (Impact Wrench)
- 1720P3 Ingersoll Rand Wrench (Impact Wrench)
Enter a part description. DIY Heroes keep it simple, eg. "belt" or "pump".
Search filter:
Clear Filter
Your search term must have 3 or more characters.

$19.54
In Stock
Light Bulb - 40W
Part #8009
This an authentic OEM 40-Watt replacement light bulb, used in a number of household appliances. It is specially designed to withstand extreme temperatures, which is why these replacement bulbs are most often used to light the inside of refrigerators and ranges. It features a standard socket base, which means you simply unscrew the burnt-o...Read moreut bulb and screw in the replacement. Depending on the appliance you may require a screwdriver or nut driver to access the light bulb. We recommend you wear work gloves while handling this replacement part. It is constructed of glass and metal and is sold individually. Depending on the appliance and location of the bulb within it, you may want to consider disconnecting power and using a flashlight for easier access to unscrewing and re-screwing in your bulb during this repair.
Read less

$7.47
In Stock

$12.81
In Stock
Fuel Line (25" Length)
Part #530069247
This 25-inch fuel line carries fuel from the tank to the carburetor, ensuring proper engine operation. Made from durable clear plastic, it is designed to withstand regular use but may become clogged or brittle over time. Replacing a worn or damaged line can help prevent leaks and restore reliable starting and performance.

$9.62
In Stock
Engine Fuel Filter
Part #530095646
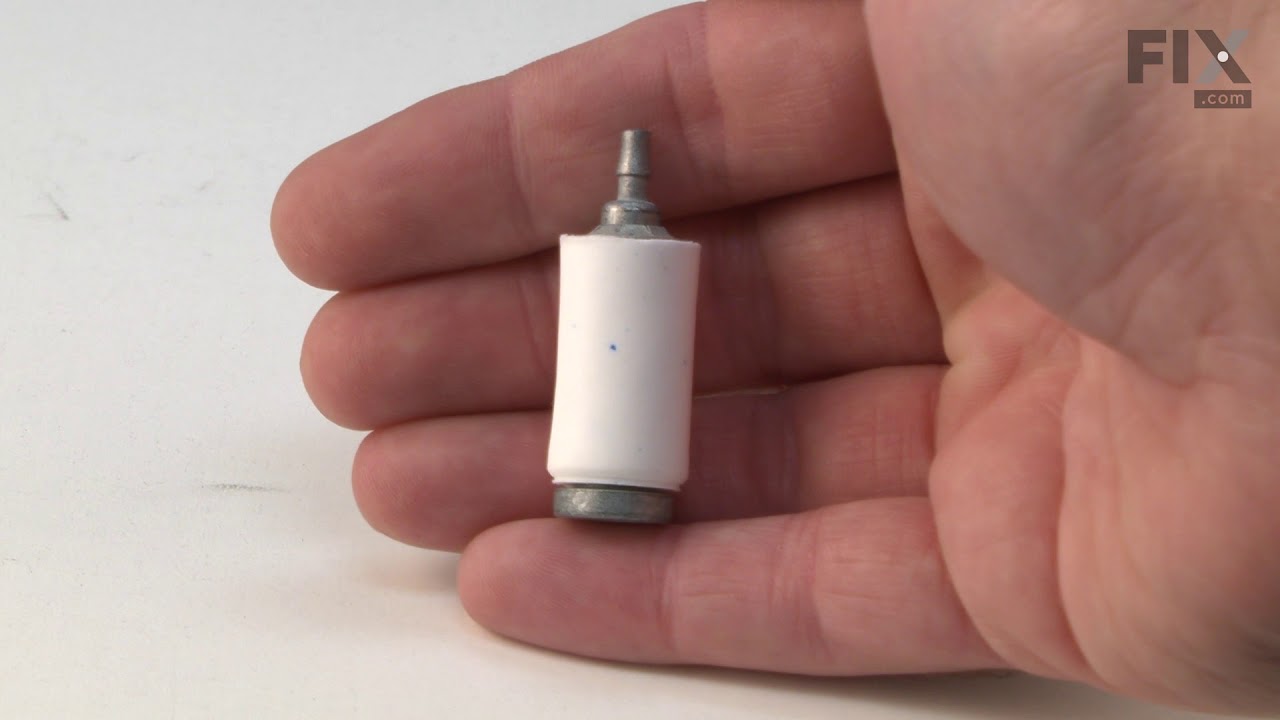
This Genuine OEM fuel filter is designed to maintain the performance and longevity of your equipment by preventing dirt and debris from entering the carburetor. Located inside the fuel tank, this essential component ensures clean fuel delivery, protecting the engine from potential damage caused by contaminants. Sold individually, the filt...Read moreer is built to meet original equipment standards for fit and function. Over time, the filter may become clogged, restricting fuel flow and making engine starts more difficult. For optimal performance, it should be replaced—not cleaned—at the first sign of blockage or wear.
Read less

$8.95
In Stock
Ceramic Fuse - 20 amp
Part #WPM0805101
This microwave fuse is just over an inch in length. It has a white ceramic center, and metal on either end. This is a twenty amp 250-volt fuse, and is used to power your microwave. If your microwave will not heat properly, will not turn on, or the touch pad becomes unresponsive, there could be a faulty fuse which should be replaced. Remem...Read moreber, since this part contains an electrical charge, before you replace the fuse from your microwave, make sure that the power is disconnected from the unit. This part is sold individually.
NOTE: Make sure your microwave is unplugged, and your capacitor is discharged before you begin this repair. A capacitor stores large amounts of electricity even after your microwave is unplugged.
Read less

$18.22
In Stock
Heat Resistant Adhesive
Part #W10841140
This is a heat-resistant adhesive for your appliance. The heat resistance allows you to stick parts such as grate feet, gaskets, and felt seals in hot areas, such as a cooktop, without compromising the integrity of the adhesive. It is white in color, and the tube is approximately 7.5 inches long.

$8.55
Special Order
Range Hex Nut
Part #WP488130
This hex nut is an authentic Whirlpool part that is sourced directly from the original equipment manufacturer, and will fit a variety of appliances including ovens, microwaves, refrigerators, air conditioners, and dishwashers. It is a metal part with a threaded hole to fasten parts in the appliance together. It is common for this part to ...Read morewear out; it is recommended to order a spare. To replace this part the tools needed are a nut driver or wrench. This nut features a built-in external tooth lock washer, which is used to help keep the nut in place.
Read less

$9.62
In Stock

$12.05
In Stock
Fuel Cap
Part #530014347
The Fuel Cap with retainer, often simply known just as the fuel cap, keeps fuel from splashing out of your tank and debris from entering it. Black in color, it is sold individually and made of plastic.
Because of everyday fatigue and wear, the cap can become damaged over time and must be replaced. You will know if it is time to replace ...Read moreyour fuel cap if you notice visible damage or experience fuel leaking from it. You can make this repair by hand, just attach the cap directly back onto the fuel tank.
Most of our customers found this repair very easy.
Read less

$10.65
In Stock
Bearing, Ball 11/16x1
Part #1705897SM
This ball bearing is sourced from the original equipment manufacturer and can be used in a variety of outdoor equipment. It has an inner diameter of 11/16 inches. The ball bearing provides support for the rotating parts in your equipment and reduces the amount of friction they are subject to during use. If the bearing is not adequately lu...Read morebricated or has worn down, you may hear grinding or squeaking from your equipment and notice excessive vibration when in use. It is important to address this issue promptly as a faulty ball bearing can potentially damage the parts located near it. To replace the ball bearing, use a pry bar or bearing puller to pry it out of its housing. Clean the housing thoroughly and press your new ball bearing in position. Note that when pressing the ball bearing into place, apply force only to the outer portion of the bearing.
Read less

$7.47
In Stock

$28.55
In Stock
Walbro Gasket/Diaphragm Kit
Part #530069844
This is an authentic OEM replacement kit for use with lawn and garden equipment. Each kit includes the carburetor, cylinder, crankcase, and muffler gaskets. The carburetor gasket seals the area between the carburetor and engine block to prevent the entry of contaminants into the carburetor. The crankcase gasket prevents oil from leaking o...Read moreut of the crankcase. The cylinder and muffler gaskets prevent the combustion and exhaust gases from escaping. If you are experiencing common problems such as leaking, loss of compression, and poor engine performance this indicates that your gaskets may be worn down or damaged and need replacement. Carefully remove the old gaskets and thoroughly clean the mating surfaces where the new gaskets will be installed to ensure a good seal. Install the new gaskets and ensure that they fit properly.
Read less
Common Symptoms of models starting with 1720
How this model fails, and the parts that fix it.
Will Not Start
Fixed by
these parts
these parts


Show All
Leaking
Fixed by
these parts
these parts

Show All
Won’t turn on
Fixed by
these parts
these parts

Show All
Engine stops after a few seconds or minutes
Fixed by
these parts
these parts
Show All
Watch our pros, then fix it yourself.

")

See how others fixed this model. Time, tools, difficulty, and steps that lead to victory!
View More
Search repair tips from other customers using simple keywords like "replace", "fit", "remove", "inspect". DIY doesn't mean you have to do it alone!
Search filter:
Clear Filter
Your search term must have 3 or more characters.
installing fuel through fuel tank wall
11 of 18 people
found this instruction helpful.
To start, remove the plastic carburetor grill. DO NOT remove the carburetor. The fuel line has to be sliced down to fit through the tank hole and get it in far enough up into the tank to grab with needle nose pliers.( need long needle nose pliers which I didn't have) I placed about six inches of the plastic tubing in the jaws of vice so t
... Read more
hat half of the tube was squeezed in the vice jaws. I then used a razor blade to shave off the exposed tube. I slipped the shaved end of the tube up through the tank hole far enough to grab with long tweezers and pulled it up to where I could grab it in the tank with needle nose pliers. I put light lube oil on the remaining tubing and pulled it through. It takes a steady firm pull to pull it in. Install the filter and pull the tube back down into the tank. I also used a small diameter drill bit and with my fingers slightly reamed the tube ends to ease the tube over the filter and carburetor nipples. To prime the engine, spray starting fluid into the carburetor and start. Repeat until the engine will run on fuel. It took me hours to figure this out, but will take less than an hour with this method.
Read less
Other Parts Used:

 – Part Number: 530069247")
Was this helpful?
Thank you for voting!