


Models
>
WRS20PRCW0
WRS20PRCW0 Frigidaire Refrigerator - Overview
Sections of the WRS20PRCW0
[Viewing 6 of 6]


Keep searches simple, eg. "belt" or "pump".

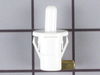
Door Shelf End Cap - Left or Right Side
PartSelect #: PS422444
Manufacturer #: 215267701
This end cap can be used for the right or left side of the refrigerator door shelf or the freezer door shelf. It is white in color, made of plastic material and measures about 2 inches high by 3 inche...
$5.25
In Stock

Defrost Timer - 60Hz 120V
PartSelect #: PS423801
Manufacturer #: 215846602
This Defrost Timer works like a clock by switching on the defrost heater circuit after a predetermined amount of compressor run time. This allows the defrost circuit to clear the evaporator of ice or ...
$38.64
In Stock

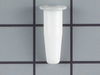
Door Shelf End Cap - Left or Right Side
PartSelect #: PS422925
Manufacturer #: 215473602
The door shelf end cap, or door bin support, secures the rack in a refrigerator or freezer door. Note that this fits on either the left or right hand side. If the end caps of your refrigerator or free...
$9.23
In Stock

Door Shelf Retainer Bar - Cut to Fit
PartSelect #: PS422630
Manufacturer #: 215366002
This white door shelf bar is approximately 31 inches long and provides storage space on your refrigerator door. If it becomes loose, cracked, or detached, it needs to be replaced. A damaged shelf bar ...
$43.89
In Stock

Run Capacitor
PartSelect #: PS2333670
Manufacturer #: 5304464438
The run capacitor helps the compressor kick on and off while maintaining a constant temperature in your fridge and freezer. You may need to replace your run capacitor if your refrigerator or freezer s...
$53.53
In Stock

Light Bulb
PartSelect #: PS12751166
Manufacturer #: 316538904
This OEM 40 watt appliance light bulb is used for some ranges, refrigerators, freezers, and microwaves. Simply locate the existing bulb, unscrew it from its socket, and replace with new light bulb. If...
$19.73
In Stock

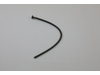
Defrost Thermostat
PartSelect #: PS469269
Manufacturer #: 5303917954
This limiter thermostat cuts out when the temperature inside your refrigerator reaches 55 degrees Fahrenheit and kicks back in when the internal temperature drops to 20 degrees Fahrenheit. If you disc...
$22.68
In Stock

Evaporator Fan Blade
PartSelect #: PS473177
Manufacturer #: 5308000010
This evaporator fan blade is a genuine OEM part that is sourced directly from the manufacturer. The evaporator fan blade circulates air through the refrigerator to control the amount of cold air goes ...
$47.83
In Stock

Upper Crisper Drawer
PartSelect #: PS461208
Manufacturer #: 5303288971
The front for this part is sold separately or you can use your existing part.
$144.43
In Stock

Hexagonal Screw
PartSelect #: PS1526503
Manufacturer #: 241710601
Sold individually.
$11.21
In Stock

Lower Crisper Drawer - Front NOT Included
PartSelect #: PS461205
Manufacturer #: 5303288968
Front must be ordered separately.
$155.75
Special Order

White Touch up Paint
PartSelect #: PS467298
Manufacturer #: 5303321319
This is white touch up paint for refrigerators, microwaves, ranges, dryers, and freezers. It is used to cover, or touch up, nicks and scratches on the appliance from wear and tear. It is an 18ml bottl...
$11.98
On Order
Questions And Answers for WRS20PRCW0
We're sorry, but our Q&A experts are temporarily unavailable.
Please check back later if you still haven't found the answer you need.
Common Symptoms of the WRS20PRCW0
[Viewing 17 of 17]Fridge too warm
Fixed by
these parts
these parts

Show All
Freezer section too warm
Fixed by
these parts
these parts
Show All
Freezer not defrosting
Fixed by
these parts
these parts
Show All
Will Not Start
Fixed by
these parts
these parts
Show All
Noisy
Fixed by
these parts
these parts
Show All
Fridge and Freezer are too warm
Fixed by
these parts
these parts
Show All
Too warm
Fixed by
these parts
these parts
Show All
Fridge runs too long
Fixed by
these parts
these parts
Show All
Leaking
Fixed by
these parts
these parts
Show All
Won’t start
Fixed by
these parts
these parts
Show All
Freezer too cold
Fixed by
these parts
these parts
Show All
Fridge too cold
Fixed by
these parts
these parts
Show All
Frost buildup
Fixed by
these parts
these parts
Show All
Light not working
Fixed by
these parts
these parts

Show All
Doesn’t stop running
Fixed by
these parts
these parts
Show All
Door won’t open or close
Fixed by
these parts
these parts
Show All
Clicking sound
Fixed by
these parts
these parts
Show All


Keep searches simple. Use keywords, e.g. "leaking", "pump", "broken" or "fit".
Fridge got warm and freezer coils were frosted
Fridge is a side by side. The freezer is pretty narrow for a guy with wide shoulders.
Pulled plug.
Had to remove bottom drawers then used nut driver to remove screws closest to back wall in drawer runners. Once the back screws were removed the runners could be swung up or down out of way so back cover could be re ... Read more moved.
Once back cover was removed thermostat was located attached to top pipe going into coil using a spring clamp.
Cut the wires just outside the crimp connectors going into thermostat. Released the spring clamp buy squeezing botton together.
Removed old badly corroded thermostat.
I wish I had attached the crimp connectors to the new thermostat wires before mounting it. Reaching way in the back, while turning shoulders verticly and trying to get the wire connectors set from both sides was awkward and uncomfortable...The biggest PIA of the whole task.
Once connected I let the fridge (thermostat) cool for 10 min. Turned the dial defrost timer to get it into defrost mode. Stupidly touched the heating element to see if it was getting warm...it was very hot.
Coils steamed...every looked like it was working. Unplugged, put back cover back on and retattached drawer mounts.
Plugged back in and everying is working great!
Read less
Parts Used:
-
Stephen from Warrington, PA
-
Difficulty Level:Easy
-
Total Repair Time:30 - 60 mins
-
Tools:Nutdriver, Pliers, Screw drivers
336 of 400 people
found this instruction helpful.
Was this instruction helpful to you?
Thank you for voting!
Clicking sound then within a minute clicking again, not cooling.
UNPLUG REFRIGERATOR. Carefully remove relay from the side of the compressor. You shouldn't need a tool to do this, if it is hard you can gently pry the edge with a flat head screw driver just to loosen. Unplug white and red wires from relay, noting that the white wire goes in the hole with a #2 stamped beside it. Shake old relay, if it r
... Read more
attles like a baby rattler then it's most likely the problem. Replace wires into the new relay and plug back into the compressor.
Read less
Parts Used:

-
Melvin from Semmes, AL
-
Difficulty Level:Easy
-
Total Repair Time:Less than 15 mins
79 of 93 people
found this instruction helpful.
Was this instruction helpful to you?
Thank you for voting!
Wouldn't hold temp.
I'm too young to die so I unpluged the refriderator first. The cold control is mounted in a plastic housing at the top of the freezer compartment that is held in place by two screws on the back side. I removed them with a nutdriver. Pull off the knob and use a screwdriver to release the control from it's bracket and pull off the 3 wire
... Read more
s noteing where they go. Slide the sensing element out and remove the plastic sleeve. Stragihten the sensing element on the new control and slide on the plastic sleve. Slide the sensing element in place, push the wires onto the terminals and snap the control into the bracket. Re-install the two screws and the control knob. Plug it in and you're done. It took longer to write this than to replace the control.
Read less
Parts Used:

-
Laurence from Overland Park, KS
-
Difficulty Level:Really Easy
-
Total Repair Time:Less than 15 mins
-
Tools:Nutdriver, Screw drivers
49 of 58 people
found this instruction helpful.
Was this instruction helpful to you?
Thank you for voting!