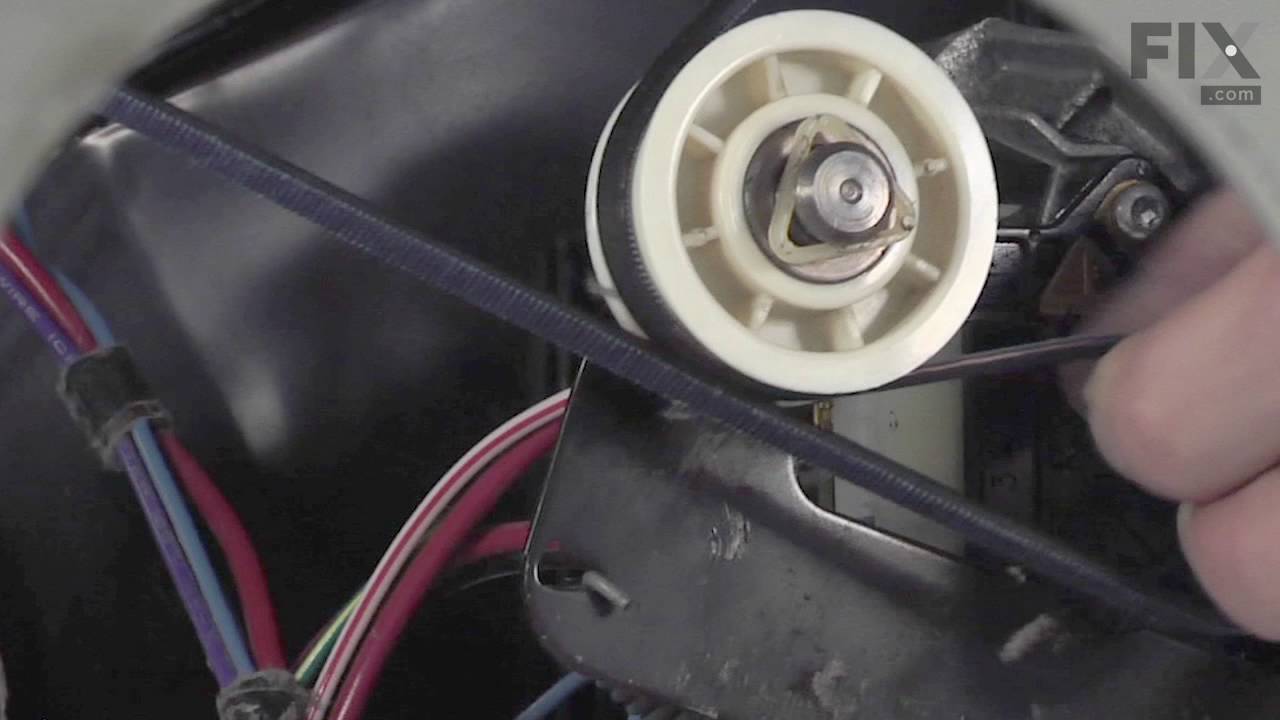
This Whirlpool Dryer Repair Kit is a convenient solution for fixing noise and drum movement problems in 27-inch dryers. Compatible with models from Whirlpool, Kenmore, Maytag, and more, the kit includes a drive belt, drum support rollers, an idler pulley, mounting clips, and a washer. It’s designed for straightforward installation using s...Read moretandard tools, and should only be installed after disconnecting power. Ideal for restoring smooth, quiet dryer performance, this kit combines essential components in one package to save time and effort during repairs.
Installation requires disassembling the dryer to replace parts using standard tools. Ensure the dryer is unplugged before starting. This durable OEM kit provides reliable repairs for quieter, more efficient operation.
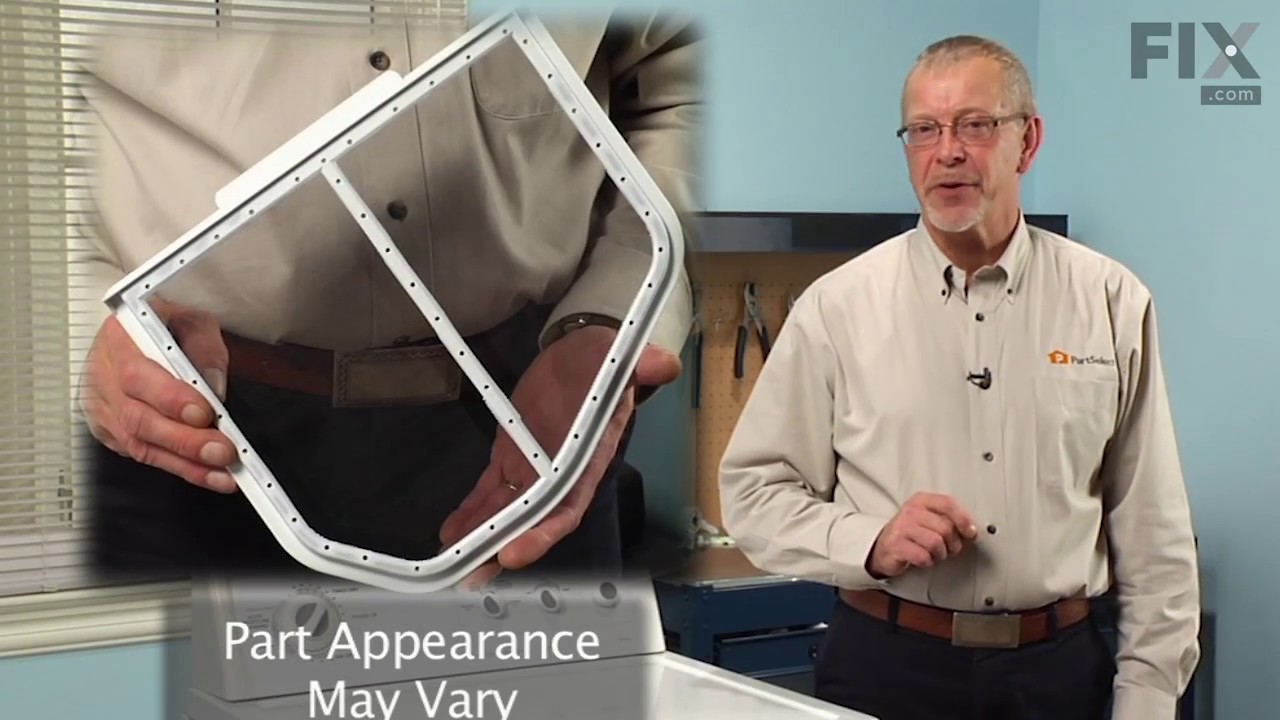
The filter collects lint during the drying cycle. This filter is 12 1/2 inches wide and 10 1/2 inches deep. Replacing the lint filter is an easy repair which requires no tools. When replacing the lint filter, check the filter slot for a buildup of lint, which can be a fire hazard. Continue to check often to make sure the filter and slot are both cleared of lint.
This replacement door catch is for your dryer door. If the catch is broken and the door will not stay shut, the dryer may not turn on. Use a putty knife to pop out the existing door catch by the locking tabs, and insert the new one. Make sure to unplug the dryer before beginning this repair.
This dryer thermistor is a genuine replacement component designed to monitor and regulate internal temperature in Whirlpool dryers. Mounted on the blower housing, it plays a critical role in controlling the heating element by adjusting resistance as temperatures rise, signaling the control board to maintain safe and efficient drying condi...Read moretions. A malfunctioning thermistor can result in symptoms such as no heat, overheating, premature cycle termination, or failure to start. It may also trigger fault codes like F-22, F-23, E1, or E2. Replacing the thermistor restores proper temperature regulation, protects the appliance from damage, and improves drying performance. Installation should be performed with the dryer unplugged and may require basic tools.
If you notice that your dryer is noisy or will not tumble, you may need to replace the tri ring. This part is triangular, and is less than an inch in size. Tri rings can be found both on the idler pulley shaft, or on the rear drum roller shaft. In either case, you will need to remove the front panel of the dryer and the drum to access the...Read more part for repair. Once you have accessed the damaged tri ring, you will simply need to slip it off and replace it with the new one. This part is sold individually. Be sure to disconnect the power source from the dryer before you begin this repair.
If your washer shakes or vibrates loudly when it reaches its max speed, check that the leveling legs are even. To ensure that the washer is firmly on the ground using all four legs, adjust the legs so that the machine is level, and tighten the locking nuts on the legs that are threaded. Keep the washer as close to the floor as possible. Y...Read moreour model might have rear legs that level themselves, or it might have threaded legs all around. Make sure the rubber feet have not worn out. Replace any missing or damaged legs and feet. This replacement part is sold individually.
The 5400W, 240-volt heating element is supplied directly by the manufacturer for use in various models of dryers. It is responsible for generating the heat needed to dry your laundry effectively. It is found within the dryer housing, behind the drum. It consists of a coiled wire made of high-resistance material. The wire heats up when an ...Read moreelectrical current flows through it and then transfers that heat to the surrounding air. This hot air is then circulated through the drum during the drying cycle. If the heating element becomes faulty, it will be unable to carry out this function leading to poor heating, damp clothes, and high energy usage.
This is the moisture sensor for your dryer. It helps detect the amount of moisture in your clothes during the dryer cycle. If you notice your clothes are still wet after an automatic dryer cycle is done, you may need to replace the sensor. You will find the moisture sensor behind the lint screen. Be sure to disconnect the power source fro...Read morem the dryer before you begin this repair. Note: Some model's require two sensors, please order quantity needed. Sensor only, harness is not included. This part is sold individually.
This 10-watt clear incandescent light bulb is designed to provide reliable interior illumination for household appliances such as dryers and refrigerators. Measuring approximately 2 inches in length, it fits securely into standard appliance sockets and activates when the appliance door is opened, offering clear visibility inside the drum ...Read moreor compartment. The bulb is suitable for use in a wide range of models across multiple appliance brands and is engineered to deliver consistent performance and durability. Installation is straightforward—simply screw the bulb into the designated socket within the appliance. Ensure the appliance is powered off before installation to maintain safety.
Ask our experts a question about this model and we'll get back to you as soon as possible!
We may have answered a similar question already! Search questions and answers left by others using simple keywords like "fit", "broken", "easy", or "quality" to find questions that match.
Search filter:
Clear Filter
Your search term must have 3 or more characters.
Sort by:
Prev
1
2
3
Next
Sorry, we couldn't find any existing answers that matched.Try using some different or simpler keywords, or submit your new question by using the "Ask a Question" button above!
Eric - For model number WED7300XW0
December 26, 2019
Where is the heating element located on this dryer ?
Hello Eric, thank you for your inquiry! The dryer heater element is located in the tab heater box housing. It is number #14 on diagram labelled "BULKHEAD PARTS". Found in the bottom center/right corner. I hope this information helps!
3 peoplefound this instruction helpful.
Was this helpful?
Thank you for voting!
Vikkie - For model number WED7300XW0
December 13, 2019
Dryer not heating. Any suggestions?
Hello Vikkie, thank you for writing. You will want to replace the Heater Element, part number PS11746337, and the Heating Element Connection Wire, part number PS334206 for your model dryer to fix this. Good luck with your repair!
2 peoplefound this instruction helpful.
Was this helpful?
Thank you for voting!
Doug - For model number WED7300XW0
November 20, 2023
Do I need part #4392067 for my Cabrio dryer to stop squealing noise?
Hello Doug,thank you for your inquiry. Yes, if your dryer is making squealing noise, then you may need to check the repair kit, part number PS373088. If it is faulty, then replace it to fix the issue. Glad to be of assistance!
The clothes do not dry. I think it is the electric burner. Need cost of electric burner.
Hello Les, Thank you for contacting us. I have researched the model you have provided and have found the part you are looking for is PartSelect Number PS11746337. Hope this helps!
My sensing indicator is blinking when i try to Star the dryer, and it won’t start. Any ideas of where to start?
Hello Mark, Thank you for your inquiry. We would recommend checking the following parts to fix your issue: thermal cut out kit, internal bias thermostat, heating element, and main control board. You can test the parts with a multimeter. If you are unfamiliar with how a multimeter functions, there are YouTube videos available to assist you. Hope this helps!
Was this helpful?
Thank you for voting!
Prev
1
2
3
Next
✖
Ask a Question
Ask our experts a question on this model and we'll respond as soon as we can.
See how others fixed this model. Time, tools, difficulty, and steps that lead to victory!View More
Search repair tips from other customers using simple keywords like "replace", "fit", "remove", "inspect". DIY doesn't mean you have to do it alone!
Search filter:
Clear Filter
Your search term must have 3 or more characters.
felt strip came off lint screen
223 of 279 peoplefound this instruction helpful.
JEFFREY from FALL RIVER, MA
Really Easy
Less than 15 mins
ordered new lint screen, removed old screen, inserted new screen.
Was this helpful?
Thank you for voting!
Dryer door catch broken
153 of 160 peoplefound this instruction helpful.
Tammy from Clute, TX
Really Easy
Less than 15 mins
Pliers
After a few years of slamming the dryer door (at least that is what my husband says), the catch on the dryer door broke. Using pliers (I used needle nose) squeeze the outer edges of the catch together (vertically). With it compressed, it should slide out easily. My husband had jacked with ours prior to the repair, so the broken piece i
... Read moren the door was actually sideways and would not fit through the hole. Using a screwdriver, I pushed that piece into the door (it lives in the door somewhere now). I was then able to slide out the rest of the old catch. Compress the new catch and insert it into the hole in the door. Push it in until it clicks into place. DONE! Happy Drying!
Read less
Was this helpful?
Thank you for voting!
very loud squeeling sound
110 of 120 peoplefound this instruction helpful.
jason from HOLDEN, MA
Really Easy
30 - 60 mins
Socket set
The issue was the idler pulley. First I began opening up the front panel based on a youtube video but soon realized the model was slightly different and required a lot more items to remove. I saw the pulley in the back with nothing in the way so I put the front panel crap back on and removed the rear panel. There it was, very simple to re
... Read moremove and replace. I'm not looking forward to drum rollers though. Hopefully they're aren't as difficult as they appear.



 My Orders