EasyApplianceParts is now PartSelect! We've merged our sites to provide a better shopping experience for you.   Full Details
✖

Find Parts

Parts Departments

Top Model Types

Top Brands

Repair Help

Expert Repair Videos

Keep typing for more specific results...

TL18J (P7739024W) Amana Refrigerator - Overview

Diagrams for TL18J

See every part. Know exactly what you need.

Enter a part description. DIY Heroes keep it simple, eg. "belt" or "pump".

Search filter:
Clear Filter
Your search term must have 3 or more characters.
Refrigerator Condenser Fan Motor Kit – Part Number: 833697
$65.73
In Stock
Refrigerator Condenser Fan Motor Kit
★★★★★
★★★★★
(51)
Part #833697
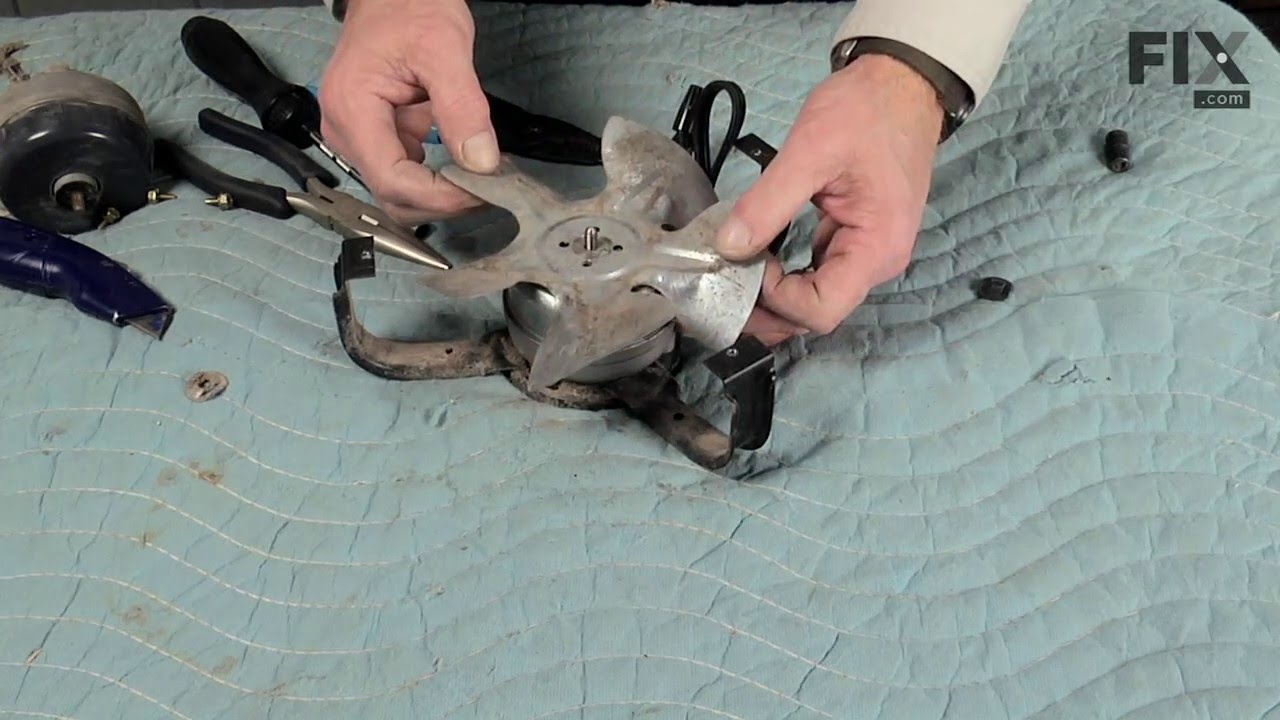
This condenser fan motor kit is designed for use with refrigerators. This fan draws air through the condenser coils and over the compressor. It does this with the goal of cooling the warm refrigerant before it enters the evaporator. When your fan or fan motor is not working your refrigerator will not cool properly. This is a 2-Watt, 115 Volt motor that rotates the fan in a counter clockwise direction. This kit includes the hardware needed for installation, and a set of instructions. Before you begin any repair work make sure to unplug your appliance.
Screw – Part Number: W11233072
$21.45
In Stock
Screw
★★★★★
★★★★★
(6)
Part #W11233072
This is a multi-use and multi-appliance screw. It can be used on a microwave, refrigerator, range/oven, air conditioner, dehumidifier, washer, or dryer. The measurements of this screw are 8 x 1/2 inch. It has 6 threads. Refer to the manual provided by the manufacturer for further information on repair and accurate guidance. Remember to wear work gloves as a safety precaution.
Dryer Screw – Part Number: WP90767
$7.47
In Stock
Dryer Screw
★★★★★
★★★★★
(2)
Part #WP90767
This screw is sold individually.
Dishwasher Screw – Part Number: WPW10348409
$7.47
In Stock
Dishwasher Screw
★★★★★
★★★★★
(6)
Part #WPW10348409
Sold individually.
Refrigerator Tray – Part Number: WP841180A
$40.65
In Stock
Refrigerator Tray
★★★★★
★★★★★
(1)
Part #WP841180A
This fourteen cube ice cube tray is eleven inches long. It is all white in color and is made entirely of plastic.
Refrigerator Door Shelf – Part Number: 67003699
No Longer Available
Screw Kit – Part Number: R9800670
$7.47
In Stock
Screw Kit
★★★★★
★★★★★
(1)
Part #R9800670
Includes 2 screws.
Door Retainer Shelf – Part Number: 67003698
No Longer Available
Roller Pin – Part Number: M1205302
No Longer Available
Roller Pin
Part #M1205302
This roller pin is used with a refrigerator's roller.
Refrigerator Button Plug – Part Number: WP67001130
$9.62
In Stock
Refrigerator Button Plug
★★★★★
★★★★★
(1)
Part #WP67001130
Sold individually. White in color.
Refrigerator Screw – Part Number: WP489464
$9.62
In Stock
Refrigerator Screw
Part #WP489464
Sold individually.
Kickplate Grille With Clips – Part Number: D7520510
No Longer Available
Kickplate Grille With Clips
★★★★★
★★★★★
(1)
Part #D7520510
The kickplate grille attaches across the bottom of the refrigerator and allows air to flow into the machine compartment to cool the condenser. The main reason to replace your grille is because it has become damaged, or will not fasten properly due to a broken mounting clip. This grille is black in color, made completely of plastic, and measures approximately 33 inches long x 5 inches wide. This is a genuine OEM replacement part, and fits many different brands and models. Be sure to check if this part will fit your model before purchasing. This kickplate grille comes with mounting clips.

Common Symptoms of the TL18J

How this model fails, and the parts that fix it.

Watch our pros, then fix it yourself.

See how others fixed this model. Time, tools, difficulty, and steps that lead to victory! View More

Search repair tips from other customers using simple keywords like "replace", "fit", "remove", "inspect". DIY doesn't mean you have to do it alone!

Search filter:
Clear Filter
Your search term must have 3 or more characters.
Sometimes the condenser fan would start causing the refrigerator to overheat.
189 of 228 people found this instruction helpful.
  • Tom from Franklin, WI
  • A Bit Difficult
  • 15 - 30 mins
  • Nutdriver, Pliers
Unplug the appliance.
Removed the screws holding the back panel.
Removed the fan blade.
removed 3 screws holding the condenser fan.
Remove the 3 metal brackets attached to the fan.
(First note which studs the brackets are attached to. Attach the 3 metal brackets to the new fan. (New screws were supplied)
Cut and strip the wire about two inches from the fan.
Cut and strip the new wire. I cut the new wire in half (about 6 inches.) Connect the two wires, twist and used 2 wire nuts. Tie wrap the wire to the wire harness. Mount the new fan (three screws)
Screw the back panel back on.
Mount the new
Was this helpful?
Thank you for voting!
noisy fan motor
38 of 46 people found this instruction helpful.
  • robert from nashotah, WI
  • A Bit Difficult
  • 30 - 60 mins
  • Nutdriver, Socket set
rmv panel (5min) rmv fan/motor 3 screws (10 m) cut wire 2in from motor, re route remainder of wire to front so can strip for wire nuts. ( 10m) attach old fan to new motor, place in old opening ,3 screws, a little fussy to align, ( 15m ) route and strip wire from new motor , zip ties work well, wire nuts , plug in fridge vola, no noise, c lose up, reverse panel. ( 20m). i also took time to clean grilles with small vac and damp rag, ( looks and sounds like new) bob Wi.
Was this helpful?
Thank you for voting!
Freezer and Fridge wouldnt cool
24 of 25 people found this instruction helpful.
  • Janet from Hillsboro, OR
  • A Bit Difficult
  • More than 2 hours
  • Nutdriver, Pliers, Screw drivers, Socket set, Wrench (Adjustable), Wrench set
My husband replaced the condenser fan. It took awhile and a few choice words but he got it replaced. The fan seemed to work fine, but it still wasn't cooling. I noticed that when we had the fridge unplugged that water started draining out the dials at the top of the fridge under the freezer. And there was absolutely no water at all in the drip pan under the fridge. So I took the doors off and totally took the inside of the freezer apart. I discovered that the styrofoam on the floor of the freezer had become inudated with fluid and the under the foam the coils were all frozen solid with ice. Hence not allowing any drainage. I put a lamp in the freezer area and defrosted all the ice. In searching the internet i discovered that they no longer produce the foam so i went to home depot and got a piece of foam and aluminum foil and cut it to replace the ruined foam. I put the fridge all back together said a prayer and crossed my fingers and lo and behold it works perfectly now!!!!
Was this helpful?
Thank you for voting!