Your coupon for will be reflected when you check out!
✖
Your coupon for
✖
Hello!
You're visiting the PartSelect site in U.S.
Would you like to shop on the Canadian site?
Stay on this site
Go to Canadian site
✖
Model Number Locations
1Select Category Type
Select Category Type
2Select Product Type
Select Product Type
3Select {MODEL} Type
Select {MODEL} Type
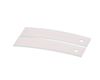
Sample Model Number Tags
Model numbers can be made up of numbers (1005400, for example) or a combination of letters and numbers (LAT1000AAE). The model number will most likely appear on either a paper sticker or a metal plate. Your appliance's model number tag may look similar to the sample model number tags shown here (model number highlighted in yellow):
Model has been saved to My Models. If you're not signed in, your lists are available on this device and will expire within 30 days.
Model has been saved to My Models.
This authentic, white Drum Bearing Slide, also known as the bearing drum slide, glide, or pad, is a plastic, easy-to-install part for your dryer. It replaces the dryer's front drum slide to allow for ...
This genuine OEM gas dryer shutoff valve assembly controls the flow of gas to the burner, helping ensure safe operation and proper heating. Featuring a durable two-coil design, it is used to restore h...
The end repair was very simple and took minimal effort. The time and difficulty was all in the testing. I disassembled the dryer and removed the drum and then hard wired each thermo-fuse to determine where the fault was. After test all of those I was stumped. When I opened the door the light would not come on so I assumed it was a pow
... Read moreer fault closer to the source. However after all of my testing I couldn't find anything wrong. I then removed the light bulb and realized it was burned out which led me to the door switch being the fault. I removed the switch and soldered the three wire together and the dryer started right up! All I had to do was order a new $15 part, unsolder the wires and plug them in. Would have been so much simpler if that light bulb hadn't of been burned out causing me to over think my diagnosis. This was my first major appliance repair and I did it with only the help of the parts diagram provided on the website.
The problem was intermittent. It only happened when the unit was first started. After it was restarted it usually worked until the load was dry. I looked at the schematics and saw that only the hi-temp therostat and the motor overload could stop the dryer completely. I put my volt meter on the hi-temp thermostat and ran the dryer. Wh
... Read moreen the dryer stopped I realized the hi-temp therm. was tripping. I read the web site help for this symptom and the suggestion was the bias therm. I replaced it and the unit worked.