


 My Orders




MDBTT70AWS Maytag Dishwasher - Overview
Diagrams for MDBTT70AWS
See every part. Know exactly what you need.


.gif "SUPPLEMENTAL INFORMATION Diagram and Parts List for Maytag Dishwasher")


Enter a part description. DIY Heroes keep it simple, eg. "belt" or "pump".
Search filter:
Clear Filter
Your search term must have 3 or more characters.

$44.23
In Stock
Dishwasher Door Handle And Latch Assembly with Switch
Part #WPW10130695
This door latch (Dishwasher Door Latch Assembly, Door Latch Assembly, Latch Assembly) is a simple on/off mechanism that prohibits the dishwasher from operating when the door is open. It is located on the door of your dishwasher, and is mounted on the inner door panel. The door latch can break from material fatigue. If the door is often sl...Read moreammed or opened quickly, the latch may break prematurely. If the door won't open or the door switches won't activate, you will need to replace this part. This latch measures 5 1/2 inches wide, 4 1/2 inches high, 2 1/2 inches deep, is constructed out of plastic and comes in black. The kit includes the black handle, latch, and 2 switches.
Read less

$44.95
In Stock
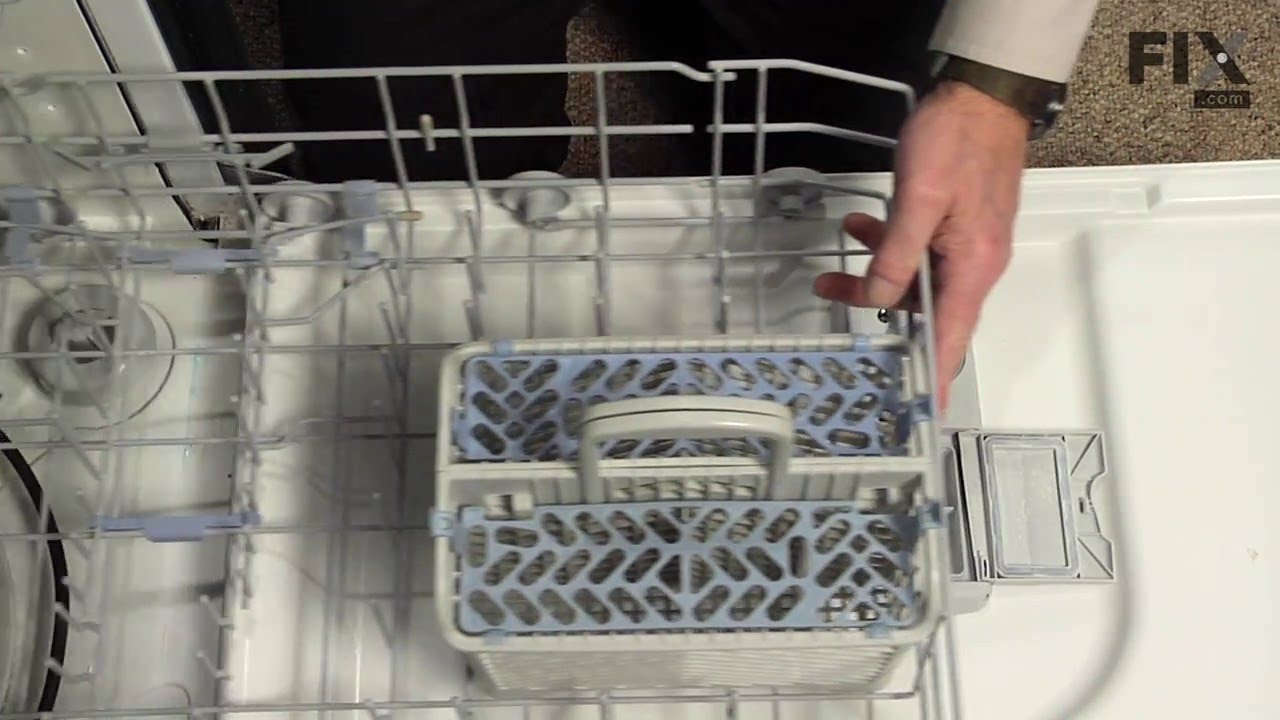
Dishwasher Silverware Basket
Part #WP6-918873
This silverware basket is gray in color and measures 8 inches wide by 11-1/2 inches high by 12 inches deep. The silverware basket is used to hold small utensils such as forks, spoons, and knives during dishwashing. The manufacturer has redesigned this part to be a complete, full basket with a handle and covers. The basket comes apart in t...Read morewo pieces if you prefer to place them along the sides of your dishwasher instead of at the front section of your bottom dish rack. To prolong the life of this part, try to place utensils into the holders carefully instead of dropping them in.
Read less

$59.47
In Stock
Dishwasher Door Latch w/Switches No Handle
Part #WPW10275768
This dishwasher door latch helps keep the dishwasher door securely closed during operation while housing the door switches that signal the appliance it is safe to begin a wash cycle. This part is JUST the latch, it does not include the handle. Please see model information to determine if the latch WITH the handle is available for your uni...Read moret. Replacing a faulty latch can help resolve issues such as a door that will not close properly, a dishwasher that will not start, unexpected door opening during operation, water leaks, or intermittent power problems. This assembly includes the latch and switches but does not include the door handle. Installation typically involves disconnecting power to the appliance, removing the inner door panel to access the latch assembly, disconnecting the wiring harness, installing the new latch, and reassembling the door. For a complete repair, inspect the door strike, handle, and related door components for wear or damage and replace them as needed to ensure proper door operation and sealing.
Read less

No Longer Available
Dishwasher Rack Adjuster w/Wheels Right Side
Part #WPW10153532
This adjuster connects to the right hand side of the top dishrack. It is used to change the height of the upper rack.

No Longer Available
Dishwasher Rack Adjuster w/Wheels
Part #WPW10153530
This adjuster connects to the left side of the top dishrack. It is used to change the height of the upper rack.

$7.47
In Stock
Washer Hose Clamp
Part #WP596669
This hose clamp is used in a wide variety of household appliances. Most often it is found in washers, dishwashers, refrigerators, freezers, dehumidifiers, garbage disposals, or air conditioners. This clamp is used to securely attach a hose to another part of your appliance, which helps prevent leaks from those connections. Depending on th...Read moree appliance, it can attach hoses to drain pumps, water inlet valves, pressure switches, and injector nozzles. We recommend you refer to model-specific diagrams for appropriate uses and exact placement. This hose clamp is made of metal, and is sold individually. To access and replace this part you will need a nut driver, pliers, and screwdrivers. Before you begin any repair work, make sure you have unplugged your appliance, and shut off the water supply if applicable.
Read less

No Longer Available
Dishwasher Inner Door Foam Insulation Strip
Part #WPW10117748
This genuine inner door foam insulation strip, sometimes known as bottom seal foam, is used to create a waterproof seal that helps prevent leaking from the door area of the dishwasher. The existing insulation strip may leave a sticky residue or leftover disintegrated strip that must be scraped off before installing the new strip. Residue ...Read morecan be scraped off with a putty knife. Be sure to remove all residue and clean surrounding areas of the dishwasher build. It is strongly recommended to check other sealant parts on the dishwasher door such as the door gasket and dispenser grommet to ensure the leaking issue is fully solved.
Read less

$9.62
Special Order
Dishwasher Convertible Tine Pivot
Part #WP99002687
This is the replacement convertible tine pivot for your dishwasher. It is made of gray plastic and is approximately 4 inches long and 1 inch wide. The convertible tine pivot allows the tine row to either stand up or lay flat, depending on what you want to store in the dish rack. If the tine pivot is broken, the tines will not stand up pro...Read moreperly, and it will need to be replaced. To replace the tine pivot, simply unclip it from the tine row and dish rack and clip the new one into place. This is an OEM part sourced directly from the manufacturer and it is sold individually.
Read less

$13.92
In Stock
Tub Wheel - NOT a Rack Wheel
Part #WP99002947
This wheel attaches to the inside of the tub to help guide the track and support the top rack.

$142.08
In Stock
Dishwasher Accumulator Filter
Part #WPW10192799
This part is essential in your dishes getting clean during the wash cycle. If there is any debris or a tear in the filter, it can cause extra buildup and, therefore, causing dirty dishes.

$9.62
In Stock
Dishwasher Door Cable Link
Part #WP99003446
This is a part for your dishwasher. The door cable link helps to keep the door steady and give support to the weight of the door when it is being opened or closed. If you notice the door latch has failed or the door is not closing properly, this might indicate a need to have the door cable link replaced. To perform this repair, you will s...Read moretart by turning the power off from the appliance. You will need to pull the unit out of installation. To access the cables, you will need to remove the side panel. You should be able to see the cables underneath the panel once removed.
Read less

No Longer Available
Manuals & Care Guides for MDBTT70AWS
Click to downloadCommon Symptoms of the MDBTT70AWS
How this model fails, and the parts that fix it.
Door latch failure
Fixed by
these parts
these parts


Show All
Leaking
Fixed by
these parts
these parts


Show All
Not cleaning dishes properly
Fixed by
these parts
these parts


Show All
Will Not Start
Fixed by
these parts
these parts


Show All
Door won’t close
Fixed by
these parts
these parts
Show All
Noisy
Fixed by
these parts
these parts


Show All
Will not fill with water
Fixed by
these parts
these parts


Show All
Not draining
Fixed by
these parts
these parts


Show All
Will not dispense detergent
Fixed by
these parts
these parts


Show All
Not drying dishes properly
Fixed by
these parts
these parts

Show All
Touchpad does not respond
Fixed by
these parts
these parts
Show All
Watch our pros, then fix it yourself.



See how others fixed this model. Time, tools, difficulty, and steps that lead to victory!
View More
Search repair tips from other customers using simple keywords like "replace", "fit", "remove", "inspect". DIY doesn't mean you have to do it alone!
Search filter:
Clear Filter
Your search term must have 3 or more characters.
Broken latch handle
1083 of 1121 people
found this instruction helpful.
The hardest thing was figuring out that you only need to purchase the latch handle because it only comes as a complete latch assembly, why they even list the latch assembly as a separate part in the parts list stupid. (you get the handle and latch already put together and it cost less than the latch assembly without the handle). Anyway al
... Read more
l you need to do is disconect the power from the dishwasher (unless you like to live dangerously like me) take your drill with the correct size torx bit and remove all the screws on the inside door pannel (the top center two screws actually hold the latch assembly in place). Disconect the 4 wires from the old part and reconect them to the new part and reinstall all the torx screws being careful not to strip the plastic threads that they screw into if you are using a drill. Whole process takes less than 5 minutes. I am surprised that Maytag used such a flimsy handle assembly in their dishwashers since they are supposed to have the repair men with the most time on their hands. They probably sell just as many handle assemblies as they do dishwashers that have this particular part in it, probably more since you will probably have to change it 2 or 3 times during the life of the unit.
Read less

Was this helpful?
Thank you for voting!