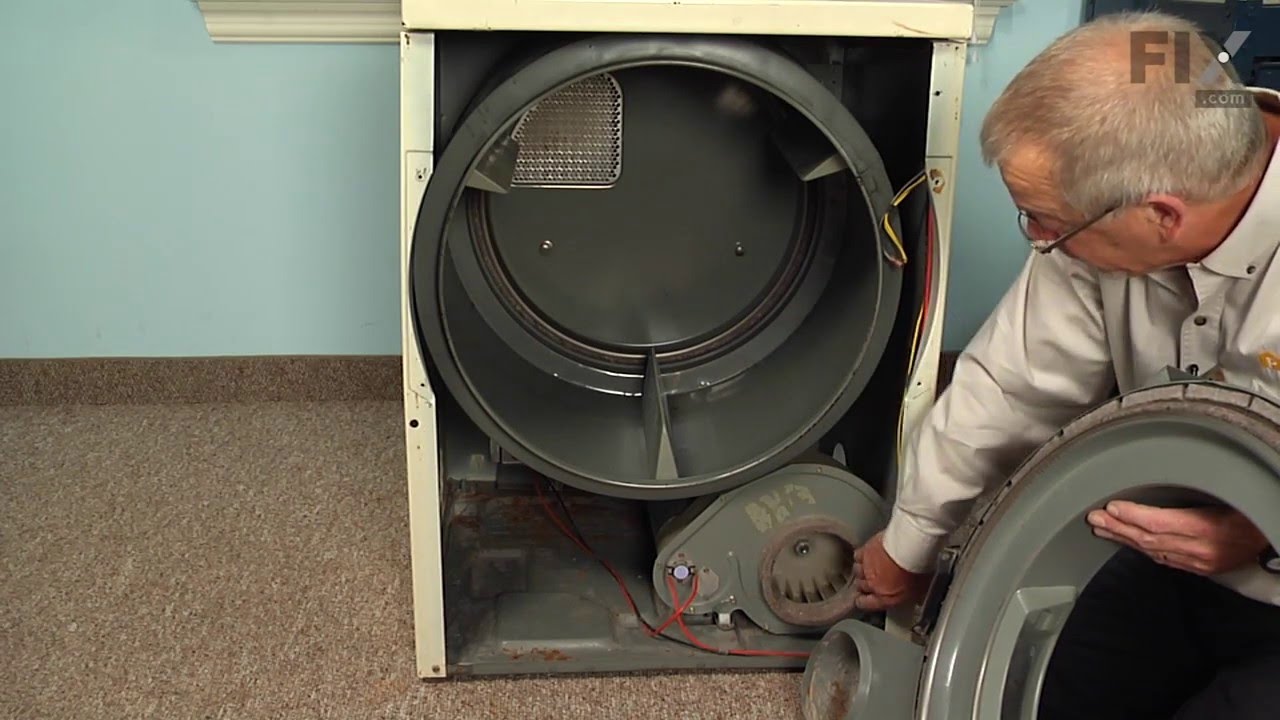
If your dryer is noisy, will not tumble, or is not producing enough heat, you may need to replace the blower wheel. This part is white in color, and is made of plastic. This part is approximately 8 inches in diameter. The blower wheel is located near the bottom of your dryer cabinet. To access it for this repair, you will need to remove b...Read moreoth the front panel and the front bulkhead assembly. Before you begin this repair, be sure to disconnect the power source to the dryer. To complete this repair, you will need a 5/16 inch nut driver, a 1/4 inch nut driver, a pair of locking pliers and a 7/8 socket with a short extension and a ratchet.
See how others fixed this model. Time, tools, difficulty, and steps that lead to victory!View More
Search repair tips from other customers using simple keywords like "replace", "fit", "remove", "inspect". DIY doesn't mean you have to do it alone!
Search filter:
Clear Filter
Your search term must have 3 or more characters.
Blower fan cracked
44 of 54 peoplefound this instruction helpful.
Rick from Birch Run, MI
A Bit Difficult
30 - 60 mins
Nutdriver, Socket set
Unplug the power cord from the unit. Remove the lower front panel; then the upper front panel including the door (unplug wire to door switch). Then remove the cover on the fan housing. Need to block the motor from turning; I used a stick to jamb the front of the motor; then unscrew the old blower fan and screw on the new one. Then repla
... Read morece the cover and put front panels back on.
Read less
Was this helpful?
Thank you for voting!
The insert-molded nut stripped from the wheel
18 of 21 peoplefound this instruction helpful.
Ted from Grayslake, IL
Really Easy
30 - 60 mins
Pliers, Screw drivers
Because the wheel had stopped and the shaft kept turning (junk from child's pocket got in there), the nut stripped itself away from the wheel causing low RPM and low air movement (lazy flame, vibration and clothes not drying)
I had to use a screwdriver to break the wheel away from the center nut and remove the fan. I then remo
... Read moreved the air fan housing (3 bolt behind the fan wheel). I used a small pair of vise grips to hold the motor shaft staionary while I used a pair of channel lock pliers to remove the nut that was molded into the fan from the motor shaft. It was harder to get the nut started then I would have thought.
Once complete, I put the fan housing back on and threaded the new wheel on easily. The motor has external fins on it which turn with the shaft-I held one lightly while I threaded the fan on to keep the shaft from turning. Tighten just slightly more than hand tight-don't go crazy-it's threaded to stay tight with rotation. Works great and very quiet now.
Read less
Was this helpful?
Thank you for voting!
Noisy and not drying the clothes
5 of 6 peoplefound this instruction helpful.
Pietro from Fairfax, VA
A Bit Difficult
More than 2 hours
Nutdriver, Pliers, Screw drivers, Wrench (Adjustable), Wrench set
This was my first time repairing a dryer. If I knew when I started the project what I know now, it would have been an easy repair. First, you should know that the series number (used for selecting a wiring diagram) is the last two digits of the unit's serial number (not model number). In my case, the series number was 11. The hardest
... Read morepart for me was figuring out how to take the dryer apart. I made the mistake of starting with the top instead of the front. In fact, I removed the control panel and disconnected all the wires, labeling them carefully, and creating a diagram, so i could put it all back together later. I now realize I could have left that all together and just lifted the top up in the front without removing it. That knowledge would have saved hours of work, so I hope it helps someone (prop up the front a few inches and start by removing the panel on the lower front, then remove the screws on the main front panel, and then pull out the bottom of that panel toward you until the top of that front panel disengages from the top of the dryer - the rest is obvious). So it turns out there were two separate problems: 1) the blower wheel had broken completely off of the motor so it wasn't spinning - this is why hot air wasn't being pulled through from the heater in the back of the dryer; 2) the pulley on the spring-loaded lever arm attached to the motor was squeaking due to lack of lubricant. So the solution was to replace the blower wheel and spray WD-40 in the pulley (and also, for good measure in the roller bearings that support the drum in the back of the dryer). Most of the time spent on the repair was just due to my own mistakes. In particular, once I got everything back together after the repair, it stopped squeaking and there was good airflow, but it wasn't heating. I spent an entire day trying to troubleshoot the lack of heat. I tested and bypassed all of the thermostats and heater fuses and the heating element still wouldn't come on. I even managed to accidentally ground one of the leads from the fuse and had to replace a melted wire connector (trip to the Shack). In the end, it turned out that a wire which had been accidentally disconnected from the main power cord to the dryer, I had put back in the wrong spot. There is L1, L2, and neutral going into the dryer. I had the heater on the same circuit as the motor and other stuff. Once I traced the wiring diagram back, I realized this and corrected it by putting the heating circuit back onto L2. Now it "hums like a Singer". If everything had gone smoothly, instead of being a 2-day repair, it would have been a 2 hour repair. 2 hours instead of 1 because to get the leverage I needed to remove the old blower nut, I had to actually pull the motor assembly out of the dryer and move it to my workbench. Someone who is strong or more limber or has better tools might be able to skip that step, reducing the time by about 45 minutes. Good luck!


 My Orders