Your coupon for will be reflected when you check out!
✖
Your coupon for
✖
Hello!
You're visiting the PartSelect site in U.S.
Would you like to shop on the Canadian site?
Stay on this site
Go to Canadian site
✖
Model Number Locations
1Select Category Type
Select Category Type
2Select Product Type
Select Product Type
3Select {MODEL} Type
Select {MODEL} Type
Sample Model Number Tags
Model numbers can be made up of numbers (1005400, for example) or a combination of letters and numbers (LAT1000AAE). The model number will most likely appear on either a paper sticker or a metal plate. Your appliance's model number tag may look similar to the sample model number tags shown here (model number highlighted in yellow):
Model has been saved to My Models. If you're not signed in, your lists are available on this device and will expire within 30 days.
Model has been saved to My Models.
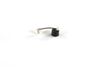
Unscrew and detached front and back panels, and inside framework holding the sheet metal to the body, after removing the sheet metal, unscrew the box enclosing the control board, use needle nose pliers to unhook the sensor module from the board and place the new sensor into the spots where the old sensor was connected (thermostat area, hu
... Read moremidity Sensor, bucket switch, and control board). Close up the unit and your good to go.
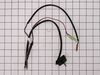
Note: The error code and bucket full indication is a result of a malfunction in the sensor assembly (p/n 6877A30013M. To replace the sensor assembly, do the following: (1) remove rear panel; 2) remove the front panel cover and remove bucket; 3) remove main cover (covers center of unit); 4) Remove cover over PC board on top right side of u
... Read morenit looking at it from the rear; 5)unplug sensor assembly connect on the main PC board; 6) remove clip that holds the temperature sensor on the compressor output tube ( this is a very strong clip)(also take a small piece of emery cloth and clean the output tube where the clip was attached); 7) use a tapered tool to spread the clip, just removed to, allow the temperature sensor to be removed from the clip; 8) unplug the bucket full switch connector; 9) remove the humidity sensor from the evaporator coil (just a snap-on connection; 10) remove the entire sensor assembly that was just disconnect during steps 1) thru 9) and reinstall the new assembly using the previous steps in reverse order; 11)Plug the unit in and all should be a go!