This kit includes both the drive belt and the pump belt which are both V-shaped. If your washer does not toss, spin, or drain water properly, this might be because one of these belts has worn or stretched out. This results in the belt losing its grip and no longer driving the pump. The pump belt is black and made of rubber. The pump belt ...Read moreis located between the motor and pump underneath the washer. Simply remove the belt and hook the new one around the pulley. You may need to loosen or tighten the belt to ensure it is set in place properly.
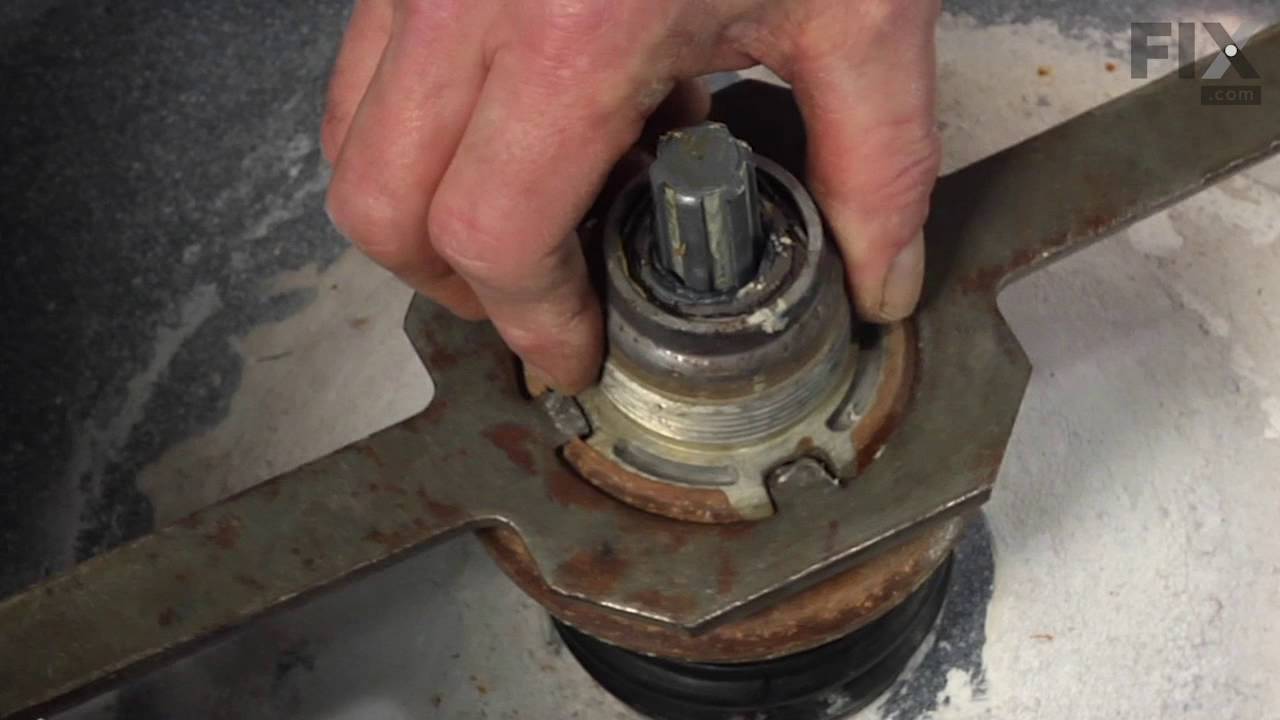
This kit comes with a hub assembly, agitator seal, and spanner nut. If your washer leaks once it is full (with or without clothes in it) or leaks during agitation, then you should replace the seal. This part will also fix symptoms such as loud noises or the washer not agitating. The seal may become damaged or deteriorate over time and wil...Read morel need to be replaced. The mounting stem goes between the two tubs and seals the water into the tubs. When the water leaks, it goes into the bearing, which will cause it to also go bad, which is why you will likely change these at the same time.
This is a multi-use and multi-appliance screw. It can be used on a microwave, refrigerator, range/oven, air conditioner, dehumidifier, washer, or dryer. The measurements of this screw are 8 x 1/2 inch. It has 6 threads. Refer to the manual provided by the manufacturer for further information on repair and accurate guidance. Remember to wear work gloves as a safety precaution.
This washer/dryer lid or door switch kit serves as a critical safety component, designed to prevent the appliance from operating when the lid or door is open. It ensures that the washer does not fill or spin and the dryer does not start unless the door is securely closed, helping to avoid water spills and potential safety hazards. The kit...Read more includes all necessary components for installation and is compatible with a wide range of top-loading washers and front-loading dryers. Installation typically involves disconnecting power, accessing the control panel or door area, and replacing the switch using standard tools. The switch is compact and designed to fit seamlessly within the appliance’s housing, with dimensions approximately 2.5 inches in length, 1 inch in width, and 1 inch in height. It features a neutral color finish that blends with most appliance interiors.
This hose clamp is used in a wide variety of household appliances. Most often it is found in washers, dishwashers, refrigerators, freezers, dehumidifiers, garbage disposals, or air conditioners. This clamp is used to securely attach a hose to another part of your appliance, which helps prevent leaks from those connections. Depending on th...Read moree appliance, it can attach hoses to drain pumps, water inlet valves, pressure switches, and injector nozzles. We recommend you refer to model-specific diagrams for appropriate uses and exact placement. This hose clamp is made of metal, and is sold individually. To access and replace this part you will need a nut driver, pliers, and screwdrivers. Before you begin any repair work, make sure you have unplugged your appliance, and shut off the water supply if applicable.
This washing machine drain pump is intended for use with automatic washers that have been manufactured since 1958. The pump itself is made of plastic, though it does come with a metallic belt pulley.
The leveling leg pad or foot pad fits over the leveling leg on your washing machine. The foot pad is designed to protect your floor and keep the washing machine level and in place. This foot pad is just over an inch in diameter. It is made entirely of rubber and is gray in color. This pad is intended for use with washers and some dryers. ...Read moreMany of our customers have rated this repair as very easy. To complete the repair, turn the old leg counter clockwise to remove it. Then, simply remove the old pad and replace it with the new one. Finally, re-attach the leg by turning clockwise. Ensure that the washer is level, and adjust the leg accordingly if it is not.
This washing machine lid hinge ball is well under an inch in diameter. These hinge balls are sold separately, though two are required per lid. This lid hinge ball is made of plastic and is used for Maytag brand washing machines.
This kit is used on 2-belt washers. It is recommended to change the seal kit at the same time. The tub bearing kit fixes issues with leaking, loud noise, excessive shaking/moving or if your pump is not spinning. The tub bearing kit is fastened in the middle of the outer tub of your washer. The tub bearing ensures the inner tub is spinning...Read more effortlessly. If the rub bearing is faulty it might lock up and cause the washer to stop spinning. This is an OEM part that is obtained straight from the manufacturer.
Ask our experts a question about this model and we'll get back to you as soon as possible!
We may have answered a similar question already! Search questions and answers left by others using simple keywords like "fit", "broken", "easy", or "quality" to find questions that match.
Search filter:
Clear Filter
Your search term must have 3 or more characters.
Sort by:
Prev
1
Next
Sorry, we couldn't find any existing answers that matched.Try using some different or simpler keywords, or submit your new question by using the "Ask a Question" button above!
Keith - For model number LAT9416AAE
February 8, 2022
bought 1999. wash cycle and rinse cycle operates well; but the spin part after washing and rinsing has some squeaking noise and a slight burn smell. It does not rinse totally dry as when new. Are the bearings worn? Can it be repaired? What parts need replacing?
Hello Keith, Thank you for your inquiry. We have researched the model number you have provided and you could be having an issue with the belt, the motor pulley, the glides and springs, the drive motor, or the brake assembly. Check the parts for any excessive wear and tear and replace if they appear worn. We hope this helps and if you need help placing an order, customer service is open 7 days a week. Please feel free to give us a call. We look forward to hearing from you!
Our washing machine fills agitated but won't drain
Hi Mary,
Thank you for your question. If your washer is not draining, there are some parts that you will need to check to see which one is causing the issue. You will need to check the belt, the drain pump, the lid switch assembly, and the motor pulley. You will find the information on how to test these parts under Free Repair Help and Instant Repairman on our website. We hope this helps! Good luck with the repair!
We constantly have to re-distribute clothes to keep the tub from banging side in the spin cycles. I would assume the damping pads or springs, not sure
Hello Gary, thank you for contacting us. The most probable culprits of the issue are the damper kit, part number PS2017036, and the balance ring, part number PS11757424. Both these parts play an essential role in keeping the tub balanced during the spin cycle. Customer service is available 7 days a week if you require assistance placing an order. Thanks again for reaching out!
Rinse is hot only. Switched hoses but still rinses only with hot water.
Hello Mev, Thank you for contacting us. If you have tried switching the hoses and also made sure that your cold water hose does have cold water coming out of it, then the issue may be with the water inlet valve part# PS11739275 for serial numbers that start with a 10 up to a 20, and PS11739359 for serial numbers that start with 20 and up. You can test the valve with a multimeter and check for any clogs in the screens. Good luck with your repair.
burning smell during spin cycle, will not spin. oily residue on bottom of machine.
Hi Fred, thank you for contacting us. Based on our understanding, we would suggest replacing the tub bearing kit, part number PS2347235. The tub bearing ensures the inner tub is spinning effortlessly. If the rub bearing is faulty, it might lock up and cause the washer to stop spinning. We hope this solves your problem!
See how others fixed this model. Time, tools, difficulty, and steps that lead to victory!View More
Search repair tips from other customers using simple keywords like "replace", "fit", "remove", "inspect". DIY doesn't mean you have to do it alone!
Search filter:
Clear Filter
Your search term must have 3 or more characters.
Drum would not drain and there was a banging noise when the drum spun
600 of 658 peoplefound this instruction helpful.
Charles from Whitman, MA
Really Easy
Less than 15 mins
Nutdriver, Screw drivers
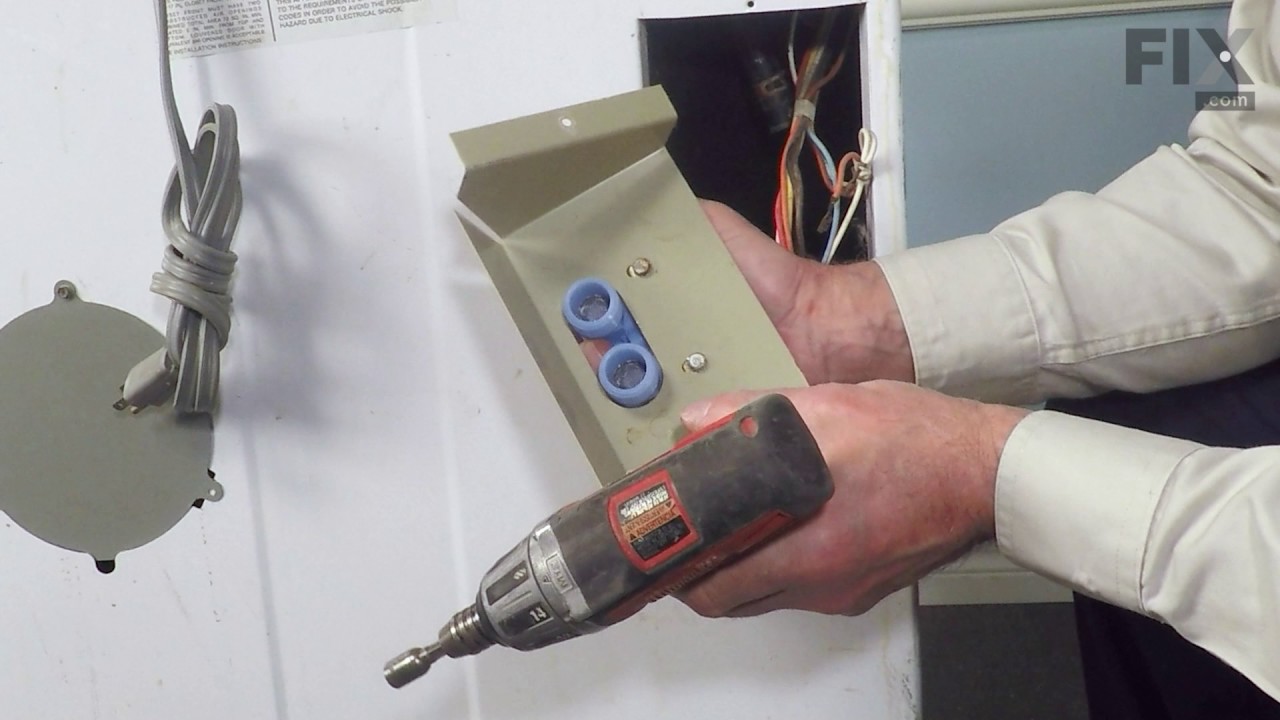
I removed the 2 phillips screws on the bottom of the front panel. Then checked around to find the belts were actually below the floor panel. I pulled the washing machine away from the wall and tilted it bacwards and found the pump belt was off the pully and the drive belt was badly damaged. I replaced the 2 belts which took no tools
... Read moreand about 3 minutes to accomplish then resecured the front panel, pushed back in place and leveled. Complete repair from diagnosis to back in operation took less than 15 minutes.
water leaking from around center shaft below fixed tub
529 of 559 peoplefound this instruction helpful.
douglas from bonita springs, FL
A Bit Difficult
1- 2 hours
Nutdriver, Pliers, Socket set
My washer is 5 years old and water began to leak on the floor. I took off the front panel and filled the tub. Water did not leak immediately, but after the tub filled with about 3-4 inches of water, the water began to leak from a rubber washer between the fixed tub and the drive shaft. I looked online for exploded diagrams of Maytag wa
... Read moreshers, when I came across your site. By looking at your diagrams, I determined what parts I needed and ordered them. The parts arrived in 2 days, and I installed them. There were no leaks and it cost me under $70 (a repairman would have cost at least $250). The only thing I would recommend to those in similar situations, is to purchase a spanner wrench (your site does not sell, but others do). The stem seal and hub assembly is reverse threaded (clockwise to loosen) and is difficult to remove due to tight quarters in the tub.
Read less
Was this helpful?
Thank you for voting!
Washer Leaking and Spin Cycle stopping frequenly
213 of 228 peoplefound this instruction helpful.
Dan from Mason, OH
A Bit Difficult
More than 2 hours
Pliers, Screw drivers, Socket set, Wrench set
* Remove front Panel * Remeove two screws that allow the top to hing up. * Loosen set screw on agitator (1/4" socket) * Remove Agitator *Loosen spanner nut from mounting seal with hammer and punch remember to loosen, turn clockwise * Remove Inner Tub * Losen Mounting stem with Hammer and Punch- Remember to l
... Read moreoosen, turn clockwise * Remove Boot seal with hands * Remove bolts from the three brackets that attach to the outer tub * Remove Outer Tub hoses * Remove outer Tub. CAREFUL, I cut my hands on sheet metal when outer tub broke free and came up * Knock Outer tub bearing out with large block of wood * Cut bearing sleeve off of the transmission with a drimmel tool and cutting wheel. It was siezed on and would not turn off. Also, first tried to chisel , but was too difficult * Cleaned area where bearing sleeve came off with fine sandpaper * Put small amount of non-permanent thread lock on transmission (bearing area) before installing the new bearing sleeve because the sleeve is not pressed on and I did not want it to turn freely * I did not but new bolts for the outer tub 3 brackets, but noticed that they needed to be sealed. So I bought some rubber washers at hardware store * I also used some stuff called CLR to clean some rust off of the outside of the INNER tank * I replaced the O-ring on the top of the agitator shaft Also, on the agitator shaft: To really do it right, I probably should have changed the agitator shaft because the old seal wore grooves into the shaft. I took my chances and cleaned it up with some fine metal sandpaper. I could not get the worn grooves completely smooth, but did not want to take off more material as I thought it may cause a leak. We'll see * I just used a hammer and punch to retighten the mounting stem and Spanner nut. REMEMBER COUNTER CLOCKWISE TO TIGHTEN * This was not too bad if you are somewhat mechanically inclined. I could have got a new washer, but quite frankly, I get more satisfaction from seeing the old one keep working * One last thing...and this is mostly for the younger guys cause the older guys already know it. CLEAN EVERYTHING on the washer...make it look like NEW and tell your wife how much you saved. Make sure you have the parts and tools to do the job within a timeframe that you do not have to go to the laundry mat and do not leave a big mess. This advice will definately pay off. GOOD LUCK



 My Orders