Your coupon for will be reflected when you check out!
✖
Your coupon for
✖
Hello!
You're visiting the PartSelect site in U.S.
Would you like to shop on the Canadian site?
Stay on this site
Go to Canadian site
✖
Model Number Locations
1Select Category Type
Select Category Type
2Select Product Type
Select Product Type
3Select {MODEL} Type
Select {MODEL} Type
Sample Model Number Tags
Model numbers can be made up of numbers (1005400, for example) or a combination of letters and numbers (LAT1000AAE). The model number will most likely appear on either a paper sticker or a metal plate. Your appliance's model number tag may look similar to the sample model number tags shown here (model number highlighted in yellow):
Model has been saved to My Models. If you're not signed in, your lists are available on this device and will expire within 30 days.
Model has been saved to My Models.
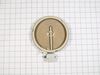
This radiant surface heating element is designed to deliver consistent heat to a designated cooking zone on select electric ranges. Measuring approximately 6 inches in diameter and rated at 1200 watts...
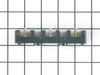
This foam tape provides cushioning and sealing between components to reduce vibration and air gaps. Designed for flexibility and durability, it supports quiet operation and effective insulation.
Removed all terminals and block mounting screws. Repaired one burnt terminal and reassembled. Replacement part was an exact fit and reassembly whnet very well.
The repair is very easy and can take as little as 10 minutes. It can also take more than an hour depending on how the cooktop being replaced was installed.
First the easy way - push the cooktop mechanism (controls, heating elements, support, etc.), up and out of its location from the bottom. This will give you access to the sc
... Read morerews holding the cooktop in place, unscrew 10 screws using a Philips head screwdriver. I used a drill motor to speed things up a little. Carefully lift the glass cooktop off of its support by applying the lifting pressure as evenly as you can, the glass may crack if leveraged up from just one side. Place the new cooktop onto the support mechanism, re-install the screws and place the entire unit back into its original location. The replacement unit will have 2 locating pins that go into the heating element control unit, this will ensure that the replacement cooktop is properly located in the support mechanism.
Now for a caveat - if the old cooktop is all-glass and has been sealed in place to a granite top (like mine) it may be next to impossible to remove the cooktop without breaking the glass. You may have to get creative to figure out how to unseal the cooktop in order to push the entire unit up from the bottom. Lifting an all-glass cooktop and its support mechanism by prying on the glass from the top has a very real chance of breaking the cooktop glass and making a mess. It really needs to be pushed up and out from the bottom. I used a heat gun to loosen the sealant, and it worked OK but took forever. Some of the older cooktops have a metal frame around all 4 edges, this can make the process a little easier.