EasyApplianceParts is now PartSelect! We've merged our sites to provide a better shopping experience for you.   Full Details

Find Parts

Parts Departments

Top Model Types

Top Brands

Repair Help

Expert Repair Videos

Keep typing for more specific results...

KECC567BWH2 KitchenAid Cooktop - Overview

Diagrams for KECC567BWH2

See every part. Know exactly what you need.

Enter a part description. DIY Heroes keep it simple, eg. "belt" or "pump".

Search filter:
Clear Filter
Your search term must have 3 or more characters.
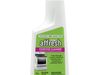
Cooktop Cleaner – Part Number: W10355051
No Longer Available
Cooktop Cleaner
★★★★★
★★★★★
(7)
Part #W10355051
This bottle of non-abrasive cooktop cleaner breaks down and gets rid of the hardest baked-on stains and residue without causing any harm to your appliance. The bottle is 10 oz and does not require a large amount of product to do the job. This cleaner is perfectly safe to use on any glass, ceramic, stainless steel, chrome, or porcelain cooktop surface. The cleaner is creamy in texture and provides a protective coat of silicone on smooth surfaces. To apply, use a gentle scrub, sponge, or rag and gently press in a circular motion until the stains are removed.
Appliance Scraper – Part Number: WA906B
$11.77
In Stock
Appliance Scraper
Part #WA906B
Use this scraper for your ceramic/glass cooktop. It has a retractable blade and is an all-purpose tool for cooktops, mirrors, windows and tile. Use it to also remove paint, paper, dirt, stickers and more.
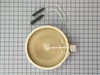
Dual Burner Element with Limiter – Part Number: W10823694
$174.48
In Stock
Dual Burner Element with Limiter
★★★★★
★★★★★
(1)
Part #W10823694
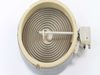
This dual radiant surface element restores proper heating on an electric cooktop and provides both an inner and outer heating ring so you can match the burner size to different pans. It is commonly replaced when a burner stops heating or heats unevenly, helping return consistent performance for everyday cooking tasks like boiling, simmering, and frying. Installation involves disconnecting power, lifting the cooktop or accessing the burner housing, transferring the wiring from the old element to the new one, and securing it in place.
Screw – Part Number: WP486579
$8.55
Special Order
Screw
Part #WP486579
Sold individually.
Dual Infinite Burner Switch – Part Number: WP3188755
$95.54
In Stock
Dual Infinite Burner Switch
Part #WP3188755
This switch controls the stove top surface burner.
Switch Seal – Part Number: 3182435
No Longer Available
Switch Seal
Part #3182435
Screw – Part Number: WP486754
$7.47
In Stock
Screw
Part #WP486754
Sold individually.
SEAL-SWTCH – Part Number: 3183956
$48.45
In Stock
SEAL-SWTCH
Part #3183956
This seal switch cover is an OEM replacement component engineered for use in select cooktops and ranges. Its primary function is to form a protective barrier over the burner switch assembly, effectively shielding it from liquid ingress, particulate contamination, and thermal exposure. By isolating the switch mechanism from environmental factors such as spills and debris, it helps preserve electrical integrity and operational reliability. This part is compatible with a range of models across brands including Whirlpool, Maytag, KitchenAid, and Jenn-Air. It is commonly used to replace degraded or compromised seals, restoring the appliance’s original protective specifications and ensuring continued safe performance.
Foam Seal - Large – Part Number: 3188854
No Longer Available
Foam Seal - Large
Part #3188854
ELMNT-SURF – Part Number: W10212682
No Longer Available
ELMNT-SURF
Part #W10212682
SEAL-FOAM – Part Number: 3190666
No Longer Available
SEAL-FOAM
Part #3190666
HARDWARE – Part Number: 8184949
$7.11
Special Order
HARDWARE
Part #8184949

Common Symptoms of the KECC567BWH2

How this model fails, and the parts that fix it.

See how others fixed this model. Time, tools, difficulty, and steps that lead to victory! View More

Search repair tips from other customers using simple keywords like "replace", "fit", "remove", "inspect". DIY doesn't mean you have to do it alone!

Search filter:
Clear Filter
Your search term must have 3 or more characters.
Baked on sauce
12 of 16 people found this instruction helpful.
  • Julie from Newnan, GA
  • A Bit Difficult
  • More than 2 hours
Used cooktop creme, oven cleaner and Mr. Clean sponges. After many days of working on the surface, we were able to remove 99% of the sauce.
Was this helpful?
Thank you for voting!
Element not heating
8 of 9 people found this instruction helpful.
  • Richard from Weatherford, TX
  • A Bit Difficult
  • 1- 2 hours
  • Nutdriver, Pliers
This was a countertop mounted cooktop. The hardest part of the repair was getting the cooktop out of the hole and separating the glass top from the burner box. It is highly recomended that you have two people to seperate the top from the burner box. Be sure you turn off the breaker to the cooktop first before you do any work. One time sav er is once you have the top sperated from the box use 2- 10"-12" pieces of 1x2 or 2x4 to prop the top open. This will eleminate the need to disconnect the power leads (be sure the breaker is OFF). If you are not electrically inclined mark the color of the wires to the corrosponding terminals on the new element BEFORE you remove them from the old element. The element that I replaced was the dual heat element. I ended up having to change 2 of the terminal ends on the wiring harness becacuse they were too small for the new element. Carefully remove the wires from the old elenent using needle nose pliers and remove the old element by removing the 2 screws that hold the element to the hold down clips, then loosen the clip mounting screws & remove the element. Change terminals if needed & reassmble in reverse order. Once I got it reassembled with a couple of the top mounting screws in, I turned on the breaker and tested for proper operation. Breaker OFF, finish reassembly and remount. You may want to consider replacing foam gasket before remounting. Good luck... R. Moore

Was this helpful?
Thank you for voting!
Outer Element stopped working
5 of 8 people found this instruction helpful.
  • Ashok from Los Altos Hills, CA
  • A Bit Difficult
  • 30 - 60 mins
  • Nutdriver, Screw drivers
Opened the Cooktop. Hardest part was removing the cooktop.
The heating element was broken, very hard to see.

Remove 2 clips and install in new element. Great oppurtunity to clean the unit.
Was this helpful?
Thank you for voting!