Your coupon for will be reflected when you check out!
✖
Your coupon for
✖
Hello!
You're visiting the PartSelect site in U.S.
Would you like to shop on the Canadian site?
Stay on this site
Go to Canadian site
✖
Model Number Locations
1Select Category Type
Select Category Type
2Select Product Type
Select Product Type
3Select {MODEL} Type
Select {MODEL} Type
Sample Model Number Tags
Model numbers can be made up of numbers (1005400, for example) or a combination of letters and numbers (LAT1000AAE). The model number will most likely appear on either a paper sticker or a metal plate. Your appliance's model number tag may look similar to the sample model number tags shown here (model number highlighted in yellow):
Model has been saved to My Models. If you're not signed in, your lists are available on this device and will expire within 30 days.
Model has been saved to My Models.
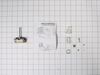
This knob allows you to turn the burner on your range or cooktop on, and it allows you to control the temperature of the burner. If your knob is broken, damaged, or lost, this is the replacement part ...
A surface element switch, also known as a burner/infinite switch, is a device used to control and regulate the heat output of the burners on a stovetop or cooktop. This switch is controlled with a kno...
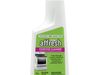
This bottle of non-abrasive cooktop cleaner breaks down and gets rid of the hardest baked-on stains and residue without causing any harm to your appliance. The bottle is 10 oz and does not require a l...
Use this scraper for your ceramic/glass cooktop. It has a retractable blade and is an all-purpose tool for cooktops, mirrors, windows and tile. Use it to also remove paint, paper, dirt, stickers and more.
This seal switch cover is an OEM replacement component engineered for use in select cooktops and ranges. Its primary function is to form a protective barrier over the burner switch assembly, effective...
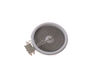
I removed 4 screws and then lifted up the top it gave me access to the element I followed the direction that came with the element (very clear to follow) removed and installed the new element and it worked fine. Remember to unplug the stove if it is electric this is not in the instructions.
First i shut off the power since this is an electric cook top/range. I then removed the knob and the two screws that hold the burner switch in place. I removed the wires one at a time and connected each to the new switch. I then reattached the screws to the switch. The most difficult part to me was breaking off the switch stem at the
... Read moreright level. I got that done and finally selected the appropriate adapter for the stem/knob fit.
1. Turned off power to trouble shoot the counter top range elements. 2. Raised the counter top up to work on it and slid two evenly placed wooden slats under the bottom of the housfor stability so it would not fall backdown into the counter top cut-out. 3. With a 1/4" nut driver removed the 10 hex-head screw that were holding the blac
... Read morek glass top in place, pulled off the 4 . Control knobs and carefully removed the glass cover and carefully seet it aside in a safe place. 5. A visual inspection of the non working element showed that it had a burn out spot causing it not to heat. 6. Got the model number of the appliance and checked the internet for parts suppliers, chose parts elect because they had the part in stock and could overnight it for reinstallation the next day, part did arrive the next morning. A visual inspection show that it was the correct part and it would be a like for like swap out. 7. Prior to replacing the element check to see that the electrical power was still off at the circuit breaker, made a quick sketch of the wiring and identified the wires so that they would be reterminated at the same points. 8. Using the needle nose pliers pulled off the 4 stake on terminations. 9. Lifted out the 6" from the body of the unit , removed the 4 phillips screws holding parts what were to be transfered onto the new element. 10. Transfered parts onto the new element, reinstalled the element into the body of the unit, reinstalled the 4-stake-on wires to there appropriate terminals and verified with previous wiring sketch. 11. Reinstalled the glass top, 10 screw holding it in place and the 4-control knobs. 12 . Turned main power to the unit back on and turned on the replaced element, it work correctly, also checked the other 3 elements to make sure that they were working correctly. 13. When the unit had cooled, removed the wooden slats and lowered the counter top back into its cut-out making sure not to damage the glasstop. Job complete.