


 My Orders




JP656DD2BV General Electric Range - Overview

Enter a part description. DIY Heroes keep it simple, eg. "belt" or "pump".
Search filter:
Clear Filter
Your search term must have 3 or more characters.

$166.42
In Stock
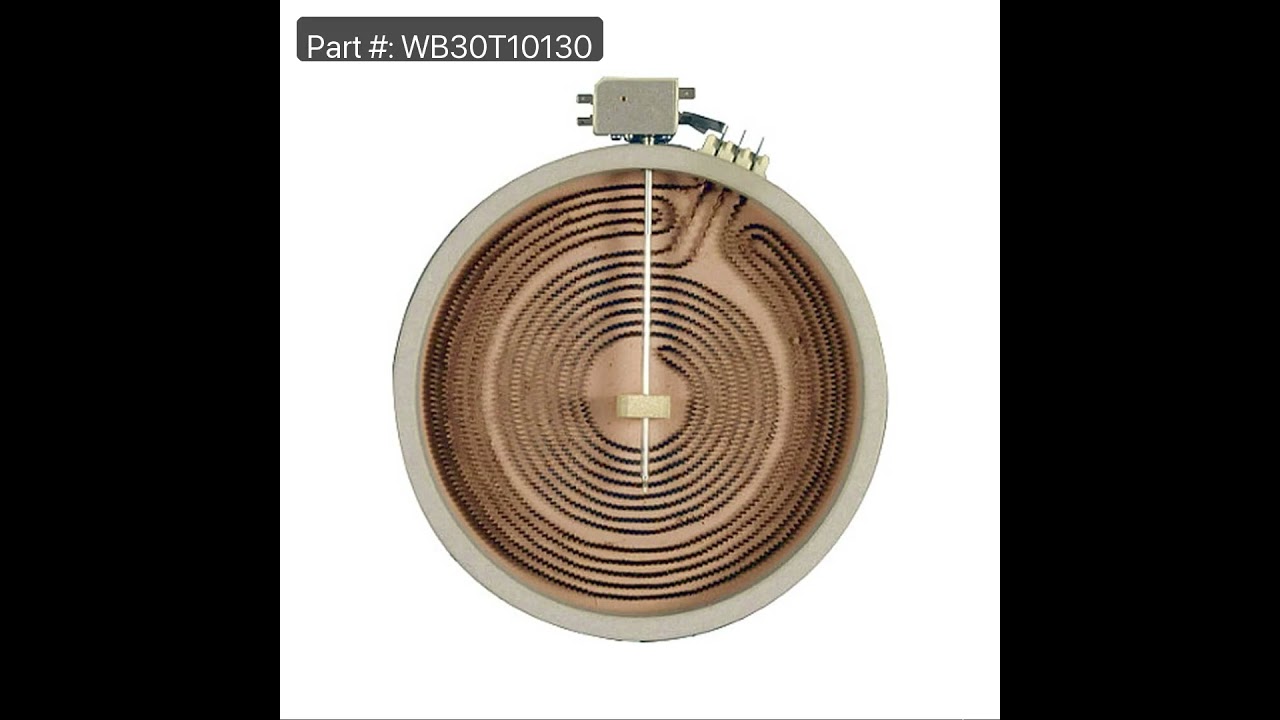
Haliant Element - 12 Inch
Part #WB30T10130
This dual radiant surface heating element is a genuine replacement component designed for select GE electric flat-top ranges, stoves, and cooktops. Commonly referred to as a "haliant" element, it features an integrated 12-inch and 9-inch heating zone, allowing for flexible cooking options based on pan size. Constructed from a durable nick...Read moreel-chromium alloy, it delivers consistent heat output and long-lasting performance. With a standard wattage of 1950 watts—though some replacements may offer up to 3000 watts—this element ensures efficient heat transfer to the glass cooking surface. Replacing a worn or malfunctioning element can restore proper heating and improve overall cooking performance. Compatibility should be verified using your appliance’s model number prior to installation.
Read less

$68.15
In Stock
Radiant Element - 8 Inch
Part #WB30T10132
This 8-inch radiant stovetop element is a genuine replacement part designed to deliver consistent heat to cookware during stovetop use. It fits select electric ranges and cooktops and is engineered to restore proper heating performance when an existing burner is damaged, unevenly heating, or non-functional. The element transfers heat effi...Read moreciently to support even cooking across a variety of pot and pan sizes. Installation involves lifting the cooktop and removing the screw and clip securing the old burner. A screwdriver is required, and the appliance should be disconnected from power before beginning the repair to ensure safety.
Read less

$16.05
In Stock

$13.92
In Stock

$54.10
In Stock
Foam Rubber Tape
Part #WB02X26088
This is foam tape and it is usually used in conjunction with your range, specifically on the cooktop. Its purpose is to help seal the edges of the cook top to the counter top. Another of its functions arises is if your cooktop does not sit properly. This tape can give it a better fit by adding additional stability. It is black in color an...Read mored can be used for gasketing, sealing, and stopping vibration. Before making this repair, make sure to shut off the circuit breaker for your appliance in order to disconnect electrical power.
Read less

$110.22
In Stock
Element Radiant 5.5 IN
Part #WB30T10145
This surface element is designed to deliver heat to a specific cooking zone on the top of an electric range, providing consistent and efficient performance for everyday meal preparation. Located beneath the cooktop surface, it plays a key role in maintaining accurate temperature control. Before installation, be sure to unplug the range or...Read more switch off the appropriate circuit breaker to ensure safety. Wearing protective work gloves is also recommended to prevent injury while handling electrical components.
Read less

No Longer Available
Knob
Part #WB03T10270
This is a replacement burner knob for your range. It is made of black plastic and is approximately 2 inches in diameter. The knob allows you to turn on and adjust the heat level of the range. If the knob is stripped so badly that the shaft will not turn when you turn the knob, or if the knob is damaged, it will need to be replaced. To rep...Read morelace the knob, carefully remove it from the shaft and replace it with a new knob. This part is sold individually and is a genuine OEM part from the manufacturer.
Read less

$16.05
In Stock
Secure Down Bracket
Part #WB2K5328

No Longer Available
Switch Seal
Part #WB2X9504
This part goes between the infinite switch (under the cooktop) and the knob.

$15.00
In Stock
SCREW-10AB
Part #WB1X1137

$41.69
In Stock
Range Indicator Light
Part #WB25T10012

$51.61
Special Order
Common Symptoms of the JP656DD2BV
How this model fails, and the parts that fix it.


Watch our pros, then fix it yourself.
See how others fixed this model. Time, tools, difficulty, and steps that lead to victory!
View More