Your coupon for will be reflected when you check out!
✖
Your coupon for
✖
Hello!
You're visiting the PartSelect site in U.S.
Would you like to shop on the Canadian site?
Stay on this site
Go to Canadian site
✖
Model Number Locations
1Select Category Type
Select Category Type
2Select Product Type
Select Product Type
3Select {MODEL} Type
Select {MODEL} Type
Sample Model Number Tags
Model numbers can be made up of numbers (1005400, for example) or a combination of letters and numbers (LAT1000AAE). The model number will most likely appear on either a paper sticker or a metal plate. Your appliance's model number tag may look similar to the sample model number tags shown here (model number highlighted in yellow):
Model has been saved to My Models. If you're not signed in, your lists are available on this device and will expire within 30 days.
Model has been saved to My Models.
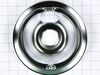
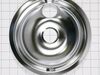
This burner drip bowl, also referred to as a drip pan or burner pan, is a genuine OEM replacement part that is designed to fit ranges. The bowl is located beneath the burner where it catches food part...
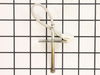
The temperature sensor, also known as the oven temperature sensor assembly is usually found in the back of the oven. The function of the oven temperature sensor assembly is to measure the temperature ...
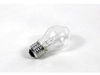
This 40-Watt light bulb is sold individually.
It is specially designed to withstand extreme temperatures, so this bulb is compatible with a variety of appliance types including refrigerators, ranges,...
This surface element control switch, also known as an infinite switch, regulates the power supplied to a 6-inch, 1560-watt heating element on electric ranges. It allows for precise adjustment of heat ...
This is a replacement drawer support for your oven. The drawer support provides stability to the drawer unit as it opens and closes. If your oven drawer is hanging or will not slide in or out efficien...
This part is the replacement light socket for your oven. The oven light socket provides power to the light, and at the same time holds the light bulb in place.
This part is a replacement lens for your oven or range. The lens is red in color, and when the elements are turned on, the light behind the lens will turn on to inform the user that the element is, in...
Ensure the stability of your GE range with this leveling leg. An essential accessory for your appliance, it helps maintain balance and provides support. With its adjustable design, you have the abilit...
Introducing the Genuine Replacement Drawer Glide specifically designed for General Electric Range/stove/ovens. This is a crucial element that supports your broil or storage drawer, effortlessly allowi...
This part is a replacement screw for your oven. It is made of black metal and is sold individually. This screw is approximately 1/4 inch in diameter and about 1/2 inch in length. It is designed to con...
This right-side drawer glider allows smooth and stable drawer movement. Designed for durability and precise alignment, it supports effortless opening and closing.
$16.76
In Stock
Order now and your part arrives by Jun 4
Questions And Answers for JCB560DJ1WW
Ask our experts a question about this model and we'll get back to you as soon as possible!
1 question answered by our experts.
Sort by:
< Prev
1
Next >
Search filter:
Clear Filter
Your search term must have 3 or more characters.
Keep searches simple. Use keywords, e.g. "leaking", "pump", "broken" or "fit".
Sorry, we couldn't find any existing answers that matched.Try using some different or simpler keywords, or submit your new question by using the "Ask a Question" button above!
Stefan
March 8, 2022
All of the elements on range top do not work, how do I fix the problem?
For model number JCB560DJ1WW
Hi Stefan,
Thank you for your question. If the surface elements are not working, but the elements in the oven are, check the power cord to see if it is loose and fastened correctly to the oven and that it is also securely plugged into the electrical outlet. If the power cord appears fine, there may be wiring issue inside the cord and it will need to be replaced. If the issue is not the power cord, you will need to check the elements, the switches, the terminal blocks and the wiring connected to these parts. We have included a link that you may reference on how to check these parts. Once you have determined the part you need, please feel free to call customer service. We are open 7 days a week and anyone will be happy to assist you. We look forward to hearing from you!
Removed six 1/4" hex nuts on rear of oven. Then through front/inside removed a single 1/4" hex nut to actually remove sensor. Unplug sensor connector, remove. Reversed steps, push oven back in place and plugged in. Tested oven function.
Unplugged appliance and removed 5 screws on back of stove/oven and removed plate. Disconnected the sensor and unscrewed it on the inside of the oven. Pulled the cord through and replaced with new sensor. Replaced all parts and plugged in the appliance and tested. Worked great.
1) pull out the stove 2) remove the 7 sheet metal screws holding the back panel on. (the panel that also covers where the cord splits and connects to the oven. 3) Find the small plastic connector located in the middle of the back of the range and unplug it. 4) open the front of the oven and remove the one screw holding in
... Read morethe oven temp sensor. 5) replace the sensor and make sure to "feed" the new cord through as best you can. 6) I had to dig through the insulation a little bit to find the new wiring harness 7) connect the wiring harness and put the back of the range back on
note: this was very simple to do if you think this might be the problem don't hesitate to handle this one yourself.