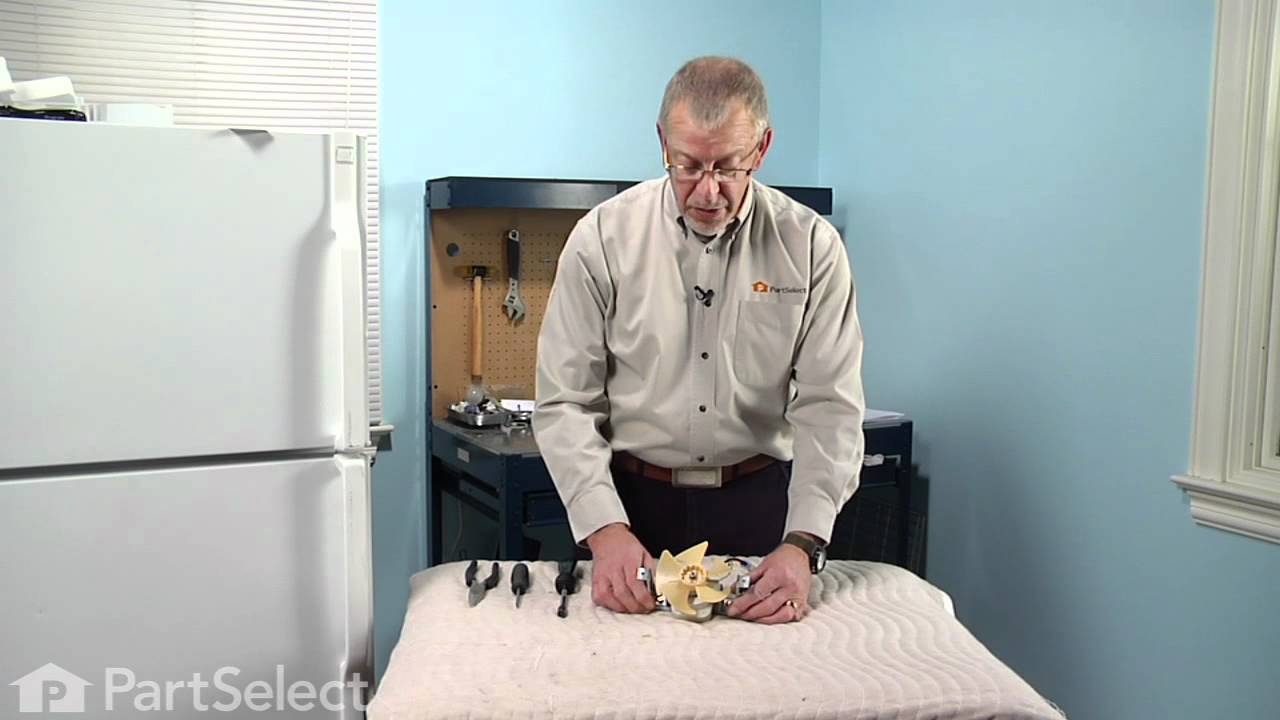
This 115-volt 60Hz evaporator fan motor is located in the back of the freezer and circulates air over the refrigerator coils. These coils will convert the heat into cool air, which is then circulated. If the motor has failed, the freezer/refrigerator will become too warm because the fan motor is not circulating the cool air from the freez...Read moreer into the refrigerator. This is a genuine OEM part. Please remember to disconnect the power to the appliance before starting your repair.
This is the light switch that goes in your refrigerator. If the light is not working or stays on, you may need to replace the switch. It is made of mainly white plastic, and is an OEM part, directly from the manufacturer. Be sure to disconnect the refrigerator from the power source before you begin this repair. To remove the switch, simpl...Read morey use a flathead screwdriver to pop the switch out from the refrigerator wall, then disconnect the wires. Reconnect the wires to the new switch, snap it into place, and the repair is complete.
This is the replacement hinge washer for your refrigerator. The hinge washer is mounted on the top of the door hinge pin, and supports the refrigerator door, allowing it to open and close easily. The main reason you would need to replace the hinge washer is if it is worn out, causing the refrigerator door to be more difficult to open and ...Read moreclose. You may also hear an unpleasant noise when you open your refrigerator door. The washer is a little less than an inch in diameter and is sold individually. This is an authentic OEM part sourced directly from the manufacturer.
This dairy door is a genuine OEM replacement designed to cover the butter or cheese compartment inside your refrigerator. Made from durable materials with a sleek finish, it helps maintain proper temperature and organization for dairy items while providing easy access through its integrated handle. Ideal for replacing a cracked, broken, o...Read morer missing door, this part ensures a secure fit and smooth operation. Installation is quick and requires no special tools—simply follow your appliance’s manual for proper placement.
This genuine OEM cover fits over the crisper drawer to help maintain optimal humidity, keep produce fresh, and prevent spills inside the refrigerator. Made from durable plastic, it ensures proper airflow and sealing for longer-lasting fruits and vegetables while improving organization. Ideal for replacing cracked or damaged covers, this p...Read moreart restores food preservation efficiency and a clean, functional interior. Installation is simple—remove the old cover and slide the new one into place for a secure fit.
If ice spills inside the freezer or the storage bin no longer slides correctly, a damaged bucket may be the cause. This replacement container collects and stores cubes made by the refrigerators automatic ice maker. Its simple plastic design allows the bin to be removed for serving or cleaning. Inspect the support rails and nearby ice-maki...Read moreng parts before installation, since a bent guide or heavy ice buildup can also block movement. Confirm the appliance model and compare the new bin with the old one. Remove any stored ice, slide out the worn bucket, clean the mounting area, and insert the replacement evenly.
An ice maker that no longer fills, freezes, or releases cubes may need a new assembly. This replacement kit controls the full ice-making cycle, from receiving water to dropping finished cubes into the bin. It uses an updated design and may not look exactly like the original unit. Several connection pieces are included to support approved ...Read morerefrigerator setups, but only the pieces shown for the appliance should be used. Confirm the complete model number before ordering. Disconnect electrical power and shut off the water supply before installation. Inspect for a frozen fill tube or weak water flow, and follow the appliance instructions carefully when connecting the wiring.
Ask our experts a question about this model and we'll get back to you as soon as possible!
We may have answered a similar question already! Search questions and answers left by others using simple keywords like "fit", "broken", "easy", or "quality" to find questions that match.
Search filter:
Clear Filter
Your search term must have 3 or more characters.
Sort by:
Prev
1
Next
Sorry, we couldn't find any existing answers that matched.Try using some different or simpler keywords, or submit your new question by using the "Ask a Question" button above!
Denise - For model number HPS16BTNDRWW
January 15, 2025
wHERE Can i purchase a rep[;acement control panel
Hi Denise,
Thank you for your question. The part number for the front control housing is PS12743828. We hope this helps!
See how others fixed this model. Time, tools, difficulty, and steps that lead to victory!View More
Search repair tips from other customers using simple keywords like "replace", "fit", "remove", "inspect". DIY doesn't mean you have to do it alone!
Search filter:
Clear Filter
Your search term must have 3 or more characters.
Freezer Fan
267 of 302 peoplefound this instruction helpful.
Luis from College Station, TX
Really Easy
15 - 30 mins
Screw drivers, Socket set
I removed two srews from the back panel inside fthe reezer compartment and the two that hold the air manifold/baffle? and pulled the baffle out. Then, I removed the two srews that hold the front part of the fan bracket behind the baffle and the back panel came out easily. Two more screws and one quick connect plug attached to the fan and
... Read moreI was done with removal. Insallation was even quicker, I slid the original fan right off the old motor and slid it on the new motor's shaft. Piece of cake! Thanks Partselect.
Read less
Was this helpful?
Thank you for voting!
dropped something on the light switch and it broke off
61 of 70 peoplefound this instruction helpful.
Lorinda from Dallas, TX
Really Easy
Less than 15 mins
Pliers, Screw drivers
we just pried out the old switch and pulled it out the rest of the way with a pair of needle nose pliers. Pulled off the wires on the broken switch and reattached to the new one and just slid/clicked it back into the hole.
Was this helpful?
Thank you for voting!
Loud Fan Motor
54 of 65 peoplefound this instruction helpful.
Arthur from East Meadow, NY
Easy
30 - 60 mins
Nutdriver, Screw drivers
Unplug refrigerator.Remove the floor of the freezer box by removing the 4 philips head screws. Remove the cover over the fan by pulling it straight up and out. Remove the styrafoam duct by pulling it straight up and out. Remove the back wall of the freezer by removing the 4 philips head screws. Unplug fan. Remove the fan, bracket and all,
... Read more by removing the two philips head screws on the back wall. Take the two halves of the bracket appart by removing the two hex head scews on the back of the bracket. Remove the "O" ring from the fan blade and remove the blade. There is a rubber grommet on both the front and back halves of the bracket. Make sure they are set properly in the brackets to secure and position the motor properly so the fan blade doesn't hit anything when it spins. Install the new motor onto the bracket the same way you took the old one off. Check the positions of the brackets, rubber grommets and motor to make sure they're properly installed and secure. Replace the "O" ring onto the fan blade and install it onto the new motor with a firm push on the center of the blade. Install the brackets and fan onto the back wall and plug in the new motor. Reinstall the back wall of the freezer box and make sure the motor is secure. Plug the refrigerator back in and check to make sure the fan blade doesn't hit anything while it's turning. Finish reassembling the freezer box.




 My Orders