Trash compactor bags are a practical way to discard your waste. Due to the extreme pressure of the compactor, trash compactor bags designed to handle the force are necessary. These bags are made from ...
$26.44
In Stock
Order within the next 1 hr and 32 mins and your part ships today!
This is the drive gear kit for the ram that compacts the trash inside your compactor. If your compactor ram is getting stuck, there is excess noise during its cycle, or if your compactor does not stop...
$49.23
In Stock
Order within the next 1 hr and 32 mins and your part ships today!
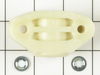
The front facing foot is sold individually. It is used on your washing machine and can also be known as an adjustable leveling leg. This specific front facing leveling leg has a rubber foot. It is imp...
$7.45
In Stock
Order within the next 1 hr and 32 mins and your part ships today!
This 15 inch compactor bag carrier fits around the compactor bag inside the compactor and is used to easily lift and remove trash compactor bags once they are full. Simply place the reusable bag carri...
$35.91
In Stock
Order within the next 1 hr and 32 mins and your part ships today!
The function of the directional switch on your trash compactor is to ensure the ram lowers to compress your trash, then returns to the top position. If your trash compactor does not complete this task...
$64.14
In Stock
Order within the next 1 hr and 32 mins and your part ships today!
This touch-up paint can be used on a wide variety of household appliances. It is most often used on washers, dryer, refrigerators, dishwashers, ranges, freezers, trash compactors, or microwaves. It is...
$8.00
In Stock
Order within the next 1 hr and 32 mins and your part ships today!
This is a 60-pack of plastic compactor bags. These bags are 15 inches wide, 3 millimeters thick and are white in color. The 3-millimeter thickness makes the bags more durable and helps prevent tearing...
$67.92
In Stock
Order within the next 1 hr and 32 mins and your part ships today!
This bearing roller may also be known as the wheel assembly or the container roller bearing, and it is a piece for your trash bin. The function of this bearing is to work in conjunction with your tras...
$16.40
In Stock
Order within the next 1 hr and 32 mins and your part ships today!
12 packs with 15 bags in a pack makes this 180 bag bulk purchase.
$197.02
In Stock
Order within the next 1 hr and 32 mins and your part ships today!
Questions And Answers for GX900QPPS2
Ask our experts a question about this model and we'll get back to you as soon as possible!
1 question answered by our experts.
Sort by:
< Prev
1
Next >
Search filter:
Clear Filter
Your search term must have 3 or more characters.
Keep searches simple. Use keywords, e.g. "leaking", "pump", "broken" or "fit".
Sorry, we couldn't find any existing answers that matched.Try using some different or simpler keywords, or submit your new question by using the "Ask a Question" button above!
Cindy
January 20, 2020
I need a new handle
For model number GX900QPPS2
Hello Cindy, Thank you for the question. I have researched the model you have provided and have found the part you are looking for is PartSelect Number: PS11747586. We hope this helps!
Moved the compactor out from under cabinet and unplugged the powercable.Laid compactor over on its side Removed the top (4 screws) and base plate (3 screws) as well as the coverplate for the motor(3 screws)Found that large drive was broken in half. Used two screwdrivers to start split ring then pliers to pull it off the rest of the way.
... Read morer />Removed the drive gear and the washer. Used a nail to drive out the pin for the smaller drive gear kit. Removed and replaced with new, used new pin to lock it on to the shaft. Changed out the bearings and washers on one powerscrew, put chain back on. Then was then a simple matter to put the new gear back on the chain then slide the whole thing back on the drive shaft. Replace the washer then slip the split ring back in place and seat it home with the pliers. Greased chain, gear drive and powerscrew. Put all covers back on with the screws. Pushed button it worked.
I pulled the trash compactor out from under the counter.
I took out the four screws that kept the top cover in place to expose the ram.
The gear shafts were turning but the ram would not lower, at first I though the ram drive bolts were stripped and it wouldn't engage the shaft. Then I realized there was a mechanical
... Read more directional\limit switch at the top that controlled the power and direction the gear shafts were turning, this switch was broken.
Just had to take off the front plate that was held on by a number of screws and replace the switch that was held on by two more screws. It had five wires attached to it, the new switch was clearly labeled as to which color wire went where.
This product comes in a bottle with a brush like Liquid Paper. It goes on incredibly easy. A second coat might be needed. I wanted to prevent rust from setting in so I covered the scratches and dings. The paint is a little brighter since my washer is 10 years old but it still looks great.


 – Part Number: 9872040T")