EasyApplianceParts is now PartSelect! We've merged our sites to provide a better shopping experience for you.   Full Details

Find Parts

Parts Departments

Top Model Types

Top Brands

Repair Help

Expert Repair Videos

Keep typing for more specific results...

FRS6LF7JS3 Frigidaire Refrigerator - Overview

Enter a part description. DIY Heroes keep it simple, eg. "belt" or "pump".

Search filter:
Clear Filter
Your search term must have 3 or more characters.
Bottom Door Bin – Part Number: 240323002
$62.65
In Stock
Bottom Door Bin
★★★★★
★★★★★
(135)
Part #240323002
The Bottom Door Bin is also commonly known as a "cantilever shelf" is a clear plastic drawer which holds items in the bottom area of your fridge's interior, on the door. This OEM part is very easy to install and will not require any tools, you will just need to snap the mounting tabs into place for removal and installation. If damaged you will notice visible damage or have problems holding items in the fridge. If damaged, it should be replaced. Check your model number and user manual to see if this is the right part for you. This is important, as many fridges use multiple door bins, many of which vary slightly. This part is sold individually.
Crisper Cover Support - Front – Part Number: 241993101
$13.12
In Stock
Crisper Cover Support - Front
★★★★★
★★★★★
(85)
Part #241993101
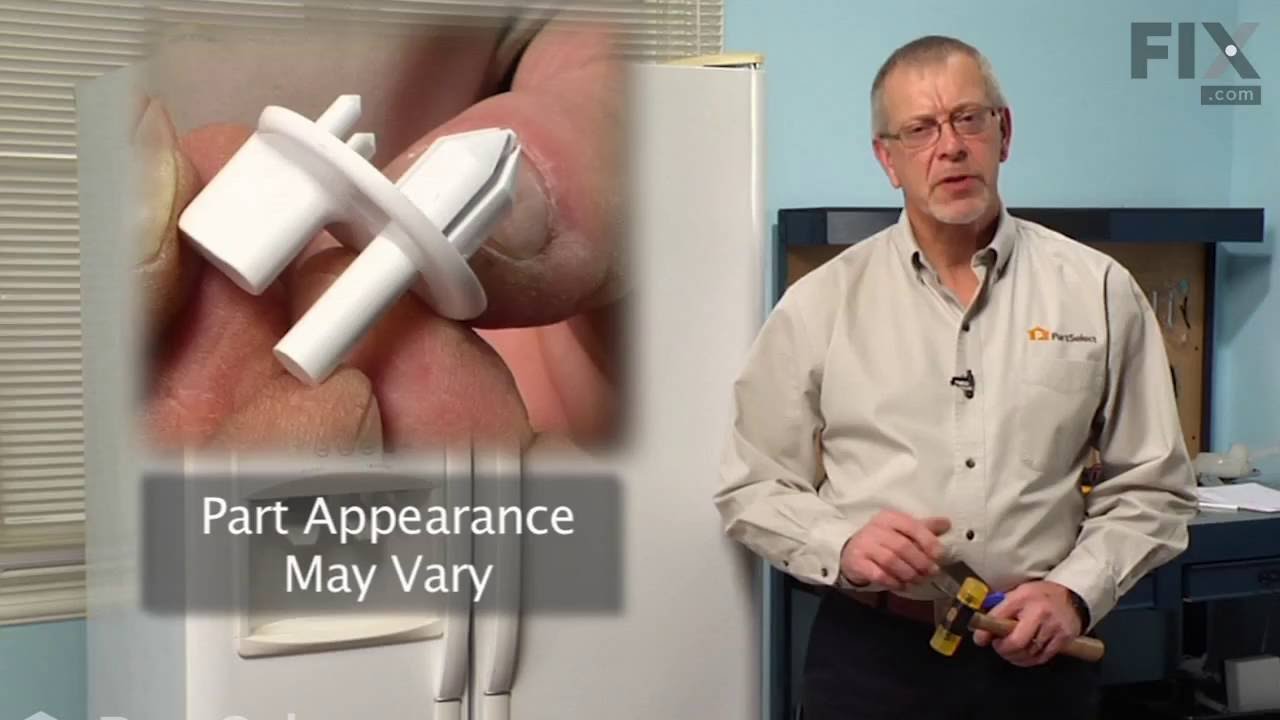
This crisper cover front support is used to keep the crisper shelf in place and may need replacing if the door will not open or close. This white, OEM part measures roughly 1 inch in diameter and can be used for the front and the rear support, as designed by the manufacturer, and mounts to the inside cabinet wall. Replacing this part is an easy repair, and will require a small flat blade screwdriver, a putty knife, and a soft hammer. Remove the crisper and shelf from the refrigerator before replacing the support. The crisper cover front support is held in place with a locking pin. To remove the old part, you will first need to push the pin into the interior of the cabinet using the screwdriver, and then you can pull the support out with a putty knife. If you cannot get the pin out you can use a flat-blade screwdriver to push it down and out of sight and it will not harm anything in your refrigerator After removing the pin and attaching the new support, simply use the soft hammer to lock the new pin in place.
Crisper Support - Rear – Part Number: 241993001
$17.18
In Stock
Crisper Support - Rear
★★★★★
★★★★★
(21)
Part #241993001
This authentic rear crisper support is a white, plastic part which is rated as "easy" to install by our customers. This OEM part replaces the rear crisper cover support in your fridge and mounts to the inside cabinet wall. If there is visible damager or your crisper stops fitting properly, it may be time to replace the part. Check your user manual and model number to ensure this part is what you need. Replacing the rear crisper support in your refrigerator is an easy job. This part is made from plastic and mounts on the inside of the wall. To complete this repair you will need a small putty knife, a punch or a short flat blade screwdriver, and a small hammer. You may need to replace your rear crisper support if you find that the door will not open or close. In order to complete this repair, you will need to remove all the shelves above the crisper in order to have ample room to work. It is also good to have duct tape on hand, which can be used to protect the liner around the support. This part is sold individually. Please note that the rear and front crisper support are different parts; this is the one you are looking for if it is your rear support that needs replacing.
Refrigerator Water Filter – Part Number: WF2CB
$71.35
In Stock
Refrigerator Water Filter
★★★★★
★★★★★
(39)
Part #WF2CB
This is a single OEM water filter used in refrigerators to remove impurities and particles from water that goes through the water and ice dispenser. It is used for reducing cysts, turbidity, lead, mercury, herbicides, and more. If your icemaker is not making ice, not dispensing ice, dispenses too little ice, or there is leakage and the fridge is making loud noises, replacing the water filter may be the solution. This filter is located in the front, top right of side-by-side refrigerators. You will know it is time for a new filter when the light on the freezer door dispenser lights up red, or after 6 months (200 gallons) of use. No tools are required for this easy repair. First, press the release button to pull out the old water filter and push and lock in the new water filter. Run water through the dispenser for about 3 minutes to prime the filter for use. Dispose of the water or use it to water plants. Press the indicator for 3-10 seconds to reset after this repair is complete. This carbon-based filter measures 6 x 3 x 7 Inches and is white plastic.
Door Shelf – Part Number: 240351601
$52.75
In Stock
Door Shelf
★★★★★
★★★★★
(92)
Part #240351601
This original equipment manufacturer Door Shelf is a white plastic part which holds items inside of your freezer or refrigerator door. It is roughly 10 inches long by 4 inches high by 5.5 inches wide. It can be used in the freezer or refrigerator and is very easy to repair. All you need to do is snap the new door bin into place, which requires no tools. This part is sold individually and not as part of a set, even though your refrigerator may take more than one of this part.
Refrigerator Water Inlet Valve – Part Number: 242252702
$68.15
In Stock
Refrigerator Water Inlet Valve
★★★★★
★★★★★
(124)
Part #242252702
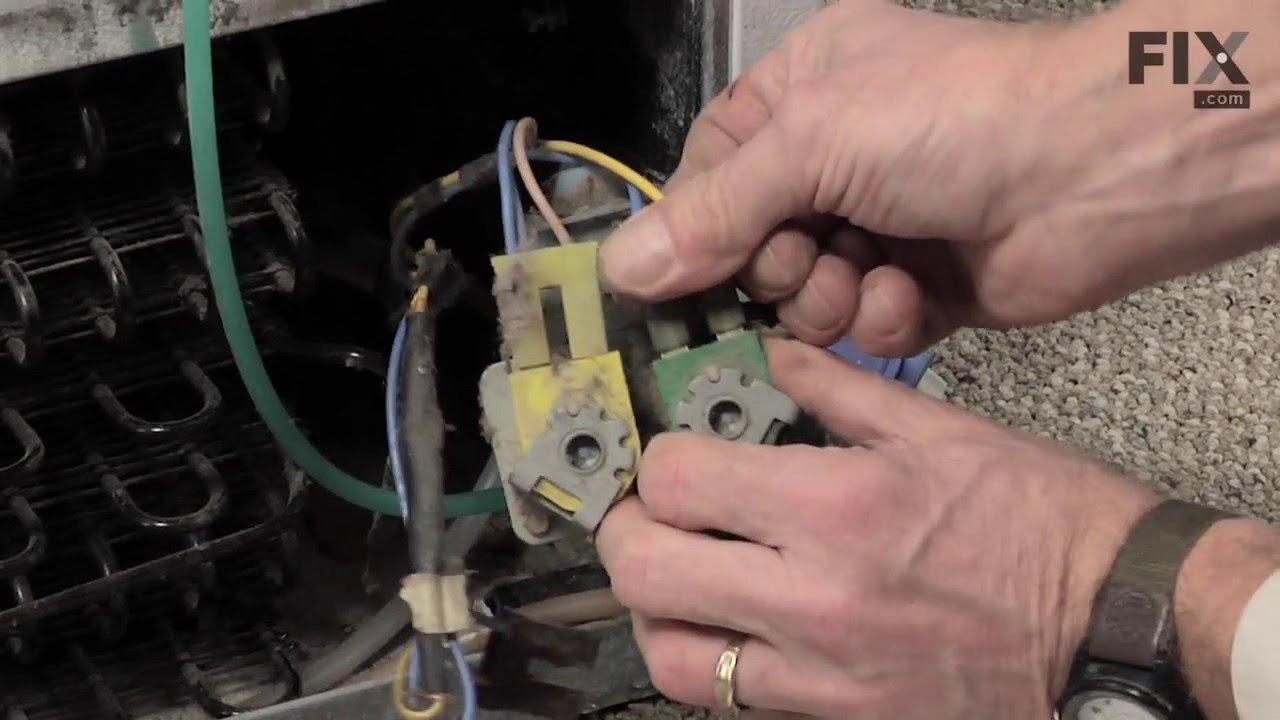
The function of the Refrigerator Water Inlet Valve (Triple Solenoid Water-Valve, Water Valve, Water Inlet Valve, Refrigerator Water Inlet Valve Assembly) is to release water from the supply line when activated, and send it through to your water dispenser or ice maker in your refrigerator. The water inlet valve is located at the back of the refrigerator, and connects to the water supply. The valve can break from material fatigue or normal use. If your water inlet valve is malfunctioning, you could be getting a lack of water to the inside of your refrigerator. Your ice maker may not produce cubes or your water dispenser may not work. The water inlet valve must be replaced if the solenoids no longer have continuity or the valve has internal blockage. This valve measures approximately 7 inches long and 4.5 inches wide, and is constructed of plastic and metal. It comes in blue, and includes the valve and mounting bracket.
Door Bin - Clear – Part Number: 240356402
$78.05
In Stock
Door Bin - Clear
★★★★★
★★★★★
(74)
Part #240356402
This genuine refrigerator door bin is perfect for storing items on your fridge door. Made from clear plastic, it’s easy to install with no tools required—just snap it into place. Ideal for replacing cracked or stained bins, it’s sold individually.
Upper Crisper Drawer Cover - Glass NOT Included – Part Number: 240350702
$53.85
In Stock
Upper Crisper Drawer Cover - Glass NOT Included
★★★★★
★★★★★
(60)
Part #240350702
This genuine upper crisper drawer cover frame is designed to support your refrigerator?s upper crisper drawer and allow for smooth opening and closing. It features built-in glides for proper drawer alignment but does not include the glass insert. There are two large crisper drawers towards the bottom of the appliance. This part covers the upper large crisper drawer, not the deli pan.
Meat Drawer Rail - Right Side – Part Number: 240356501
$59.35
In Stock
Meat Drawer Rail - Right Side
★★★★★
★★★★★
(57)
Part #240356501
As you look into the fridge, this drawer support track is located on the right-hand side. This item is white in color and made of plastic. The drawer support track can wear out over time. The only tool required is a Phillips screwdriver. Empty out the drawer and remove it by sliding it forward. Lift out the shelf, remove the screw on the side of the shelf, remove the rail by pushing the rail forward and snapping out of place, insert new rail, and install the screw back in. Now the shelf can be put back into the refrigerator. The mounting screws are sold separately.
Door Closing Cam – Part Number: 240457701
$59.35
In Stock
Door Closing Cam
★★★★★
★★★★★
(32)
Part #240457701
Sold individually. This cam is located at the bottom of the fridge/freezer door.
Hinge Bearing – Part Number: 240328203
$36.29
In Stock
Hinge Bearing
★★★★★
★★★★★
(66)
Part #240328203
This refrigerator door hinge bearing is a durable black plastic component designed to fit into the bottom of the door, providing a smooth pivot point for the hinge pin. It plays a critical role in ensuring effortless door movement, reducing friction, and maintaining proper alignment. Positioned at the lower hinge area, it helps eliminate stiffness, noise, and misalignment that can interfere with door operation. Over time, wear may result in symptoms such as squeaking, clicking, or difficulty opening and closing the door. Replacing this bearing restores smooth functionality and helps prevent issues like door sweating or inefficient sealing.
Refrigerator Crisper Drawer – Part Number: 240351061
$74.82
In Stock
Refrigerator Crisper Drawer
★★★★★
★★★★★
(29)
Part #240351061
This clear plastic crisper drawer is for side-by-side refrigerators. It is sold individually and sourced right from the original manufacturer. Please note that the new pan does not have the humidity control slide, and this component is now sold separately. The crisper drawer is designed to store produce at a humidity level that ensures your food is kept fresh for as long as possible. It is commonly replaced because it is cracked, warped, or stained. For this simple tool-free repair, start by opening your refrigerator door and sliding out the old crisper drawer. Take your new crisper drawer and align the thin ridge on the top of the drawer with the track located inside the refrigerator. Slide the new part into place and your repair is complete.

Manuals & Care Guides for FRS6LF7JS3

Click to download

Questions And Answers for FRS6LF7JS3

Ask our experts a question about this model and we'll get back to you as soon as possible!

Sort by:
  • 1
Sorry, we couldn't find any existing answers that matched.Try using some different or simpler keywords, or submit your new question by using the "Ask a Question" button above!
Peggy - For model number FRS6LF7JS3
July 7, 2021
Is there more than one light bulb in the refrigerator? I thought there was a light by the vegetable tray
Chris Boyle Profile
Hello Peggy, Thank you for the question. There is a light bulb up by the controls and also at the bottom behind the Crisper Drawers. We hope this helps!
$27.45
In Stock
Light Bulb
3 people found this instruction helpful.
Was this helpful?
Thank you for voting!
Joe - For model number FRS6LF7JS3
August 20, 2022
IN LINE CONNECTI0N OR FILTER
Chris Boyle Profile
Hello Joe, thank you for reaching out. We have researched your model and found water filter part number PS503621 and water line tube part number PS1765195. We hope this is what you were looking for. Please reach out to customer service if you need help placing an order. Glad we could help.
1 person found this instruction helpful.
Was this helpful?
Thank you for voting!
Roy - For model number FRS6LF7JS3
August 23, 2022
HOW TO INSTALL A POWER CORD ON A FRIGIDAIRE REFRIGERATOR
Chris Boyle Profile
Hey Roy, thank you for your inquiry. To replace the power cord make sure the old power cord is unplugged and the water supply is turned off. Use a quarter inch socket or nut driver to unthread the screws which are securing the water supply line retainer to the rear panel and detach the water supply line from the inlet valve. Next, unthread the remaining screws which are securing the rear access panel. Set the panel aside to make it easier to access the power cord grounding wire mounting screw. You can move the compressor and inverter board out of the way. Pull off the three retaining pins and remove the washers. Now, carefully lift up the compressor and inverter board and move them to the right. Unthread the screws securing the power cord retaining clip as well as the screw securing the grounding wire. You can now disconnect the wire connector to fully remove the old power cord. Prepare the new power cord for installation by transferring the retaining clip from the old cord to the new one. Now connect the wire connector and secure the grounding wire to the refrigerator base with the screw. Thread and tighten the screw to secure the power cord retaining clip. Now reposition the compressor and inverter board. With the washers in place, secure the compressor with the three retaining pins. Reposition the rear access panel and secure it with the screws. Reattach the water supply line to the inlet valve, and secure the line to the rear panel with the retainer. Turn the water supply back on. We hope this information helps!
Was this helpful?
Thank you for voting!
  • 1

Common Symptoms of the FRS6LF7JS3

How this model fails, and the parts that fix it.

Watch our pros, then fix it yourself.

See how others fixed this model. Time, tools, difficulty, and steps that lead to victory! View More

Search repair tips from other customers using simple keywords like "replace", "fit", "remove", "inspect". DIY doesn't mean you have to do it alone!

Search filter:
Clear Filter
Your search term must have 3 or more characters.
yearly maintenance
623 of 666 people found this instruction helpful.
  • Antonio from Folsom, CA
  • Really Easy
  • Less than 15 mins
swap filter
Was this helpful?
Thank you for voting!
water leaking out of refrigerator
608 of 723 people found this instruction helpful.
  • Jose from Alexandria, VA
  • Easy
  • 15 - 30 mins
  • Nutdriver, Pliers, Wrench (Adjustable)
In my specific appliance the water valve is located in the bottom right hand corner looking at it from the back. To get to it I remove the thin layer of cardboard the covers the back of the fridge. I then proceeded to disconnect the 1/4" copper tubing which is the water feed coming out of the wall. Then I removed the screws that hold the valve assembly in place. I took the water valve out and removed the electrical connections as well as the plastic tubing which feed the water dispenser and the ice maker. To install the new water valve it was just a matter of reversing steps.

Was this helpful?
Thank you for voting!
Tab on bottom door bin broke off
541 of 573 people found this instruction helpful.
  • Mark from Redlands, CA
  • Really Easy
  • Less than 15 mins
Replaced bottom door bin being careful not to put stress on the tabs to fit into molded area in door.
Was this helpful?
Thank you for voting!