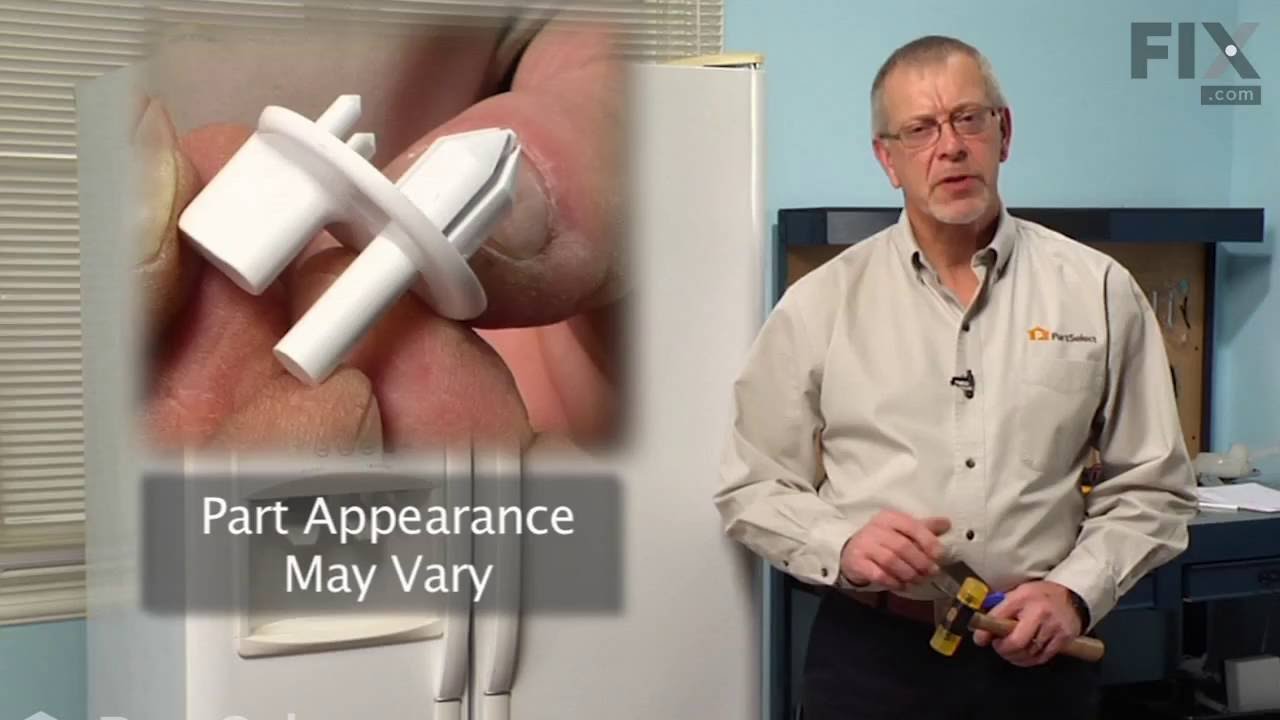
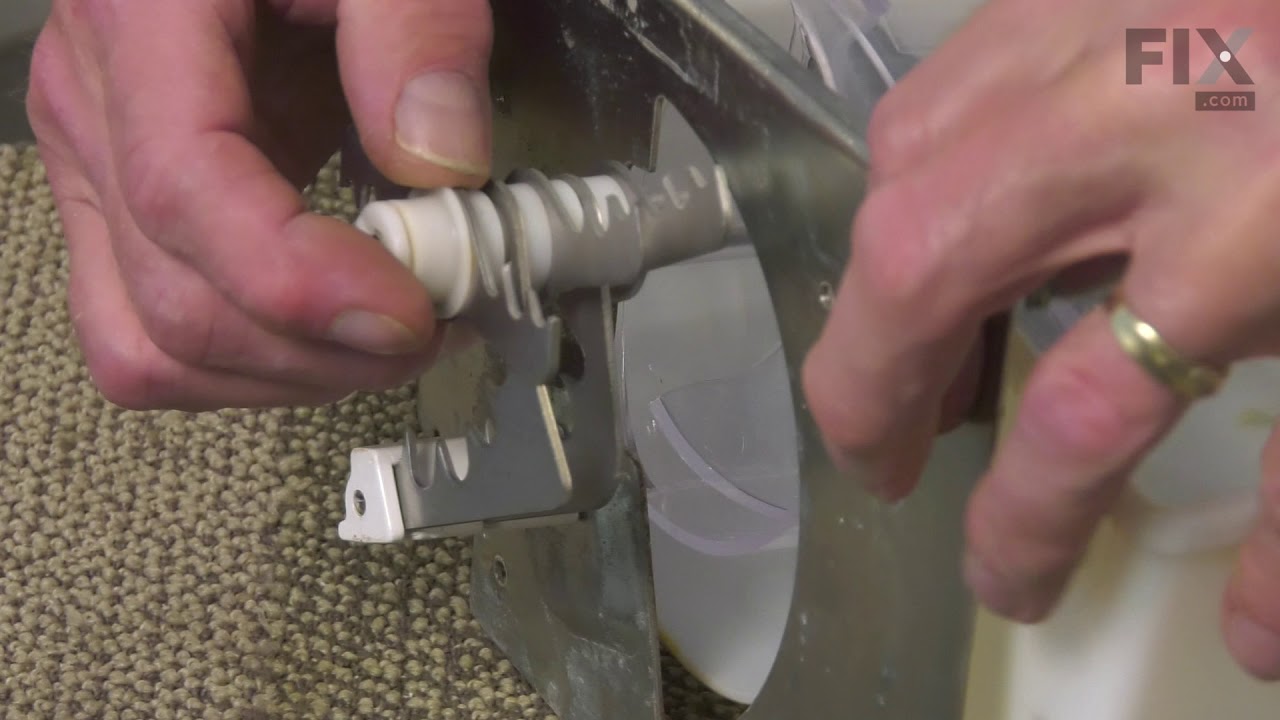
This crisper cover front support is used to keep the crisper shelf in place and may need replacing if the door will not open or close. This white, OEM part measures roughly 1 inch in diameter and can be used for the front and the rear support, as designed by the manufacturer, and mounts to the inside cabinet wall. Replacing this part is a...Read moren easy repair, and will require a small flat blade screwdriver, a putty knife, and a soft hammer. Remove the crisper and shelf from the refrigerator before replacing the support. The crisper cover front support is held in place with a locking pin. To remove the old part, you will first need to push the pin into the interior of the cabinet using the screwdriver, and then you can pull the support out with a putty knife. If you cannot get the pin out you can use a flat-blade screwdriver to push it down and out of sight and it will not harm anything in your refrigerator After removing the pin and attaching the new support, simply use the soft hammer to lock the new pin in place.
This authentic rear crisper support is a white, plastic part which is rated as "easy" to install by our customers. This OEM part replaces the rear crisper cover support in your fridge and mounts to the inside cabinet wall. If there is visible damager or your crisper stops fitting properly, it may be time to replace the part. Check your us...Read moreer manual and model number to ensure this part is what you need. Replacing the rear crisper support in your refrigerator is an easy job. This part is made from plastic and mounts on the inside of the wall. To complete this repair you will need a small putty knife, a punch or a short flat blade screwdriver, and a small hammer. You may need to replace your rear crisper support if you find that the door will not open or close. In order to complete this repair, you will need to remove all the shelves above the crisper in order to have ample room to work. It is also good to have duct tape on hand, which can be used to protect the liner around the support. This part is sold individually. Please note that the rear and front crisper support are different parts; this is the one you are looking for if it is your rear support that needs replacing.
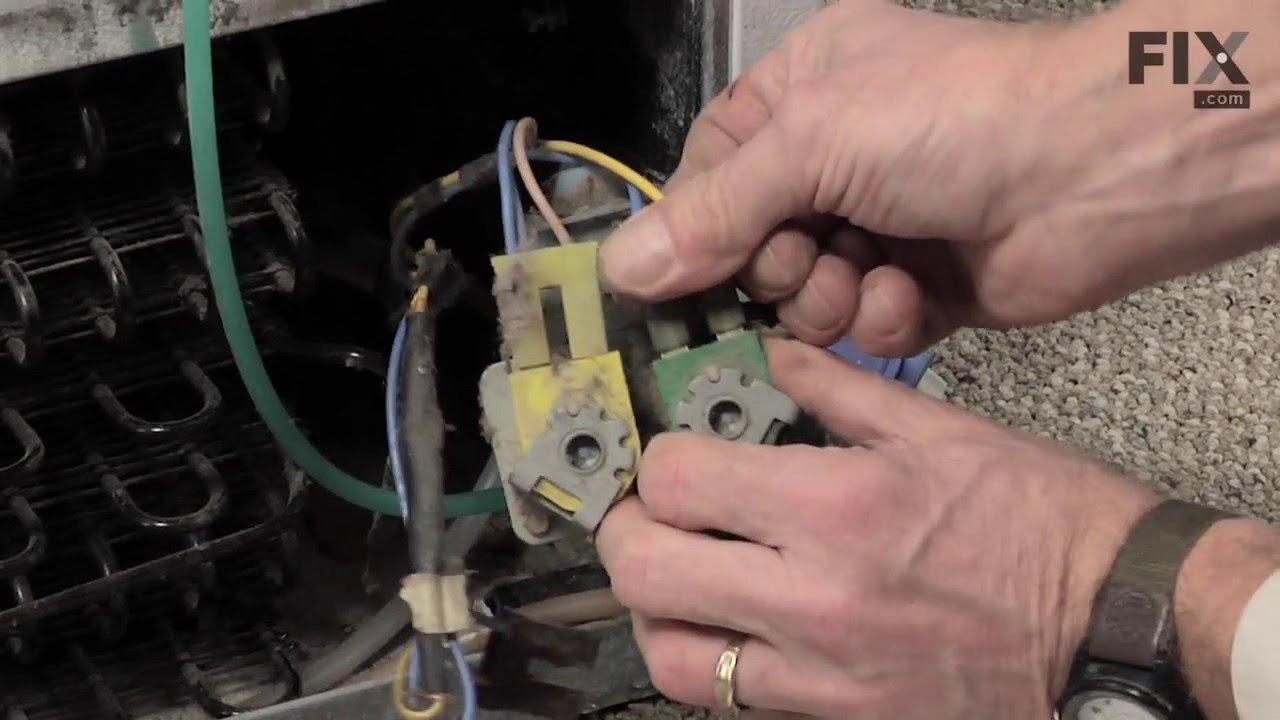
The function of the Refrigerator Water Inlet Valve (Triple Solenoid Water-Valve, Water Valve, Water Inlet Valve, Refrigerator Water Inlet Valve Assembly) is to release water from the supply line when activated, and send it through to your water dispenser or ice maker in your refrigerator. The water inlet valve is located at the back of th...Read moree refrigerator, and connects to the water supply. The valve can break from material fatigue or normal use. If your water inlet valve is malfunctioning, you could be getting a lack of water to the inside of your refrigerator. Your ice maker may not produce cubes or your water dispenser may not work. The water inlet valve must be replaced if the solenoids no longer have continuity or the valve has internal blockage. This valve measures approximately 7 inches long and 4.5 inches wide, and is constructed of plastic and metal. It comes in blue, and includes the valve and mounting bracket.
This genuine PureSource Ultra water filter will fit most Frigidaire french door and side by side refrigerators. You will find this filter located in the back, top right of the appliance. It is white in color and the filter has a polypropylene plastic housing and extruded carbon block filter media. Certified by NSF/ANSI to reduce contamina...Read morents that may be in your household water supply by 99.8 percent. The operating temperature for this filter is 33-100 degrees Fahrenheit, the flow rate is 0.5 GPM, the working pressure is 30-100 PSI, and it has a micron rating of 1. This filter should be replaced every six months or when the indicator lights up red. Installation is quick and easy. Push on the end face of the older filter to allow it to release. Remove and discard the old filter. Slide the new filter into the housing and press it down until it locks into place. Be sure to run water through the dispenser for about three minutes to prime the filter before use. Discard this water or use it to water plants. Do not forget to reset the indicator by pressing it down for 3-10 seconds. Review the use and care guide before you install for more detailed instructions.
This manufacturer-approved air filter system for refrigerators eliminates odors and any impurities. It does this by neutralizing and removing odor-causing molecules. For best results, it is important to change the filter every 6 months to ensure that food is kept fresh, and the humidity is controlled. This part measures about 7 inches wid...Read moree and 5 inches deep. Follow installation instructions provided by the manufacturer when installing this part to ensure accurate results and further guidance. Remember to unplug the refrigerator from the power source before starting this project. The air filter may be located in different places depending on your appliance, but is usually on the inner right or left side. See your manual for exact location. Our customers rated this as a very easy repair that takes only a few minutes; just locate and remove the old air filter and insert the new one to complete the repair, which requires no tools.
This clear plastic crisper drawer is for side-by-side refrigerators. It is sold individually and sourced right from the original manufacturer. Please note that the new pan does not have the humidity control slide, and this component is now sold separately. The crisper drawer is designed to store produce at a humidity level that ensures yo...Read moreur food is kept fresh for as long as possible. It is commonly replaced because it is cracked, warped, or stained. For this simple tool-free repair, start by opening your refrigerator door and sliding out the old crisper drawer. Take your new crisper drawer and align the thin ridge on the top of the drawer with the track located inside the refrigerator. Slide the new part into place and your repair is complete.
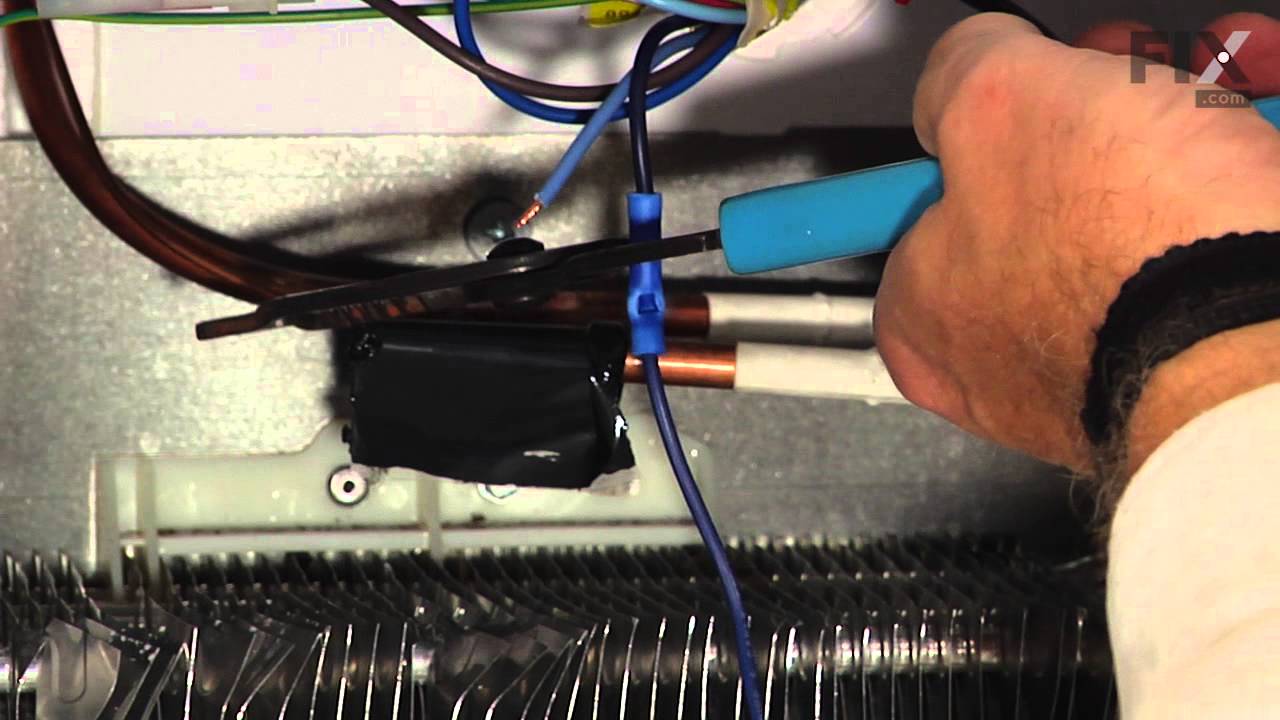
If you find that there is excessive frost in your freezer, or the freezer will not defrost, you may need to replace the defrost thermostat. The defrost thermostat kit comes with the clip, leads, and one heat shrink. To access the defrost thermostat for this repair, you will need to remove your freezer shelves, as well as the back panel of...Read more your freezer. To complete this repair, you will need a 1/4-inch nut driver, a set of wire strippers and crimpers, and a heat gun or blow dryer. Before you begin this repair, be sure to disconnect the power source from the appliance.
Cracked crisper glass? This replacement insert is just what you need. It’s about 17.12" by 15.40" and fits right into the frame above your crisper drawers, giving you extra shelf space and keeping things neat. Made of sturdy glass and easy to install—just slide the old one out and pop the new one in. Sold individually, so make sure it matches your fridge model before ordering!
This refrigerator shelf frame is designed to sit directly above the bottom crisper drawer, helping to regulate humidity and maintain optimal conditions for storing fresh produce. Built for durability and a precise fit, it supports the glass shelf (sold separately) and contributes to the overall organization of your refrigerator’s interior...Read more. Please note that this part includes the frame only; the glass insert must be ordered separately.
This OEM 40 watt appliance light bulb is used for some ranges, refrigerators, freezers, and microwaves. Simply locate the existing bulb, unscrew it from its socket, and replace with new light bulb. If the existing bulb is broken in the socket, disconnect the power to the refrigerator and use a pair of needle nose pliers to grip the intern...Read moreal fragments of the bulb to unscrew. Replace with the new bulb and reconnect the power to the refrigerator. These bulbs are sold individually and are a commonly replaced part; consider ordering a spare.
This refrigerator meat pan frame is a genuine replacement component designed to support the meat drawer and hold the glass shelf that serves as its cover. Measuring approximately 17 inches by 16 inches, the white plastic frame provides structural stability and helps contain spills with its raised edges. It is commonly replaced when cracke...Read mored or damaged due to excess weight or wear. Please note that the glass shelf and drawer are not included and must be purchased separately if needed. Compatible with select refrigerator models, this OEM part ensures a precise fit and reliable performance. Always verify model compatibility before ordering.
This kit includes the ice maker, power cord, bail arm, and fill cup. If your ice maker is not making or dispensing ice, or you notice a leak, you may need to replace the rear-mount ice maker assembly. This ice maker mounts to the back panel in the freezer section of the side-by-side refrigerator. If you are having an issue with the arm of...Read more this kit hitting the shelf, you will have to replace the shelf. You can find the shelf by searching PS1152582. To complete this repair, you will need a 1/4-inch nut driver and a small flat blade screwdriver.
Ask our experts a question about this model and we'll get back to you as soon as possible!
We may have answered a similar question already! Search questions and answers left by others using simple keywords like "fit", "broken", "easy", or "quality" to find questions that match.
Search filter:
Clear Filter
Your search term must have 3 or more characters.
Sort by:
Prev
1
2
3
Next
Sorry, we couldn't find any existing answers that matched.Try using some different or simpler keywords, or submit your new question by using the "Ask a Question" button above!
Mitch - For model number FGHC2331PFAA
December 12, 2019
My ice maker is making ice, but not delivering it through the door. Do i need a new ice maker to fix it?
Hello Mitch, thank you for inquiring. This is likely due to a faulty Ice Solenoid, part number PS8691995 for your model. Good luck with your repair!
3 peoplefound this instruction helpful.
Was this helpful?
Thank you for voting!
HARLEY - For model number FGHC2331PFAA
December 10, 2021
Replacing power cord is the Green wire with yellow strip just a ground wire
Hi Harley,
Thank you for your question. Yes, the green wire in the power cord is the ground wire. We hope this helps! If you have any questions, please let us know.
3 peoplefound this instruction helpful.
Was this helpful?
Thank you for voting!
Shawn - For model number FGHC2331PFAA
July 22, 2026
Just bought this used refrigerator. The computer screen is half working. Can I replace the screen?
Hi Shawn, thank you for getting in touch. Yes, the issue could be with the dispenser control board, part number PS16555508. You may need to replace it to fix the issue. We hope this sorts out your problem!
I have water to ice maker & no water to the water dispenser
Hello William, Thank you for your inquiry. We have researched the model you have provided and we would recommend checking the following parts to fix your issue: the water filter, the water inlet valve, and the water tubes. You can check both solenoids on the water inlet valve with a multimeter. Good luck with your repair.
I need a part for freezer ice bucket. The drum in the front of ice bucket
Hello Christine, Thank you for your inquiry. We have researched the model number you have provided and the ice bucket drum is part# PS1526412. We hope this helps and if you need help placing an order, customer service is open 7 days a week. Please feel free to give us a call. We look forward to hearing from you!
See how others fixed this model. Time, tools, difficulty, and steps that lead to victory!View More
Search repair tips from other customers using simple keywords like "replace", "fit", "remove", "inspect". DIY doesn't mean you have to do it alone!
Search filter:
Clear Filter
Your search term must have 3 or more characters.
water leaking out of refrigerator
608 of 723 peoplefound this instruction helpful.
Jose from Alexandria, VA
Easy
15 - 30 mins
Nutdriver, Pliers, Wrench (Adjustable)
In my specific appliance the water valve is located in the bottom right hand corner looking at it from the back. To get to it I remove the thin layer of cardboard the covers the back of the fridge. I then proceeded to disconnect the 1/4" copper tubing which is the water feed coming out of the wall. Then I removed the screws that hold the
... Read more valve assembly in place. I took the water valve out and removed the electrical connections as well as the plastic tubing which feed the water dispenser and the ice maker. To install the new water valve it was just a matter of reversing steps.
Read less
Was this helpful?
Thank you for voting!
icemaker stopped making ice
355 of 425 peoplefound this instruction helpful.
David from New Bern, NC
Really Easy
15 - 30 mins
Nutdriver, Screw drivers
Even though my wife said that our icemaker broke, there was actually nothing wrong with it. It was the valve that let water flow in during the 'harvest' cycle. A real easy way to test the icemaker without voltage and current measurements, is to fill the tray by hand with a little cup of water; wait till the water freezes and see if t
... Read morehe maker dumped the ice into the bin.
Read less
Was this helpful?
Thank you for voting!
Support studs were broken
337 of 381 peoplefound this instruction helpful.
Peter from Amherst, NY
Really Easy
Less than 15 mins
Pliers, Screw drivers
Used pliers to remove the residual broken stud that was still attached to the wall of the refrigerator, and then just pushed the new part in place. The longest time was spent in removing the food and crisper drawers.



 My Orders