EasyApplianceParts is now PartSelect! We've merged our sites to provide a better shopping experience for you.   Full Details
✖

Find Parts

Parts Departments

Top Model Types

Top Brands

Repair Help

Expert Repair Videos

Keep typing for more specific results...

DLGX3701W (00) LG Dryer - Overview

Diagrams for DLGX3701W

See every part. Know exactly what you need.

Enter a part description. DIY Heroes keep it simple, eg. "belt" or "pump".

Search filter:
Clear Filter
Your search term must have 3 or more characters.
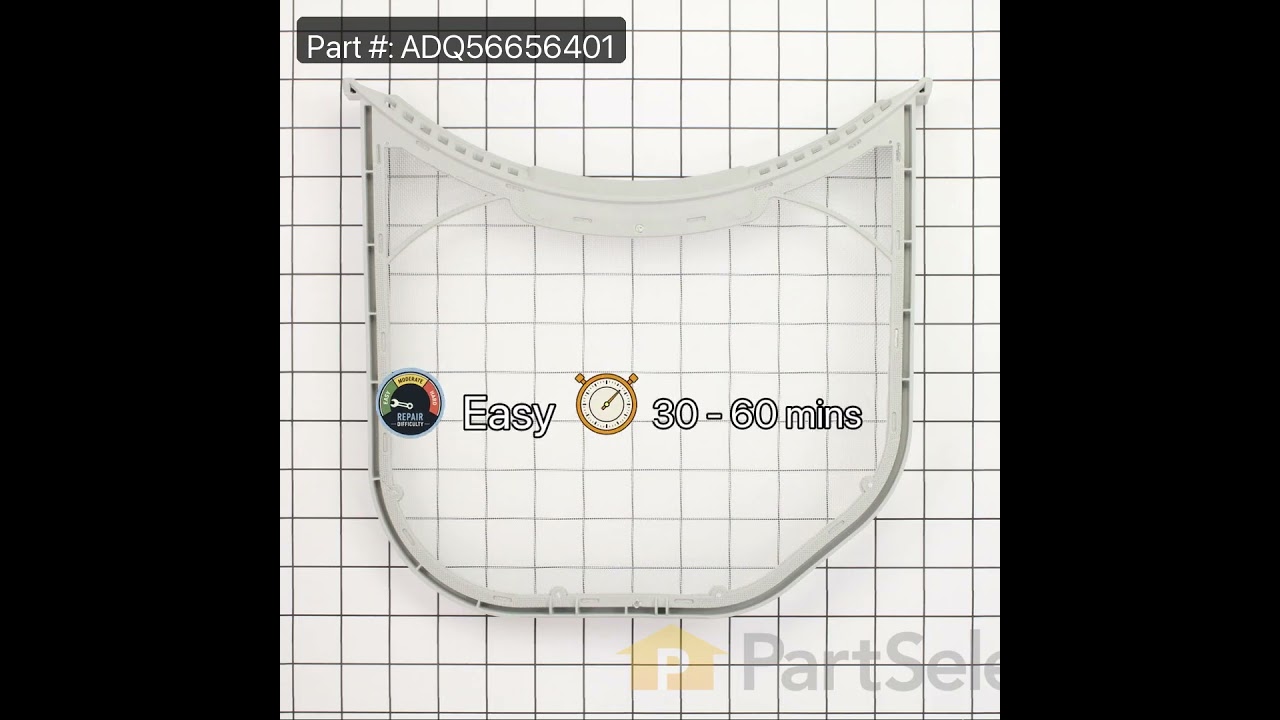
Dryer Lint Filter – Part Number: ADQ56656401
$36.85
In Stock
Dryer Lint Filter
★★★★★
★★★★★
(178)
Part #ADQ56656401
The Dryer's Lint Filter is used to collect lint during the dryer cycle as it passes through the dryer vent, in order to prevent damage to the machine. This manufacturer-approved part comes in gray, measures around 12 inches wide by 11 inches high, and is easy to install. It slides into the lint filter slot in your dryer. If there is visible damage to the screen then it's time to replace the part. We recommend that you thoroughly clean the lint filter before every load, but even with good maintenance, this hard-working part is often damaged or worn over time. If your dryer isn't drying quickly, the filter may be responsible. The manufacturer has made an authorized substitution to the lint filter. Special details: When replacing lint screen ADQ56656401 you may need to also replace lint screen housing MCK49049101 and lint screen guide MEA49050001 to prevent items from catching on the lint screen, depending on your model.
4 PACK ROLLER ASSEMBLY – Part Number: 4581EL2002L
$138.79
In Stock
4 PACK ROLLER ASSEMBLY
★★★★★
★★★★★
(82)
Part #4581EL2002L
This part is sold individually. The drum support roller is found in your dryer. It is used to hold the drum in place in the cabinet while letting the drum rotate on the support rollers. It is recommended that you replace both rollers at once. You may notice that this part needs to be replaced if you are experiencing a squeaking noise, which could be due to the bearing going bad. The bearing could be severely damaged if you hear a very loud thumping noise, much like you would when you are drying a pair of shoes.
Dryer Drum Belt – Part Number: 4400EL2001F
$35.80
In Stock
Dryer Drum Belt
★★★★★
★★★★★
(8)
Part #4400EL2001F
The belt wraps the length of the dryer drum, secured by a tension pulley and then loops around the motor pulley. If you find that the drum is not turning properly or at all while your dryer is in succession, it might be due to the belt being broken.
Duct Assembly – Part Number: 5209EL1006A
$53.20
In Stock
Micro Switch – Part Number: EBF61734701
$29.47
In Stock
Micro Switch
Part #EBF61734701
Also known as a belt switch.
Bracket,Hinge – Part Number: MAZ47156203
$55.29
In Stock
Bracket,Hinge
Part #MAZ47156203
PARTS ASSEMBLY,MOTOR – Part Number: AGM30061302
$175.97
In Stock
PARTS ASSEMBLY,MOTOR
Part #AGM30061302
Main PCB Assembly – Part Number: EBR85130504
$334.36
In Stock
Main PCB Assembly
Part #EBR85130504
GENERATOR ASSEMBLY – Part Number: ADZ73410102
$143.86
In Stock
GENERATOR ASSEMBLY
Part #ADZ73410102
This generator assembly produces the energy or output required for specialized appliance functions, supporting consistent and reliable operation. It is typically replaced when component failure results in loss of performance or interrupted functionality.
ACCESSORY ASSEMBLY – Part Number: AAA75232311
$125.62
Special Order
ACCESSORY ASSEMBLY
Part #AAA75232311
CABINET ASSEMBLY – Part Number: ABJ34640605
$308.68
Special Order
CABINET ASSEMBLY
Part #ABJ34640605
PANEL ASSEMBLY,CONTROL – Part Number: AGL76992503
$268.86
Special Order
PANEL ASSEMBLY,CONTROL
Part #AGL76992503

Common Symptoms of the DLGX3701W

How this model fails, and the parts that fix it.

Watch our pros, then fix it yourself.
See how others fixed this model. Time, tools, difficulty, and steps that lead to victory! View More

Search repair tips from other customers using simple keywords like "replace", "fit", "remove", "inspect". DIY doesn't mean you have to do it alone!

Search filter:
Clear Filter
Your search term must have 3 or more characters.
Dryer making a thumping and squealing noise when running
132 of 171 people found this instruction helpful.
  • Mark from WAVERLY, OH
  • Easy
  • 30 - 60 mins
  • Screw drivers, Wrench (Adjustable), Wrench set
Had to replace front drum support rollers. Removed screws underneath top in back that held bracket that keeps top in place. Slid top towards rear and lifted up. Removed 4 screws that hold plastic front panel in place (inside..2 on each corner) Unplugged front panel electric plugs to remove panel. Opened door..removed 2 screws at bottom of door opening. Removed screws on top of front panel. Unplugged door switch plug. Removed front panel. Removed right front roller with 9/16th wrench for nut. Adjustable for back of stud. Lifted up on drum to get roller out. Reversed to install. Left roller a bit harder to get to stud. Removed and installed same as right side. Did not attempt to replace rear rollers. Have them if needed but very much more involved to replace.
Was this helpful?
Thank you for voting!
Screeching during operation
66 of 101 people found this instruction helpful.
  • CAROL from NAMPA, ID
  • Really Easy
  • More than 2 hours
  • Pliers, Screw drivers
Found disassembly video and watched several times. Suspected that one of the drum wheels had seized up. Found extreme volume of lint and hair inside unit as well as a dryer sheet melted on top of heating unit. Front left drum wheel was worn down from lint and hair jamming its movement. Video made it easy, not a really complicated piec e of machinery. Replaced all 4 wheels due to normal wear on other three. Wanted to be sure drum evenly balanced on all 4. Parts came quickly and were easy to install. My sister and I did this together. Would not recommend doing it alone. Took time to vac and wipe down entire unit. Now it runs so quiet we have to look to see if it is operating. Got a brand new machine out of it, saved a couple of hundred dollars in repair bills, and found 11 cents inside the machine. For your own piece of mind, if you have had your dryer for several years, you need to open it up and clean it out. Its not hard... added note, we are both in our 60's... so if we can do it so can you.... Such a feeling of accomplishment, can't buy that in a store....
Was this helpful?
Thank you for voting!
The lint dryer filter was not fitting in correctly so it sticks out a bit and while clothes are drying it was catching it and ripping/twisting and damaging all my clothes
33 of 40 people found this instruction helpful.
  • Luciana from PRT WASHINGTN, NY
  • Very Easy
  • Less than 15 mins
I bought the whole dryer filter kit, but turns out I only needed the dryer filter and am very happy about that. No tools necessary I just slid it right in. It fit perfectly and I no longer have anxiety about my clothes coming out ripped.
Was this helpful?
Thank you for voting!