EasyApplianceParts is now PartSelect! We've merged our sites to provide a better shopping experience for you.   Full Details

Find Parts

Parts Departments

Top Model Types

Top Brands

Repair Help

Expert Repair Videos

Keep typing for more specific results...

CSK27PFXEWW Hotpoint Refrigerator - Overview

Enter a part description. DIY Heroes keep it simple, eg. "belt" or "pump".

Search filter:
Clear Filter
Your search term must have 3 or more characters.
Dispenser Door Assembly or Flapper – Part Number: WR17X11653
$33.60
In Stock
Dispenser Door Assembly or Flapper
★★★★★
★★★★★
(93)
Part #WR17X11653
This “Dispenser Door Assembly” (Door Recess Assembly, Ice Door Assembly, Dispenser Door, Refrigerator Dispenser Ice Chute Door Kit, Dispenser Door Flap, Ice Chute Door, Flapper) keeps the room air from infiltrating the freezer. Once the lever is pressed, the door flap opens and allows the ice to dispense into your container. If your door flapper is broken, it could allow outside air to enter the freezer and alter the inside temperature. You may notice frost buildup surrounding the dispenser area. The door flap can disconnect from the dispenser lever, or the tabs that hold it in place may break. Frequent use may distort the sealing face and cause air leaks and frost buildup. This part mounts in the ice dispenser, and measures approximately 3.25 inches in diameter. It is constructed of plastic and rubber, and comes in white/black. This part is sold individually.
Plastic Tubing - 5/16 Inch – Part Number: WR17X2891
$40.56
In Stock
Plastic Tubing - 5/16 Inch
Part #WR17X2891
This part is the replacement water line for your refrigerator. It is a long plastic tube, which is 5/16 of an inch in diameter. If your refrigerator is leaking, or will not dispense water or ice, you may have a damaged water line. When you replace the water line, you may want to pick up a new water tube union as well. You can use a utility knife to cut the old water line where it is damaged, and use the union to attach the new water line to the old one. This tubing is sold individually and is an OEM part.
Screw – Part Number: WH2X930
$16.05
In Stock
Screw
★★★★★
★★★★★
(1)
Part #WH2X930
This screw is sold individually.
Ice Bucket Auger – Part Number: WR17X4341
No Longer Available
Ice Bucket Auger
★★★★★
★★★★★
(5)
Part #WR17X4341
When activated, the auger rotates and pushes ice out of the bin through the chute to the user.
Dispenser Water Reservoir – Part Number: WR17X4358
$122.47
Special Order
Dispenser Water Reservoir
★★★★★
★★★★★
(1)
Part #WR17X4358
This in-refrigerator dispenser water reservoir tank comes with tubing. This tank stores water until the water actuator is activated and water is requested.
Door Recess Retainer – Part Number: WR2X8818
$16.05
In Stock
ARMATURE KIT – Part Number: WR62X26536
$60.30
In Stock
ARMATURE KIT
Part #WR62X26536
1/4 Tubing Nut – Part Number: WR57X57
$15.00
Special Order
1/4 Tubing Nut
★★★★★
★★★★★
(4)
Part #WR57X57
This is a quarter tubing nut and is sold individually. The tubing nut works in conjunction with your refrigerator/freezer and is made entirely of plastic. The function of this part is to connect the lines that supply water to your ice maker and water dispenser. The most common reason or needing to replace this part is if fluid is leaking from the water line to your icemaker or water dispenser. The tools you will need to make this repair include a nut driver, a pair of pliers, and a screwdriver set.
Plastic Tube - 1/4 Inch – Part Number: WR17X11349
$16.05
Special Order
Dispenser Assembly Crank – Part Number: WR17X3089
$40.02
Special Order
Dispenser Assembly Crank
Part #WR17X3089
Ice Storage Door – Part Number: WR17X10275
No Longer Available
Ice Storage Door
★★★★★
★★★★★
(5)
Part #WR17X10275
This is a decorative front cover that is made of plastic that covers the opening to where the icemaker is located and disables contact by the user while the icemaker is engaged.

Common Symptoms of the CSK27PFXEWW

How this model fails, and the parts that fix it.

Watch our pros, then fix it yourself.
See how others fixed this model. Time, tools, difficulty, and steps that lead to victory! View More

Search repair tips from other customers using simple keywords like "replace", "fit", "remove", "inspect". DIY doesn't mean you have to do it alone!

Search filter:
Clear Filter
Your search term must have 3 or more characters.
Leaking water lines fixed.
38 of 47 people found this instruction helpful.
  • Thomas from Sammamish, WA
  • Difficult
  • 1- 2 hours
  • Nutdriver, Pliers, Screw drivers, Socket set, Wrench set
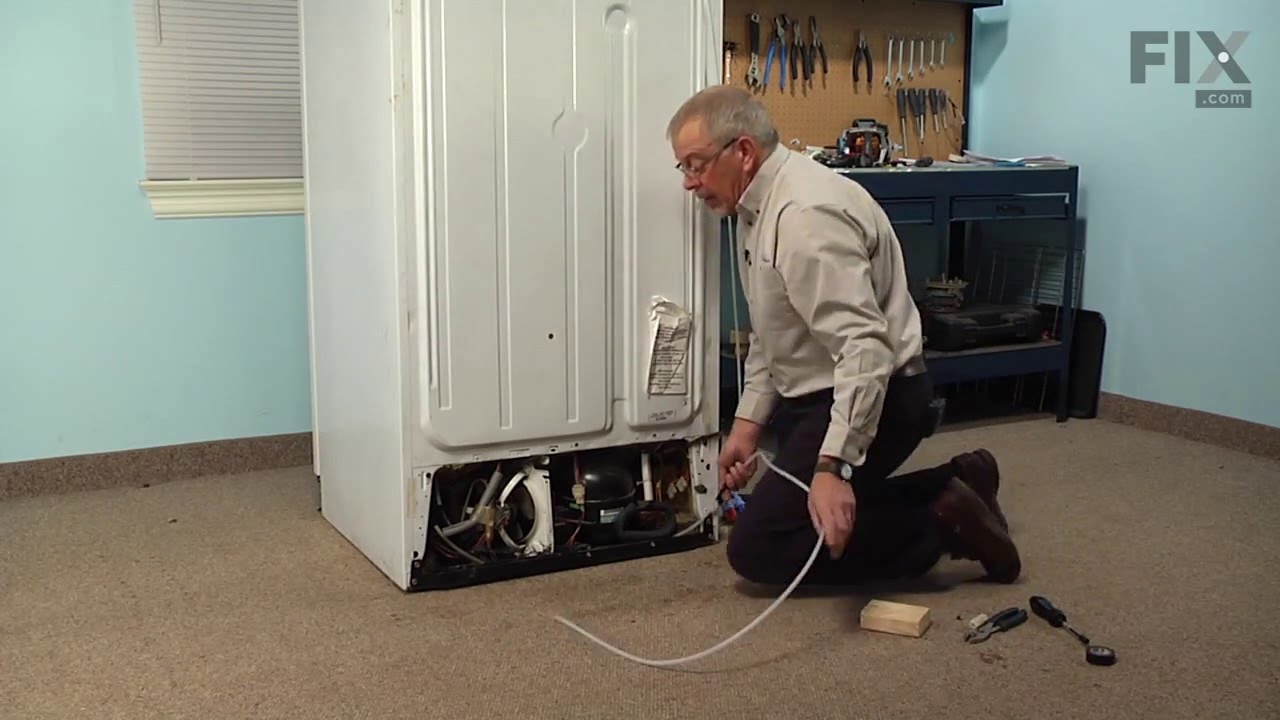
The problem is the common issue that the proximity of the plastic water lines that leave the electrically controlled valve near the compressor in the bottom back corner of the fridge, means they become brittle and crack/break. Both the line leaving to the ice-maker that runs diagonally across the outside back of the fridge, and the line t hat runs under the fridge to feed the water dispenser failed at the valve, breaking off just where they start at the valve.

The result was I noticed a big puddle coming out from under the fridge (too late for the poor wood floor).

The solution, replace the parts. For the ice maker line, it is one thin line - its easy to replace other than taking care to uncrimp and recrimp the connection up at the entry to the freezer.

For the thicker tube, the one that goes to the water dispenser, you replace the reservoir tank that sits inside the fridge. It has the two lines leaving it permanently attached to the tank, hence you replace the whole thing. There are separate lines and a splice/union that can be used to replace just the last 6 inches near the compressor, but I chose to replace the whole unit. This describes replacing that water chill tank unit.

The tank sits behind the bottom 2 drawers in the fridge.. you see it when you pull out the drawers. It has two lines permanently attached, one runs out of one hole in the bottom of the fridge and to the back of the fridge where it attaches to the exit on the electrical valve. The other runs out of the other hole in the bottom of the fridge and runs along the side, then along the front from the fridge to the freezer side. There is a union that connects that line to another line that then runs up the freezer door. Remove the front cover under the fridge to see this line and the union.

To replace the tank, you have to disconnect it from both ends, where its held in by plastic nuts/unions. Water remaining in the lines will drain out when you disconnect them. I unscrewed the valve assembly from the fridge body and then unplugged the plugs to the valves to do the work (but left the fridge plugged in).

To do this work, I needed to raise the fridge side edge of the appliance, since the hoses route along the underside of the fridge. After you disconnect the two ends (at the union on the freezer side bottom front egdge, and back side at the valve) you can pull the hoses up into the fridge. Routing the new hoses will require you have at least that one side off the floor to get your hands under it. I got two 6" tall 4x4 wood blocks and tipped the fridge slightly, raising the right (fridge) side off the ground and slid the blocks under the fridge rollers.

To remove the tank, before you raise the edge of the fridge, there are two screws that you need to remove (top side and left side) from the storage tank.

I recommend that in addition to removing the bottom two drawers, you remove all the bins hanging in the fridge door, since you need to work in there with gravity wanting to shut the door on you. Once you have the tank unscrewed (and the hose ends disconnected) note which hose(based on where it connects to the tank) goes to which hole in the bottom of the fridge. Pull up the hoses from the inside the fridge. The tank is free..go put it in the sink and drain the water out.

Installing the new tank, remove any hose end caps and route the hoses back through the lower drawer support frame you pulled them out of, and feed the correct hoses back through the holes in the bottom of the fridge. I found it better to feed the longer one first, which leads to the water dispenser/front. I could then pull that one up front from under the raised fridge and clip it in place and then route the other hose fully though its hole and route it to the back of the fridge to the valve. This way I ensured I was sending the right hose to the right destination.

You will likely have to trim the hoses once the tank is reattached as they are slightly long. Be sure
Was this helpful?
Thank you for voting!
Ice auger rusted
25 of 29 people found this instruction helpful.
  • Michael from Alto, MI
  • Easy
  • 30 - 60 mins
  • Nutdriver, Pliers, Screw drivers
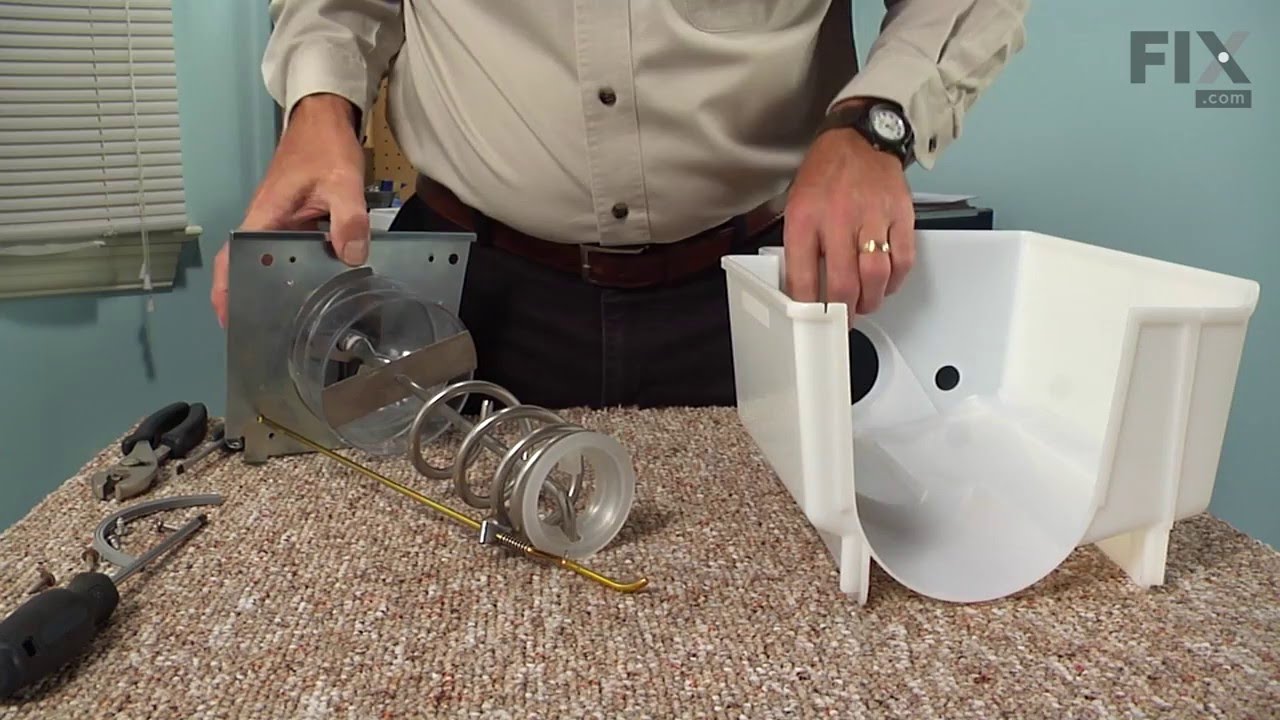
The OEM auger pitted and rusted. My ice was coming out brown. I had cleaned it before, but in no time is was back to 'spiced' ice cubes. I cleaned the entire ice bucket and disassembled, ordered the part and re-assembled. Now the disassembly was a different day than the assembly. It's a good thing the parts diagram was on the web, I am no Thomas Edison when putting things back together. It is pretty general though. I sand blasted the tin cover and re-painted before buying a new one. That had rusted too. Before that expense, I thought I would try it. Be careful of the bucket as it can crack. I am not sure when mine was cracked, but I noticed it this time. If you are contemplating the purchase of a new auger - don't. The new one is stainless and the old steel and chrome is a joke. The inside of the freezer where the bracket spins the auger is rusty too and the old auger will rust again in no time. Buy a new one for under $50 shipped to your door. Another note, be sure to remember what screws came from what hole. It will eliminate the guess work when assembling. Also, the spring on the arm that controls the crushed ice function, note the position before tearing apart.
Was this helpful?
Thank you for voting!
This seems to be a design problem because I have to replace this part about every other year since we bought it. I tried to talk to GE but all they want to do is send a service man out to replace the part for about 100.00, But I do it for around 15.00. I just think they should find out why the rubbe
26 of 35 people found this instruction helpful.
  • Jeff from Columbia City, IN
  • Really Easy
  • Less than 15 mins
  • Screw drivers
The repair is easy, just pop the grill off around the ice and water door, then there are 4 screwws to take out so the touch pad can be moved out of the way to unsnap the old door assm. and snap in the new one and wait about a year and a hald to order another one!!!!!
Was this helpful?
Thank you for voting!