This “Dispenser Door Assembly” (Door Recess Assembly, Ice Door Assembly, Dispenser Door, Refrigerator Dispenser Ice Chute Door Kit, Dispenser Door Flap, Ice Chute Door, Flapper) keeps the room air from infiltrating the freezer. Once the lever is pressed, the door flap opens and allows the ice to dispense into your container. If your door...Read more flapper is broken, it could allow outside air to enter the freezer and alter the inside temperature. You may notice frost buildup surrounding the dispenser area. The door flap can disconnect from the dispenser lever, or the tabs that hold it in place may break. Frequent use may distort the sealing face and cause air leaks and frost buildup. This part mounts in the ice dispenser, and measures approximately 3.25 inches in diameter. It is constructed of plastic and rubber, and comes in white/black. This part is sold individually.
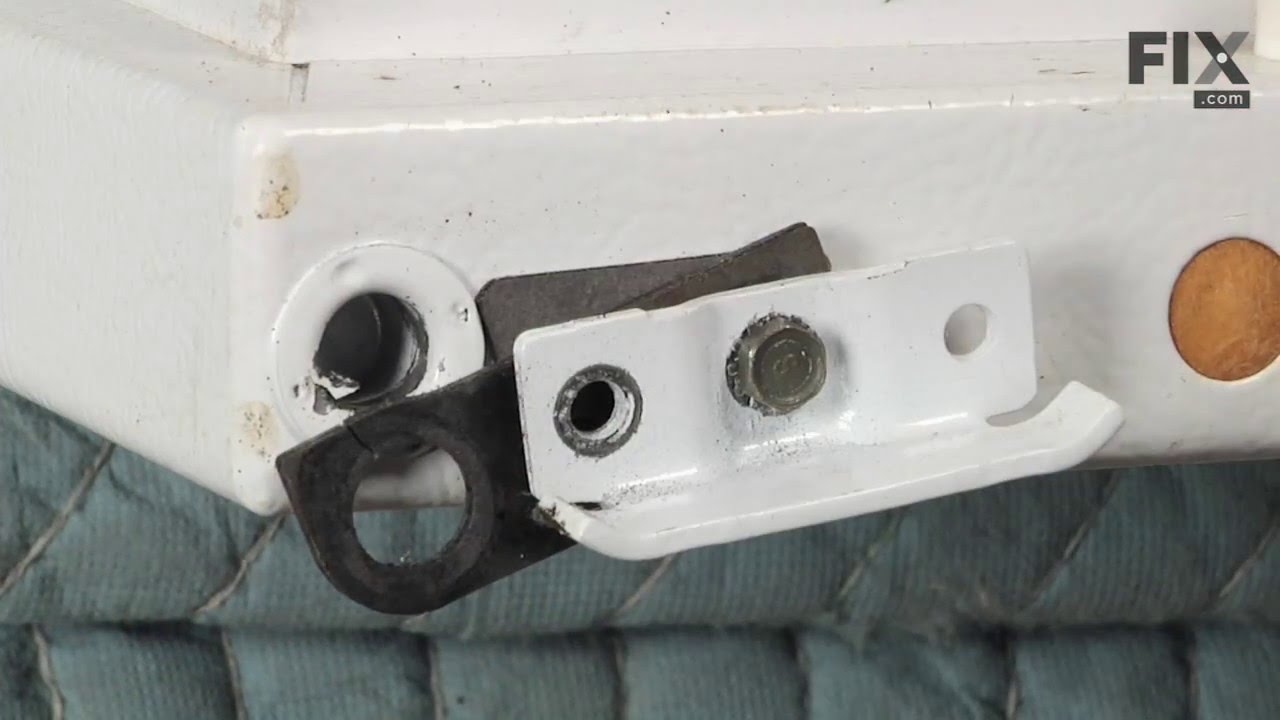
This refrigerator door hinge cam riser is designed to ensure smooth and consistent door movement. Installed directly on the door, it helps the appliance open and close properly by guiding the door to rise and fall gently, which also supports a secure seal. Made from durable plastic, this part is ideal for resolving issues such as doors that stick, fail to seal correctly, or make unusual noises during operation.
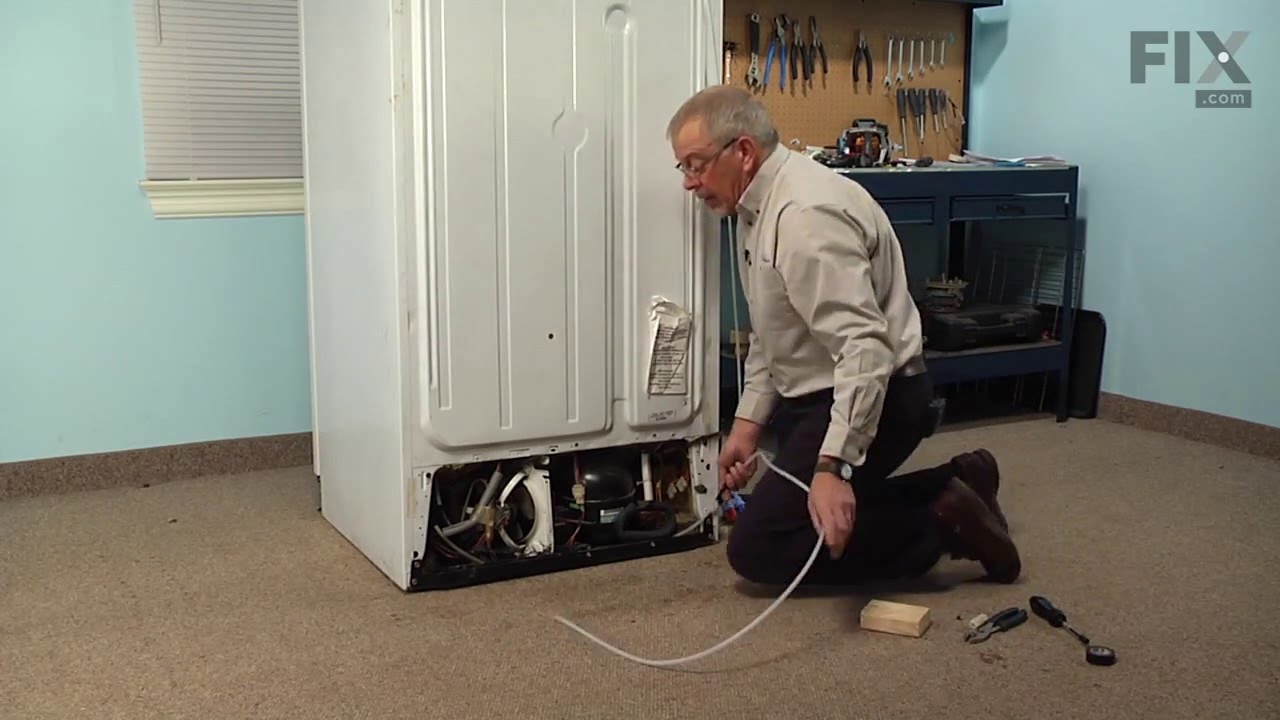
This part is the replacement water line for your refrigerator. It is a long plastic tube, which is 5/16 of an inch in diameter. If your refrigerator is leaking, or will not dispense water or ice, you may have a damaged water line. When you replace the water line, you may want to pick up a new water tube union as well. You can use a utilit...Read morey knife to cut the old water line where it is damaged, and use the union to attach the new water line to the old one. This tubing is sold individually and is an OEM part.
This in-refrigerator dispenser water reservoir tank comes with tubing. This tank stores water until the water actuator is activated and water is requested.
This is a quarter tubing nut and is sold individually. The tubing nut works in conjunction with your refrigerator/freezer and is made entirely of plastic. The function of this part is to connect the lines that supply water to your ice maker and water dispenser. The most common reason or needing to replace this part is if fluid is leaking ...Read morefrom the water line to your icemaker or water dispenser. The tools you will need to make this repair include a nut driver, a pair of pliers, and a screwdriver set.
This is a decorative front cover that is made of plastic that covers the opening to where the icemaker is located and disables contact by the user while the icemaker is engaged.
See how others fixed this model. Time, tools, difficulty, and steps that lead to victory!View More
Search repair tips from other customers using simple keywords like "replace", "fit", "remove", "inspect". DIY doesn't mean you have to do it alone!
Search filter:
Clear Filter
Your search term must have 3 or more characters.
Door would not automatically close.
180 of 194 peoplefound this instruction helpful.
Gary from North eastham, AL
Really Easy
15 - 30 mins
Screw drivers, Socket set
Symptom: Door did not close automatically. Also had found small chunks of black plastic on the floor. Refrigerator door was slightly lower than the freezer door.
One false start because I did not realize both of the door-closing cams had disintegrated and I had only ordered the cam without the hinge.
Purchased part
... Read more290199 Hinge Assembly. It came with matching door-closing cam. (Had not known so I also purchased the cam 297995 separately). Next time I will know to only purchase the Hinge Assembly.
Replacement procedure took about 20 minutes including removing and replacing door shelves and their contents. Two people involved.
1. Remove all door shelves with contents and other contents on door.
2. Remove the top Phillips head screw holding the decorative plastic on the top.
3. Remove the two top hinge screws on top of refrigerator using metric #8 socket wrench. Second person made sure door did not fall off.
4. Lift the door off the bottom hinge pin. Second person holds door on it’s side.
5. Take off the bottom refrigerator cover
6. Remove the bottom hinge assembly screws using metric #8 socket wrench.
7. Mount the replacement bottom hinge assembly and tighten the two screws.
8. On the door bottom, remove the outer screw and loosen the inner screw using metric #8 socket wrench.
9. Replace the door-closing cam (or what is left of it) with the cam in line with the door and cam bumps away from the door.
10. Place the door back on the hinge pin (one person holds while the other person maneuvers the door bottom).
11. Replace the top hinge and reinsert the screws on top of the refrigerator. Dress the door so that it does not press hard on the rubber door gaskets (or the door will fail to shut automatically). Tighten the screws.
12. Replace the decorative plastic over the top hinge.
13. Open the door and replace the bottom refrigerator cover.
14. Replace the door shelves and all contents.
15 Close the door.
Read less
Was this helpful?
Thank you for voting!
Leaking water lines fixed.
38 of 47 peoplefound this instruction helpful.
Thomas from Sammamish, WA
Difficult
1- 2 hours
Nutdriver, Pliers, Screw drivers, Socket set, Wrench set
The problem is the common issue that the proximity of the plastic water lines that leave the electrically controlled valve near the compressor in the bottom back corner of the fridge, means they become brittle and crack/break. Both the line leaving to the ice-maker that runs diagonally across the outside back of the fridge, and the line t
... Read morehat runs under the fridge to feed the water dispenser failed at the valve, breaking off just where they start at the valve.
The result was I noticed a big puddle coming out from under the fridge (too late for the poor wood floor).
The solution, replace the parts. For the ice maker line, it is one thin line - its easy to replace other than taking care to uncrimp and recrimp the connection up at the entry to the freezer.
For the thicker tube, the one that goes to the water dispenser, you replace the reservoir tank that sits inside the fridge. It has the two lines leaving it permanently attached to the tank, hence you replace the whole thing. There are separate lines and a splice/union that can be used to replace just the last 6 inches near the compressor, but I chose to replace the whole unit. This describes replacing that water chill tank unit.
The tank sits behind the bottom 2 drawers in the fridge.. you see it when you pull out the drawers. It has two lines permanently attached, one runs out of one hole in the bottom of the fridge and to the back of the fridge where it attaches to the exit on the electrical valve. The other runs out of the other hole in the bottom of the fridge and runs along the side, then along the front from the fridge to the freezer side. There is a union that connects that line to another line that then runs up the freezer door. Remove the front cover under the fridge to see this line and the union.
To replace the tank, you have to disconnect it from both ends, where its held in by plastic nuts/unions. Water remaining in the lines will drain out when you disconnect them. I unscrewed the valve assembly from the fridge body and then unplugged the plugs to the valves to do the work (but left the fridge plugged in).
To do this work, I needed to raise the fridge side edge of the appliance, since the hoses route along the underside of the fridge. After you disconnect the two ends (at the union on the freezer side bottom front egdge, and back side at the valve) you can pull the hoses up into the fridge. Routing the new hoses will require you have at least that one side off the floor to get your hands under it. I got two 6" tall 4x4 wood blocks and tipped the fridge slightly, raising the right (fridge) side off the ground and slid the blocks under the fridge rollers.
To remove the tank, before you raise the edge of the fridge, there are two screws that you need to remove (top side and left side) from the storage tank.
I recommend that in addition to removing the bottom two drawers, you remove all the bins hanging in the fridge door, since you need to work in there with gravity wanting to shut the door on you. Once you have the tank unscrewed (and the hose ends disconnected) note which hose(based on where it connects to the tank) goes to which hole in the bottom of the fridge. Pull up the hoses from the inside the fridge. The tank is free..go put it in the sink and drain the water out.
Installing the new tank, remove any hose end caps and route the hoses back through the lower drawer support frame you pulled them out of, and feed the correct hoses back through the holes in the bottom of the fridge. I found it better to feed the longer one first, which leads to the water dispenser/front. I could then pull that one up front from under the raised fridge and clip it in place and then route the other hose fully though its hole and route it to the back of the fridge to the valve. This way I ensured I was sending the right hose to the right destination.
You will likely have to trim the hoses once the tank is reattached as they are slightly long. Be sure
Read less
Was this helpful?
Thank you for voting!
Door wouldn't stay closed & was out of alignment
29 of 31 peoplefound this instruction helpful.
Patsy S from Ahoskie, NC
Easy
30 - 60 mins
Socket set
Order 2 cams as recommended in other posts. I didn't realize until the project was finished that the 2 cams fit together to tilt the door toward the refrigerator and force the door to catch. 1. Removed all items from door storage. 2. Removed top hinge cover held by single screw and top hinge plate held by two bolts.
... Read more/>3. Lifted up door to clear bottom hinge pin and removed door. 4. Turned door upside down and removed bottom hinge assembly held on by two bolts. 5. Replaced upper cam located on bottom of door and screwed the hinge assembly back on to bottom of door. 6. Drilled out the rivet that holds the lower cam to the bottom hinge pin. 7. Removed old lower cam and and replaced with new cam and secured to lower hinge assembly with pan head screw and nut (instead of rivet). NOTE: The metal shim that goes between the cam riser & door was also broken, we used a small washer instead of the replacement shim. 8. Replaced door back onto lower hinge pin and secured upper hinge pin with original bolts. 9. Placed cover on upper hinge assembly and secured with original screw. This is a project my husband and I completed together :) Perhaps we will store lighter items on the door to lessen the chances of the cams deteriorating again.