
















Models
>
9113674990
9113674990 Kenmore Range - Overview
Sections of the 9113674990
[Viewing 8 of 8]
Manuals & Care Guides for 9113674990
Click to downloadKeep searches simple, eg. "belt" or "pump".
Round Style Oven Igniter
PartSelect #: PS243425
Manufacturer #: WB2X9154
The round style oven igniter is also known as an oven bake or broil igniter and is compatible with your range appliance. The function of the round style oven igniter is to pull electrical current thro...
$117.20
In Stock
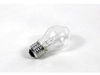
Light Bulb - 40W
PartSelect #: PS217532
Manufacturer #: 40A15
This 40-Watt light bulb is sold individually and is a genuine OEM replacement option for your home appliances. It is specially designed to withstand extreme temperatures, so this bulb is compatible wi...
$11.02
In Stock
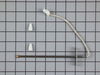
Oven Sensor
PartSelect #: PS236043
Manufacturer #: WB21X5301
It is possible that your oven is cold because of a fault in the temperature sensor. The temperature sensor regulates oven temperature in modern ranges, like a thermostat. It is on the back wall near t...
$151.71
In Stock
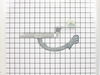
Hinge with Roller - Right Side
PartSelect #: PS231612
Manufacturer #: WB14X104
This is a hinge with roller for the oven door on your range. The roller allows you to open and close the door with ease and control. If your door is not opening easily, you may need to replace this pa...
$48.72
In Stock
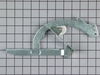
Hinge with Roller - Left Side
PartSelect #: PS231611
Manufacturer #: WB14X103
This is known as a hinge with roller and it is for the oven door of your range. The hinge with roller allows you to easily open and close your oven door without much effort. Take note that your applia...
$57.27
In Stock
Ignitor Mounting Screw
PartSelect #: PS234519
Manufacturer #: WB1X1293
Sold Individually.
$9.64
In Stock
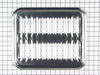
Broiler Pan - Large
PartSelect #: PS1517612
Manufacturer #: WB48X10056
This large broiler pan is found in the bottom of your oven and is used to catch drippings from broiling foods. This part includes the grate and bottom pan and is made of porcelain. The grate measures ...
$30.07
In Stock
Large Burner Drip Bowl
PartSelect #: PS244366
Manufacturer #: WB31M11
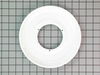
This part is sold individually. It is white on the top side, and black underneath. Used for gas ranges. You may need to order the drip bowl seal.
No Longer Available
Rear Drawer Glide
PartSelect #: PS243417
Manufacturer #: WB2X9146
Also called Rear Block.
No Longer Available
Questions And Answers for 9113674990
We're sorry, but our Q&A experts are temporarily unavailable.
Please check back later if you still haven't found the answer you need.
Common Symptoms of the 9113674990
[Viewing 9 of 9]Little to no heat when baking
Fixed by
these parts
these parts


Show All
Will Not Start
Fixed by
these parts
these parts
Show All
Gas igniter glows, but will not light
Fixed by
these parts
these parts
Show All
Element will not heat
Fixed by
these parts
these parts
Show All
Door won’t close
Fixed by
these parts
these parts


Show All
Oven not heating evenly
Fixed by
these parts
these parts
Show All
Little to no heat when broiling
Fixed by
these parts
these parts
Show All
Oven is too hot
Fixed by
these parts
these parts
Show All
Door won’t open after self cleaning cycle
Fixed by
these parts
these parts
Show All
Keep searches simple. Use keywords, e.g. "leaking", "pump", "broken" or "fit".
No ignition
Unplug the oven.
Open the oven door.
Remove the racks.
Remove the two screws that hold the oven floor; they are located toward the back.
Remove the oven floor pan.
Remove the screw holding the heat shield/dispenser.
Remove the heat shield/dispenser.
Untwist the ceramic wire caps on the two igniter wires. ... Read more
Remove the two screws holding the igniter.
Remove the igniter.
Replace the igniter working all the steps backwards.
It’s super simple.
Open the oven door.
Remove the racks.
Remove the two screws that hold the oven floor; they are located toward the back.
Remove the oven floor pan.
Remove the screw holding the heat shield/dispenser.
Remove the heat shield/dispenser.
Untwist the ceramic wire caps on the two igniter wires. ... Read more
Remove the two screws holding the igniter.
Remove the igniter.
Replace the igniter working all the steps backwards.
It’s super simple.
Read less
Parts Used:
-
Mark from Upland, CA
-
Difficulty Level:Really Easy
-
Total Repair Time:Less than 15 mins
-
Tools:Nutdriver, Screw drivers
765 of 831 people
found this instruction helpful.
Was this instruction helpful to you?
Thank you for voting!
broiler works, bake oven does not work.
Your website help me troubleshoot the problem and locate the part. Part was delivered the next day. Following the instructions that others on your website had provided, the repair was quick and SUCCESSFUL.
Gas will not flow if the igniter is bad. Gas will only flow if the igniter heats up the internal bimetal strip which in turn, ... Read more allows gas to flow through the safety valve
First, unplug the power sourse. For this repair it is not necessary to shut off the gas, but do so if it makes you more comfortable. Remove the oven door...it lifts right off. Next, remove the screws and lift out the bottom panel in the oven box. This will expose the igniter. Next, remove the lower drawer. Two 1/4-28 screws retain the igniter...remove these. With the drawer removed, go underneath and locate the 2 wires to the igniter. One has a green connector, and the other has a red connector. Disconnect these 2 wires and carefully remove the igniter and wires. Cut the wires from the igniter on the igniter end. You will need to reuse the plug end of each wire, so don't cut them too short. Splice these two wires to the new igniter with the wire splice caps provided. Feed the wires back down throught the opening at the back of the oven and carefully move the igniter into place. Install the two 1/4-28 retaining screws. Go back underneath the oven through the drawer opening and plug in the 2 wires. You should be good to go. Reassemble the oven and have mama bake a cake..
Gas will not flow if the igniter is bad. Gas will only flow if the igniter heats up the internal bimetal strip which in turn, ... Read more allows gas to flow through the safety valve
First, unplug the power sourse. For this repair it is not necessary to shut off the gas, but do so if it makes you more comfortable. Remove the oven door...it lifts right off. Next, remove the screws and lift out the bottom panel in the oven box. This will expose the igniter. Next, remove the lower drawer. Two 1/4-28 screws retain the igniter...remove these. With the drawer removed, go underneath and locate the 2 wires to the igniter. One has a green connector, and the other has a red connector. Disconnect these 2 wires and carefully remove the igniter and wires. Cut the wires from the igniter on the igniter end. You will need to reuse the plug end of each wire, so don't cut them too short. Splice these two wires to the new igniter with the wire splice caps provided. Feed the wires back down throught the opening at the back of the oven and carefully move the igniter into place. Install the two 1/4-28 retaining screws. Go back underneath the oven through the drawer opening and plug in the 2 wires. You should be good to go. Reassemble the oven and have mama bake a cake..
Read less
Parts Used:
-
Robert from Hebron, CT
-
Difficulty Level:Easy
-
Total Repair Time:30 - 60 mins
-
Tools:Pliers, Screw drivers, Socket set, Wrench set
600 of 783 people
found this instruction helpful.
Was this instruction helpful to you?
Thank you for voting!
Oven igniter failed to heat up and ignite the gas burner.
Before starting it's a good idea to disconnect the electricity and turn the gas valve off behind the stove.
Next, uncrew the two finger-screws at the back of the oven that hold the porcelain & steel drip plate in. It comes out if you push it towards the back of the oven and lift it out. This reveals the burner and the cylin ... Read more drical igniter attached to the side of the burner. While I was there I unscrewed the one screw at the front end of the burner (nearest me).
After attempting the repair from inside the oven, I realized it was far easier to pull out the bottom drawer and work from under the oven instead. Using only one size mini-socket for all screws it was easy. I undid the two screws that hold the main burner to the back of the oven. This allowed me to pull the burner up inside the oven so I could access the screws that held the igniter to the side of the burner. A flashlight helps when working under the oven.
Under the oven again I then pulled the two wires off their respective connectors. Then inside the oven unscrewed the two screws holding the igniter to the burner. The old part came off very easily. However, the new part didn't have connectors attached, so I had to remember which wire went where and cut the old connectors off and splice them to the new. Be sure to leave yourself as much of the old wire as possible attached to the connector. Otherswise you might find the "new" wires too short to reach the connectors.
I reconnected the igniter to the main burner with the two screws. Then fed the burner and wires back into place. I then lightly screwed the single front screw on the burner (inside the oven) to help position the burner, then went underneath to install the other two screws.
Under the oven I made sure the wires fit onto their connectors then tightened the two screws to hold the burner to the back wall. Once the burner was properly in place I tightened the two screws and the single one inside the oven.
I then plugged the oven back in and turned on the gas flow. I turned the oven dial and watched the new igniter glow wonderfully.
Finally I replaced the porcelain floor cover inside the oven. These finger screws can be a bit tricky because they go into a threaded clip that might have moved while you worked. The whole task took less than 30 minutes - and I had never done this before.
Next, uncrew the two finger-screws at the back of the oven that hold the porcelain & steel drip plate in. It comes out if you push it towards the back of the oven and lift it out. This reveals the burner and the cylin ... Read more drical igniter attached to the side of the burner. While I was there I unscrewed the one screw at the front end of the burner (nearest me).
After attempting the repair from inside the oven, I realized it was far easier to pull out the bottom drawer and work from under the oven instead. Using only one size mini-socket for all screws it was easy. I undid the two screws that hold the main burner to the back of the oven. This allowed me to pull the burner up inside the oven so I could access the screws that held the igniter to the side of the burner. A flashlight helps when working under the oven.
Under the oven again I then pulled the two wires off their respective connectors. Then inside the oven unscrewed the two screws holding the igniter to the burner. The old part came off very easily. However, the new part didn't have connectors attached, so I had to remember which wire went where and cut the old connectors off and splice them to the new. Be sure to leave yourself as much of the old wire as possible attached to the connector. Otherswise you might find the "new" wires too short to reach the connectors.
I reconnected the igniter to the main burner with the two screws. Then fed the burner and wires back into place. I then lightly screwed the single front screw on the burner (inside the oven) to help position the burner, then went underneath to install the other two screws.
Under the oven I made sure the wires fit onto their connectors then tightened the two screws to hold the burner to the back wall. Once the burner was properly in place I tightened the two screws and the single one inside the oven.
I then plugged the oven back in and turned on the gas flow. I turned the oven dial and watched the new igniter glow wonderfully.
Finally I replaced the porcelain floor cover inside the oven. These finger screws can be a bit tricky because they go into a threaded clip that might have moved while you worked. The whole task took less than 30 minutes - and I had never done this before.
Read less
Parts Used:
-
Paul from Santa Rosa, CA
-
Difficulty Level:Easy
-
Total Repair Time:15 - 30 mins
-
Tools:Socket set
354 of 516 people
found this instruction helpful.
Was this instruction helpful to you?
Thank you for voting!