Your coupon for will be reflected when you check out!
✖
Your coupon for
✖
Hello!
You're visiting the PartSelect site in U.S.
Would you like to shop on the Canadian site?
Stay on this site
Go to Canadian site
✖
Model Number Locations
1Select Category Type
Select Category Type
2Select Product Type
Select Product Type
3Select {MODEL} Type
Select {MODEL} Type
Sample Model Number Tags
Model numbers can be made up of numbers (1005400, for example) or a combination of letters and numbers (LAT1000AAE). The model number will most likely appear on either a paper sticker or a metal plate. Your appliance's model number tag may look similar to the sample model number tags shown here (model number highlighted in yellow):
Model has been saved to My Models. If you're not signed in, your lists are available on this device and will expire within 30 days.
Model has been saved to My Models.
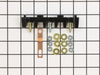
Terminal block kits are also known as terminal boards, or terminal strips, and they are found in a wide variety of household appliances. Most often in ranges, wall ovens, and dryers. This kit attaches...
The temperature sensor, also known as an oven probe, helps measure the temperature within the oven cavity. If your oven is too hot, not heating evenly, has little to no heat when baking, or flashing F...
The Frigidaire Range Light Lens Indicator, compatible with selected Frigidaire, Electrolux, White Westinghouse and Tappan models, ensures optimal function of your stove, oven, or range. As a genuine O...
Presenting the Frigidaire Light Indicator, a genuine OEM part signalling when the oven or surface burners are active or if a cooking area is hot. It accentuates safety in the kitchen by visually alert...
This switch controls the stove top surface burner. This surface element control switch is for ranges.
Surface element control switch turns the surface element on and off and controls how much heat...
The Frigidaire Oven Door Light Switch is a genuine OEM part designed specifically for some models of Frigidaire stoves, ovens, and ranges. This highly efficient switch is responsible for turning off t...
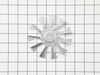
This convection fan blade is designed for use with various makes and models of range and oven and is sold as an individual part. Made of metal and measuring approximately 4.75-inches in diameter, this...
This part is a levelling leg and it is used in conjunction with your range. The function of this part is to supply stability and support to your appliance. This part is adjustable to allow you to tail...
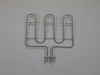
This genuine OEM broiler heating element is designed to provide high-intensity heat from the top of the oven cavity, supporting the broiling function in compatible electric ranges. It delivers consist...
$66.77
In Stock
Order now and your part arrives by Jun 5
Questions And Answers for 79097403411
Ask our experts a question about this model and we'll get back to you as soon as possible!
1 question answered by our experts.
Sort by:
< Prev
1
Next >
Search filter:
Clear Filter
Your search term must have 3 or more characters.
Keep searches simple. Use keywords, e.g. "leaking", "pump", "broken" or "fit".
Sorry, we couldn't find any existing answers that matched.Try using some different or simpler keywords, or submit your new question by using the "Ask a Question" button above!
Az
March 19, 2025
What is the model number for the Left front burner (turbo Boil Flex) and the infinite switch that goes with it.
Thanks
For model number 79097403411
Hi Az,
Thank you for your question. The part number for the left-front burner is PS11723364. We hope this helps!
PF alarm appeared on display. Noticed clicking when cord was moved. Had arced for some time and melted original block. New part slightly different. Only has 3 lugs, old one had six. Stack using washers provided. Take note of colors before disassembly. Use caution while working through access opening. The edges are sharp. Only tools neede
... Read mored are phillips screwdriver, deep socket for lug nuts. Nut driver optional. Hope this is helpful.
This was the first time replacing the fan. It is a lot easier to work in the oven compartment with the oven door removed, only two screws on the door and the hinges were released. I found that a couple of the screws were either rusted or stripped so I used a pair of pliers to remove the screws that were holding the diffuser in place. O
... Read morence there was access to the fan I found that the fan was warped and that the blades were scraping against the back wall of the oven. The next challenge was to remove the retaining nut. I used a sheet metal screw to secure the warped fan to keep it from spinning. once I figured out that you have to turn the retaining nut to the right to loosen, it came off easily. 1/2" socket with extension. When I replace the fan I used two washers for spacers to make sure that the fan would not scrape the wall of the oven. Its been tested many times and the oven does not make that horrible sound anymore.
Have a double wall oven and the top oven would not shut off or broiler part would stay on and burn tops of food. Since bottom oven was not having any issues felt like it could Not be control panel so decided to try the temp sensor. Since replacing oven has worked properly.