Your coupon for will be reflected when you check out!
✖
Your coupon for
✖
Hello!
You're visiting the PartSelect site in U.S.
Would you like to shop on the Canadian site?
Stay on this site
Go to Canadian site
✖
Model Number Locations
1Select Category Type
Select Category Type
2Select Product Type
Select Product Type
3Select {MODEL} Type
Select {MODEL} Type
Sample Model Number Tags
Model numbers can be made up of numbers (1005400, for example) or a combination of letters and numbers (LAT1000AAE). The model number will most likely appear on either a paper sticker or a metal plate. Your appliance's model number tag may look similar to the sample model number tags shown here (model number highlighted in yellow):
Model has been saved to My Models. If you're not signed in, your lists are available on this device and will expire within 30 days.
Model has been saved to My Models.
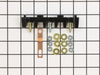
Terminal block kits are also known as terminal boards, or terminal strips, and they are found in a wide variety of household appliances. Most often in ranges, wall ovens, and dryers. This kit attaches...
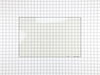
This tempered glass is supplied by the original manufacturer and measures 20 inches by 13 inches. It is an inner door glass, designed for use in ranges/ovens and has several purposes which include pro...
The Frigidaire Range Light Lens Indicator, compatible with selected Frigidaire, Electrolux, White Westinghouse and Tappan models, ensures optimal function of your stove, oven, or range. As a genuine O...
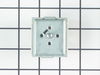
This switch controls the stove top surface burner. This surface element control switch is for ranges.
Surface element control switch turns the surface element on and off and controls how much heat...
Introducing the Latch Motor Door lock latch motor and switch assembly by Frigidaire, an essential component for your range. It is an authentic, OEM standard part, compatible with certain models of Fri...
The Frigidaire Oven Door Light Switch is a genuine OEM part designed specifically for some models of Frigidaire stoves, ovens, and ranges. This highly efficient switch is responsible for turning off t...
This convection fan blade is designed for use with various makes and models of range and oven and is sold as an individual part. Made of metal and measuring approximately 4.75-inches in diameter, this...
This part is a levelling leg and it is used in conjunction with your range. The function of this part is to supply stability and support to your appliance. This part is adjustable to allow you to tail...
This genuine OEM broiler heating element is designed to provide high-intensity heat from the top of the oven cavity, supporting the broiling function in compatible electric ranges. It delivers consist...
This fan blade retainer nut in your oven secures the fan blade onto the motor shaft, preventing it from coming loose during operation. You can typically find it at the back of your oven behind a cover...
$29.47
In Stock
Order now and your part arrives by May 23
Questions And Answers for 79097319410
Be the first to ask our experts a question about this model!
✖
Ask a Question
Ask our experts a question on this model and we'll respond as soon as we can.
PF alarm appeared on display. Noticed clicking when cord was moved. Had arced for some time and melted original block. New part slightly different. Only has 3 lugs, old one had six. Stack using washers provided. Take note of colors before disassembly. Use caution while working through access opening. The edges are sharp. Only tools neede
... Read mored are phillips screwdriver, deep socket for lug nuts. Nut driver optional. Hope this is helpful.
I called a repair place. They charged $54 to diagnose, (said it needed a new latch motor) then wanted $220 to complete the repair. I checked online prices and did it myself for about 15 minutes work and the latch motor itself ($44?).
Was necessary to uplug the range, pull it away from the wall and remove the back panel sheet m
... Read moreetal, then 3 screws that mount the motor. Replace motor, reattach sheet metal. Plug in. Done. Ready to bake cookies.
Repair was quite easy, as long as you have the instructions for removing the door. The screws that hold the bottom of the door to the fixed hinge are placed into the side of the hinge assembly after removal; this holds the door at a 45 degree angle for easy removal. After that, just place the door on a flat surface and dismantle the door
... Read morefrom the inside. The inner glass is contained in a metal frame with another piece of glass; this frame comes apart easily using the clips in each side. The door assembles easily after the glass is replaced; just take your time and give yourself enough room to lay out the parts as you go. Good luck!