Your coupon for will be reflected when you check out!
✖
Your coupon for
✖
Hello!
You're visiting the PartSelect site in U.S.
Would you like to shop on the Canadian site?
Stay on this site
Go to Canadian site
✖
Model Number Locations
1Select Category Type
Select Category Type
2Select Product Type
Select Product Type
3Select {MODEL} Type
Select {MODEL} Type
Sample Model Number Tags
Model numbers can be made up of numbers (1005400, for example) or a combination of letters and numbers (LAT1000AAE). The model number will most likely appear on either a paper sticker or a metal plate. Your appliance's model number tag may look similar to the sample model number tags shown here (model number highlighted in yellow):
Model has been saved to My Models. If you're not signed in, your lists are available on this device and will expire within 30 days.
Model has been saved to My Models.
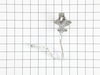
This gas oven bake igniter is designed to initiate the heating process by activating the burner during baking cycles. It functions by heating up until it reaches the ignition point, allowing gas to ig...
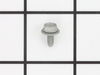
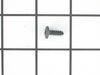
This part is the igniter/orifice mounting screw for your cooktop or range. It is approximately ½ an inch in length and is made of metal. The mounting screw connects the orifice to the cooktop. If the ...
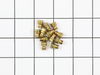
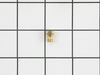
This orifice is a replacement fuel-delivery component designed to regulate gas flow to a burner. It plays a critical role in maintaining proper flame size and efficiency and is commonly replaced when ...
This black burner cap is a genuine OEM part made of a durable material capable of reaching 14,000-BTU, with an approximately 3-inch diameter. It is compatible with various models of ranges and cooktop...
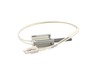
This spark module provides the electrical spark needed to ignite surface burners on a gas range or cooktop, helping ensure safe and reliable burner operation. It is commonly replaced when burners will...
This orifice holder ensures the left front burner delivers the right amount of gas for safe, efficient cooking. Built from heat-resistant metal, it provides a secure fit and reliable flame control, so...
It was the week before Thanksgiving and we didn't know what to do without an oven. I did some research on Google and of all the websites out there, I found a decent price here at Parts Select and ordered it on Friday. I was shocked when FEDEX pulled up to the door on Saturday afternoon. I went online to youtube and found a step by step
... Read more video specifically for this part. It's posted by the Repair Clinic. http://www.youtube.com/watch?v=cLxKoF16gac. I was able to fix the part and probably saved at least $150.00 for a service call and repair time. The part cost about $90 and I was done in less than 15 minutes. We just got this stove about 2 years ago and I'm thinking maybe we could have saved my old stove since it had the same problem. Great job Parts Select - I got just what I needed and saved a ton of money in the process. Thanks also for their great informative video online. We had a great Thanksgiving and were very thankful for all our hot food fresh from the oven.
After reading a lot of reviews online, I came to the conclusion it was the bake igniter. The "glow rod" would glow but would not ignite the oven. The broiler would ignite and the top burners would work. I removed the racks, took a screwdriver and removed the 2 screws in the back corners. I then slid the bottom shield towards the back then
... Read more lifted up and the shield came off and exposed the flame shield. I removed the screws the hold that in place on the front of the oven with my 6 way screwdriver. I used the nutdriver part. Lifted that off which exposed the the actual flame tube and bake igniter. There were two screws, used the nutrdiver on the 6 way screwdriver, holding the bake igniter on. The screws are on the side of it. Removed those and the igniter came free. I pulled out the warming drawer and followed the wire from the igniter to a wiring harness. Pulled that apart and pulled the whole thing out through the oven. Got the new part, reversed order of removal. Fired right up. Pretty pricey part. But, saved 500+ dollars for a new range. Actual removal and install of new part, maybe 20 minutes if that. Super easy.
Disconnected power, I removed the igniter from oven. Measured the resistance (275 ohms) and then the current draw. DO NOT ATTEMPT THIS UNLESS YOU ARE ABLE TO ACCOMPLISH THIS SAFELY. I made a harness and connected the old igniter to 110 V ac, Current draw thru the meter settled at 2.7 Amps. Too weak to fully open gas valve. Valve require
... Read mores 3.2 - 3.6 amps to fully operate properly. New igniter measured 300 ohms and current draw was 3.4 amps. Installed new part and everything works fine. Correct part and good service from this site