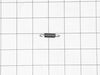













This AC synchronous motor is a genuine OEM replacement part specially made for microwaves. It operates on an alternating current, and it is responsible for rotating the turntable to ensure even heating of your food. The motor can fail due to physical damage or malfunctioning internal components such as the bearings. If your turntable is n...Read moreot rotating, you will need to replace the motor. You can find it underneath the microwave cavity, near the center. Disconnect the microwave from the power source and remove the cover. Turn the microwave over and remove the bottom panel to access the motor. Disconnect the motor from its mounting location, and then insert the new motor in its place. Ensure the new motor is securely attached before reassembling the appliance.
Usually found kitchen appliances, this OEM-certified diode cable assembly helps to convert power from the transformer to the magnetron, to heat up your food. A damaged cable assembly will cause your appliance to heat food inconsistently or to not work at all. You might notice a burning smell or a loud buzzing sound coming from your applia...Read morence. If you do not replace a broken cable assembly, the components that produce heat in your appliance can overheat and fail. To replace your cable assembly, start by unplugging your appliance from any electrical source. Remove any protective casing from the assembly by unthreading any screws or clips. Disconnect the cable assembly from the transformer and the magnetron with pliers. Reinstalling a new cable assembly requires you to reverse the previous steps. Please keep in mind that this cable assembly is sold individually.
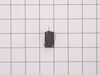
This is a micro switch, but you may also know it as a door switch and it is compatible with your microwave. The function of the micro switch is to communicate to the electronic control board of your appliance when the door is opened and closed. If this part is broken and needs replacing you will notice your timer activated but the food in...Read moreside is not being heated. This part measures to be roughly 1.5 inches long by just over half an inch wide, and it is black in color. You will find the location of this part behind the front panel of your microwave.
See how others fixed this model. Time, tools, difficulty, and steps that lead to victory!View More
Search repair tips from other customers using simple keywords like "replace", "fit", "remove", "inspect". DIY doesn't mean you have to do it alone!
Search filter:
Clear Filter
Your search term must have 3 or more characters.
Motor Burned Out On Turntable
37 of 49 peoplefound this instruction helpful.
Steven from Oak Forest, IL
Really Easy
15 - 30 mins
Screw drivers
My 8 year old daughter cleaned the inside of the microwave with enough water to rival a tsunami. Resulted in a clean microwave with a fried out motor that no longer revolved. Part came quickly. Took cover and bottom off to get to the part. One screw held it on and a plug. Removed those, put on new part and she was good to go. No tri
... Read morep to home depot today.
Read less
Was this helpful?
Thank you for voting!
Arcing had caused burned turntable and melted connection to sec. motor.
5 of 6 peoplefound this instruction helpful.
John from MOUNTAIN VIEW, CA
Easy
15 - 30 mins
Screw drivers
Note: also had to replace turntable. Removed top cover using secure driver set. Placed microwave on it's front, using a soft towel. Removed edge screws from bottom plate (leaving 4 screws in center attached to heavy transformer). Separated bottom plate from body of microwave (leaving transformer wires still attached) exposing Synchrono
... Read moreus motor. Removed two screws holding motor and electrical plug. Swapped new motor in its place. Re-attached bottom plate with its screws. Placed microwave onto it normal position. Re-attached top cover with its secure screws. Installed new turntable inside.
Read less
Was this helpful?
Thank you for voting!
Turntable stopped turning
4 of 4 peoplefound this instruction helpful.
Ed from MILLS RIVER, NC
Very Easy
15 - 30 mins
Screw drivers
Removed micro bottom - 5 screws. One screw on the motor and a clip. Reversed the sequence, turned it on and watched it turn.