EasyApplianceParts is now PartSelect! We've merged our sites to provide a better shopping experience for you.   Full Details
✖

Find Parts

Parts Departments

Top Model Types

Top Brands

Repair Help

Expert Repair Videos

Keep typing for more specific results...

66CB Maytag Dryer - Overview

Enter a part description. DIY Heroes keep it simple, eg. "belt" or "pump".

Search filter:
Clear Filter
Your search term must have 3 or more characters.
Drum Roller Shaft Washer – Part Number: WP312535
$12.85
In Stock
Drum Roller Shaft Washer
★★★★★
★★★★★
(1)
Part #WP312535
If you notice that your dryer is noisy or will not tumble, then you may need to replace the drum roller shaft washer. This drum roller shaft washer is just under an inch in diameter and is sold individually. It is located on the shaft of the drum roller, in the interior of your dryer. To access the drum roller shaft, you will need to remove the front panel of your dryer, and then remove the drum. Before completing this repair, be sure to disconnect the power source from the dryer. Tools required for this repair include a 5/16 nut driver, a stubby Phillips screwdriver, and a pair of snap ring pliers.
High Temperature Adhesive - 2oz. – Part Number: WPY055980
No Longer Available
High Temperature Adhesive - 2oz.
★★★★★
★★★★★
(11)
Part #WPY055980
This is replacement high temperature adhesive for your washer and dryer. It is designed to hold objects together, and will not disintegrate at a high temperature. This is a 2-ounce tube of adhesive that is sold individually. This is an OEM product sourced directly from the manufacturer.
Dryer Screw – Part Number: WP90767
$7.47
In Stock
Dryer Screw
★★★★★
★★★★★
(2)
Part #WP90767
This screw is sold individually.
Rubber Foot Pad – Part Number: WP210684
$11.77
In Stock
Rubber Foot Pad
★★★★★
★★★★★
(1)
Part #WP210684
The leveling leg pad or foot pad fits over the leveling leg on your washing machine. The foot pad is designed to protect your floor and keep the washing machine level and in place. This foot pad is just over an inch in diameter. It is made entirely of rubber and is gray in color. This pad is intended for use with washers and some dryers. Many of our customers have rated this repair as very easy. To complete the repair, turn the old leg counter clockwise to remove it. Then, simply remove the old pad and replace it with the new one. Finally, re-attach the leg by turning clockwise. Ensure that the washer is level, and adjust the leg accordingly if it is not.
Adjustable Leveling Leg – Part Number: 22003428
$17.15
In Stock
Adjustable Leveling Leg
★★★★★
★★★★★
(1)
Part #22003428
If your washer shakes or vibrates loudly when it reaches its max speed, make sure the 4 levelling legs are even. Adjust the legs so that the machine is level, and tighten the locking nuts on the legs that are threaded. Your washer should be kept as close to the floor as possible. Your model might have rear legs that level themselves, or it might have threaded legs all around. Make sure the rubber feet have not worn out. Replace any missing or damaged legs and feet. This genuine OEM replacement part is sold individually, so be sure to order the amount you need.
Dryer Screw – Part Number: WP1163839
No Longer Available
Dryer Screw
Part #WP1163839
10 - 16 x .375
Heating Element Terminal & Insulator Kit – Part Number: Y304596
$26.82
In Stock
Heating Element Terminal & Insulator Kit
★★★★★
★★★★★
(1)
Part #Y304596
This kit comes with two ceramic insulators.
Range Hex Nut – Part Number: WP112432
$7.47
In Stock
Range Hex Nut
Part #WP112432
This 10-32-inch hex nut works with multiple appliances in your home as a fastener. This specific model is sold individually. Hex nuts usually have 6 even sides and together they are used with bolts and screws in order to hold items firmly together. This piece is a fastener that attaches one item to another. This part has several advantages, the main one being that it is universal and can be used with most pieces and appliances in your home. This hex nut is an original equipment manufacturer part, meaning it is directly sourced from the manufacturer.
Lint Filter – Part Number: 300838
No Longer Available
Lint Filter
Part #300838
This filter collects lint as it passes through the dryer vent.
Range Screw 632 X 5/16 – Part Number: WP74004005
$7.47
In Stock
Range Screw 632 X 5/16
Part #WP74004005
This screw is well under an inch long, and is made of metal.
Heater Wire - 240V – Part Number: Y311946
No Longer Available
Heater Wire - 240V
Part #Y311946
This heater wire is 240V and is 79" long.
DRIVE BELT – Part Number: Y311012
No Longer Available
DRIVE BELT
Part #Y311012
This belt is V-shaped, 3/8 of an inch wide, and drives the drum.

Common Symptoms of the 66CB

How this model fails, and the parts that fix it.

Watch our pros, then fix it yourself.
See how others fixed this model. Time, tools, difficulty, and steps that lead to victory! View More

Search repair tips from other customers using simple keywords like "replace", "fit", "remove", "inspect". DIY doesn't mean you have to do it alone!

Search filter:
Clear Filter
Your search term must have 3 or more characters.
Dryer wouldn't heat
63 of 76 people found this instruction helpful.
  • Edith from Grove City, OH
  • Difficult
  • More than 2 hours
  • Nutdriver, Screw drivers, Wrench (Adjustable)
Since the heating coil is right behind the front door I had to remove all panels starting with the back one to get to it. The back has a lot of tech screws that I removed with the nut driver. The side panels were removed with a phillips screwdriver. The top is held in place with the other panels. The base was shifted away from the fro nt and I released the heating coil case with 4 screws in the front and was able to pull it out of the top to replace it. I cut the old one out with wire cutters and snaked the new one through the ceramic insulators. I was careful not to touch the new one without gloves because the oil from your hands can burn them out more quickly. I screwed the new ones to the contact points while trying not to stretch it too much. I vacuumed the whole dryer out before putting it back together.
Was this helpful?
Thank you for voting!
Stripped leveler screw making impossible to level my washer
24 of 31 people found this instruction helpful.
  • Rebecca from Wylie, TX
  • Easy
  • 15 - 30 mins
  • Wrench set
Put blocks under the washer where the leveling leg was needed and screwed the part into the washer. Then it was just a matter of moving the washer into place and leveling. Pretty easy.
Was this helpful?
Thank you for voting!
The drum wasn't rotating very well, and it made grinding noises
14 of 16 people found this instruction helpful.
  • Jon from Salem, OR
  • Easy
  • More than 2 hours
  • Screw drivers
In retrospect, this repair was not diffcult, but it took a long time because I could not find any directions or advice on the internet. The first puzzle was getting inside. The back panel comes off very easily with removal of a handful of panel screws. This exposes the motor, belts, drive pulleys, etc., and while I could rotate the drum b y hand, I could not diagnose the grinding noise or why it turned with difficulty.

To go further, I had to remove the cabinet, which is easy - once you know what to do. Take out three screws along each side, near the bottom (of course, don't lose or mix up these screws with the ones from the back panel). You'll also have to detach four colored wires from the motor - the connectors are color coded, so there shouldn't be a mix up when you reattach them later. There are also two wires (B & W) that connect to the back of the drum that nneed to be detached - I marked B and W on the metal with a sharpie so as to remember which goes where. I didn't bother to check, but they must be the wires that connect to the door-open switch. After that, the whole cabinet (sides, front panel and door, top and control panel as one unit) can be tilted forward and lifted off to be set aside.

It turns out the grinding was from all the crap that fell through the gap at the front edge of the drum over the years - handfuls of paper clips, hair clips, wadded wrappers, earrings and $3.60 in change.

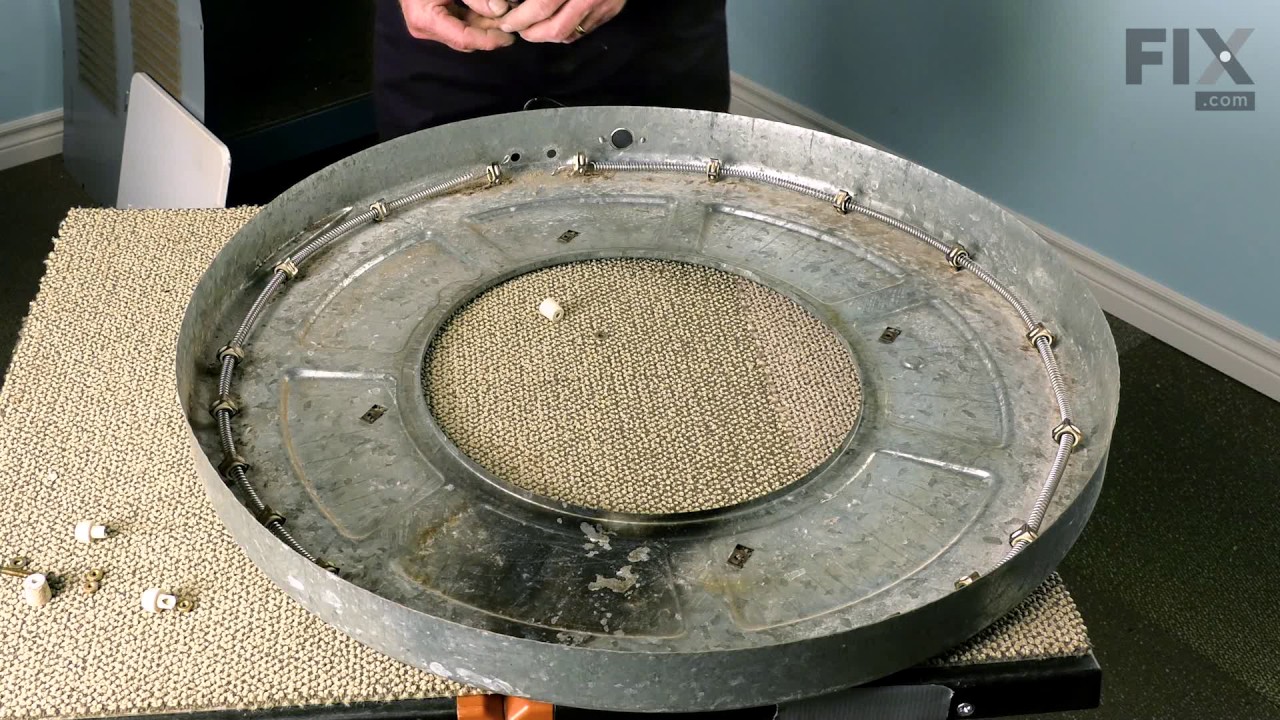
It mostly landed in the flange, or sheet metal shield, surrounding the coil heating element, which encircles the front of the drum ("Halo of Heat"). I cleaned all the lint and crud off the heater flange, and from the whole cabinet. Be very careful not to break the heating coil wire or the ceramic insulatots that hold itin a circle - they are somewhat fragile. If you ever need to replace the heating coil element, this is how you get there. It's a fairly simple matter of threading the new wire could through the ceramic insulators and making the obvious electrical connections at either end.

But my issues were still with the frame and exposed drum, belts etc. The drum is suspended from bearings at the back; nothing holds it at the front. There are two belts. One runs from a small pulley on an idler wheel (tensioned by a spring) to a large pulley on the back of the drum. The other is the motor belt, which is the longer of the two, that runs from the motor shaft to a small pulley on the back of the drum (inside the large pulley mentioned above), then over to the large pulley portion of the idler wheel (inside the small pulley mentioned above).

I wondered if any of the bearings on any of the parts was going bad, so I took off the belts. I don't remember which belt should come off first to make it any easier, but you'll manage either way Pull the idler wheel to slightly loosen a little tension on the belts and rotate one belt off a small pulley, then the other one. If you're new to this, take a picture, or make a sketch where the belts go - don't trust yourself to remember it later.

The idler wheel is attached to a bar that slides in a bit of a track or bracket. By lifting the wheel (stretching the spring) and moving it to the R side just a little, the bar can drop down the track and take all the tension off the spring. The spring is hooked into the cabinet at the biottom, and fits on the idler wheel shaft at the top, so you can take it off with no problem. Once you do that, you can pull the idler wheel/pulleys right off toward you. I took the bar out of the bracket and washed it off and polished it with steel wool to get rid of rust. similarly, I cleaned the frame bracket it slides in. I lubricated both parts with a litte petro jelly before reassembling. All the parts were covered with lint, and I took the time to clean everything off, especially the motor. We're talking forty years' worth.

I also went inside the drum and took out the lint filter and a plastic guard, and used a little brush and a vacuum to clean out the caked
Was this helpful?
Thank you for voting!