


 My Orders




25HHT (TYPE 2) Poulan Trimmer - Overview

Enter a part description. DIY Heroes keep it simple, eg. "belt" or "pump".
Search filter:
Clear Filter
Your search term must have 3 or more characters.

$12.81
In Stock
Fuel Line (25" Length)
Part #530069247
This 25-inch fuel line carries fuel from the tank to the carburetor, ensuring proper engine operation. Made from durable clear plastic, it is designed to withstand regular use but may become clogged or brittle over time. Replacing a worn or damaged line can help prevent leaks and restore reliable starting and performance.

$9.62
In Stock
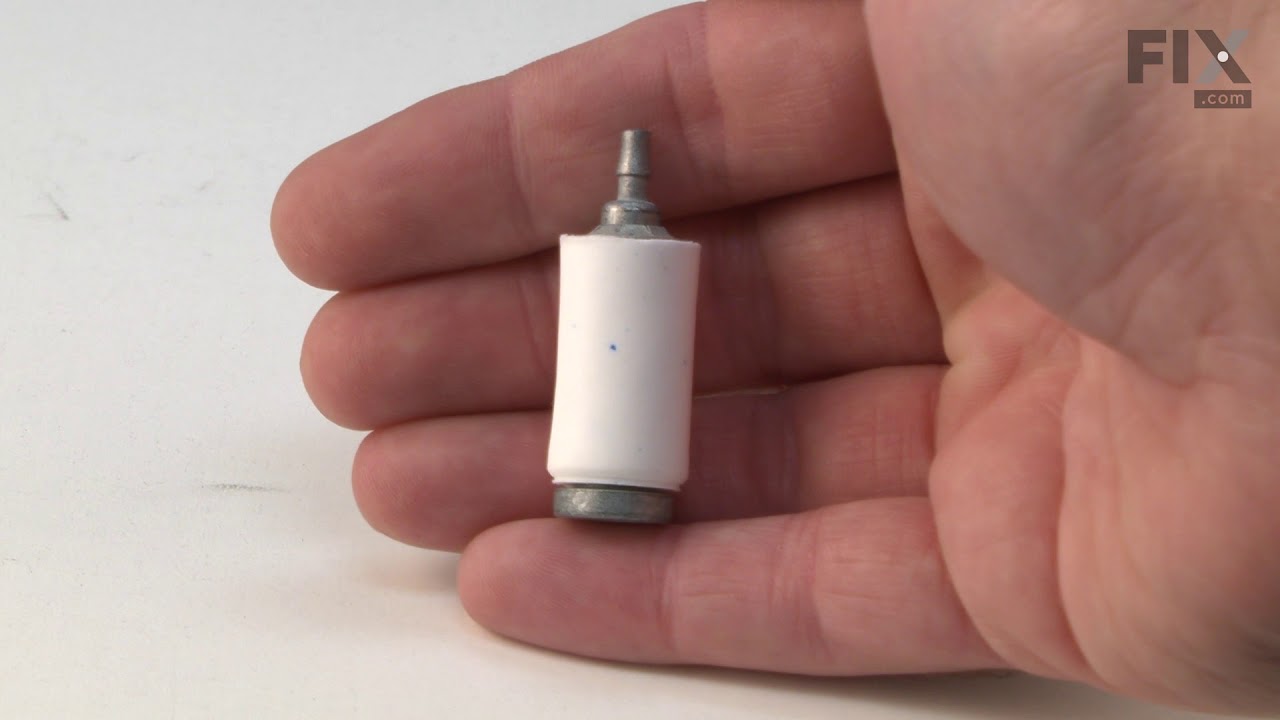
Engine Fuel Filter
Part #530095646
This Genuine OEM fuel filter is designed to maintain the performance and longevity of your equipment by preventing dirt and debris from entering the carburetor. Located inside the fuel tank, this essential component ensures clean fuel delivery, protecting the engine from potential damage caused by contaminants. Sold individually, the filt...Read moreer is built to meet original equipment standards for fit and function. Over time, the filter may become clogged, restricting fuel flow and making engine starts more difficult. For optimal performance, it should be replaced—not cleaned—at the first sign of blockage or wear.
Read less

$17.55
In Stock
Purge Line
Part #530069216
This is the Genuine Craftsman replacement part. It is made out of Flexible Rubber and is Sold Individually. The purpose of the 530069216 Tank Purge Line is to return the excess fuel that is in the carburetor after the primer bulb has been pushed. The excess fuel is forced through the purge line back into the fuel tank. Over time the Tank Purge Line will become brittle and crack and will need to be replaced.

$7.65
In Stock
Fuel Line Fitting
Part #530023877
The Fuel Line Fitting is a plastic part which attaches two pieces of fuel line together. If broken due to damage/fatigue, there may be a leak and the part must be replaced. Installation is rated as "Easy". Refer to your make, model and diagram to ensure this part is correct for you.

$6.95
In Stock
Piston Ring
Part #545154009
This OEM Piston Ring is used to provide a seal between the piston and cylinder wall. It attaches around the piston, inside the groove. It will require a screwdriver, allen wrench, torx wrench and socket set and is rated as "Hard" to install. The part is silver, metal, and individually sold. If broken due to general wear/fatigue you will h...Read moreave poor compression within the cylinder, causing a loss of power. If broken, damaged or worn, the part should be replaced. Refer to your make, model, and diagram to ensure this is the correct part.
Read less

$39.55
In Stock
Flywheel
Part #545221701
This flywheel is an authentic manufacturer replacement part for use with lawn and outdoor equipment. The flywheel is a heavy, circular disc that has magnets that create an electric charge sent to the spark plug to create the spark that ignites the fuel and air mixture in the engine. It is attached to the engine crankshaft by a key known a...Read mores a shear pin or flywheel key. This assembly is a critical component in the starting and running of your power equipment. Over time, the magnets on the flywheel will wear down, and the flywheel may chip and crack. A faulty flywheel will result in a loss of power, excessive shaking during use, and difficulty starting the equipment. Remove the flywheel using a flywheel puller. Position the new flywheel on the crankshaft and secure it with the retaining nut and flywheel key. This flywheel is sold as an individual replacement part.
Read less

$7.65
In Stock
Rope Kit
Part #530069232
The chainsaw starter rope is a three-foot-long white rope that is approved by the original equipment manufacturer, and which wraps around the recoil pulley and is pulled to start the engine. Installation is rated as "Easy" by customers and requires a screw driver, pliers, and torx screwdriver. If the rope breaks it should be replaced. Ref...Read moreer to your make, model and diagram to ensure this rope is right for your machine.
Read less

$7.65
In Stock
Friction Disc,Clutch 36/41
Part #530015611
It is a genuine item that is supplied by the original manufacturer for use with Poulan and Weed Eater chainsaws. This washer-clutch is a special friction disk that helps to engage the clutch by ensuring a right fit between connected components. It provides an identical replacement for a damaged or a missing hardware that was installed on ...Read morea new unit. Check the diagrams of your model for the exact location and the correct installation of this part. One durable metal washer-clutch is included. You may need a screwdriver and a wrench set to perform this repair.
Read less

$7.65
In Stock
Air Filter
Part #530047932
This is an authentic replacement foam filter commonly used on handheld lawn and garden equipment. The purpose of this air filter is to prevent dust and other particles from entering carburetor and engine. Includes one (1) filter per order. Replacing this filter is a quick and easy task. It will only require a phillips head screwdriver. ...Read more • Remove screw that hold filter cover • Remove cover and replace air filter • Reassemble and test your equipment
Read less
$98.95
In Stock
Carburetor Assembly
Part #530071633
The Carburetor Assembly (Carburetor, WT 379 w/ Limiter Caps) includes the carburetor and primer bulb. This assembly requires a screwdriver, pliers, and a wrench set, and is rated as "Easy" to install by customers. This assembly is metal, with a plastic primer bulb. It attaches to the intake of the engine, in order to mix the fuel/air to t...Read morehe proper ratio for combustion. If broken due to wear/fatigue/damage you may notice performance isseus, the engine may run rough and be hard to start. If this happens, the part should be replaced. Refer to your make, model and diagram to ensure this model is correct.
Read less

$6.72
In Stock
Screw
Part #530016429
This is an original Craftsman replacement part. The screw is designed by the manufacturer for use in yard tools such as trimmers, blowers, and brushcutters. This part is made of metal, and is generally used in securing the air box assembly. Please be aware that there are different screws used in the machine. Refer to the parts diagram...Read more to be sure of ordering the correct part. You may require a screwdriver when replacing this item. This part is sold individually.
Read less

$6.72
In Stock
Screw-10-14 x 13/16
Part #530015886
This replacement screw is a high quality hardware that is designed for use with Paramount, Poulan and Weed Eater power equipment. It has multiple applications depending on your equipment, please make sure to check appropriate diagrams for correct location and use of this item. One durable hex socket head screw is included per order.
Common Symptoms of the 25HHT
How this model fails, and the parts that fix it.
Will Not Start
Fixed by
these parts
these parts


Show All
Engine stops after a few seconds or minutes
Fixed by
these parts
these parts
Show All
Watch our pros, then fix it yourself.
")
See how others fixed this model. Time, tools, difficulty, and steps that lead to victory!
View More
Search repair tips from other customers using simple keywords like "replace", "fit", "remove", "inspect". DIY doesn't mean you have to do it alone!
Search filter:
Clear Filter
Your search term must have 3 or more characters.
Both the Fuel line and the Engine fuel line, where dry rotted.
55 of 73 people
found this instruction helpful.
1) While still attached to the fuel tank, I first sized up the old fuel lines with the newer fuel lines.
2) With a pair of needle nose players, I then removed the old dry rotted fuel ?? lines, from the fuel tank.
3) I cleaned the fuel tank and around the carburetor area, to insure that there was no debris, that could possibly fa ... Read more ll into the path of the new fuel lines installation.
4) I then installed the smaller one of the fuel lines, so that it would be out of the way, of the larger fuel line. I Pulled the fuel line through the smaller hole in the fuel tank, with needle nose players. I pulled the smaller fuel line out through the fuel tank filler hole, attached the fuel filter to the smaller fuel line. I Made sure that the fuel filter was extended to the furthest end of the fuel tank bottom. Six inches in all. I then attached the smaller fuel line to the carburetor.
5) I Installed the larger fuel line, followed the same procedures as the smaller fuel line.
6) Both fuel lines where cut on an angle for easy installation. No lubricant was necessary.
7) I filled up the fuel tank with fresh fuel and oil, new air filter and spark plug. It started on the first pull. Amazing.
2) With a pair of needle nose players, I then removed the old dry rotted fuel ?? lines, from the fuel tank.
3) I cleaned the fuel tank and around the carburetor area, to insure that there was no debris, that could possibly fa ... Read more ll into the path of the new fuel lines installation.
4) I then installed the smaller one of the fuel lines, so that it would be out of the way, of the larger fuel line. I Pulled the fuel line through the smaller hole in the fuel tank, with needle nose players. I pulled the smaller fuel line out through the fuel tank filler hole, attached the fuel filter to the smaller fuel line. I Made sure that the fuel filter was extended to the furthest end of the fuel tank bottom. Six inches in all. I then attached the smaller fuel line to the carburetor.
5) I Installed the larger fuel line, followed the same procedures as the smaller fuel line.
6) Both fuel lines where cut on an angle for easy installation. No lubricant was necessary.
7) I filled up the fuel tank with fresh fuel and oil, new air filter and spark plug. It started on the first pull. Amazing.
Read less
Other Parts Used:
 – Part Number: 530069247")


Was this helpful?
Thank you for voting!
Fuel line size - Important
13 of 19 people
found this instruction helpful.
Be sure the fuel line is the exact same size (id and od) as the one you are replacing. I had purchased a Fuel line from my local dealer - and after a few hours I figured out that it was the wrong size! He simply cut some line from a spool he had. Didn't bother to look it up! The line from this site was perfect! The id is important because
... Read more
the line has to Compress to go through the hole.
Read less
Other Parts Used:

Was this helpful?
Thank you for voting!
installing fuel through fuel tank wall
10 of 17 people
found this instruction helpful.
To start, remove the plastic carburetor grill. DO NOT remove the carburetor. The fuel line has to be sliced down to fit through the tank hole and get it in far enough up into the tank to grab with needle nose pliers.( need long needle nose pliers which I didn't have) I placed about six inches of the plastic tubing in the jaws of vice so t
... Read more
hat half of the tube was squeezed in the vice jaws. I then used a razor blade to shave off the exposed tube. I slipped the shaved end of the tube up through the tank hole far enough to grab with long tweezers and pulled it up to where I could grab it in the tank with needle nose pliers. I put light lube oil on the remaining tubing and pulled it through. It takes a steady firm pull to pull it in. Install the filter and pull the tube back down into the tank. I also used a small diameter drill bit and with my fingers slightly reamed the tube ends to ease the tube over the filter and carburetor nipples. To prime the engine, spray starting fluid into the carburetor and start. Repeat until the engine will run on fuel. It took me hours to figure this out, but will take less than an hour with this method.
Read less
Other Parts Used:
Was this helpful?
Thank you for voting!