


 My Orders




2375 - Overview
Models starting with 2375
Click on the best match to narrow your results.
Enter a part description. DIY Heroes keep it simple, eg. "belt" or "pump".
Search filter:
Clear Filter
Your search term must have 3 or more characters.

$28.42
In Stock
Range Grease Filter
Part #WP707929
The function of the grease filter is to trap grease into the filter from the exhaust air. The grease filter is intended to be used with certain downdraft cooktops and ranges. This grease filter is roughly fourteen inches long and almost twelve inches wide, and chrome in color. Removing your old grease filter and replacing it with a new on...Read moree is an easy job, users say it took them less than fifteen minutes to install. We recommend that when removing your current grease filter, you use work gloves to protect your hands and clean the entire area thoroughly before installing the new filter.
Read less

$25.75
In Stock
Surface Burner Knob
Part #WPY700854
This surface burner control knob provides a simple and reliable way to adjust burner heat levels on your range, stove, or cooktop. Featuring a black finish with stainless/chrome trim and clearly marked heat settings from Off to Hi, it is designed to fit securely onto a D-shaped shaft for smooth and precise burner control. Replacing a crac...Read moreked, melted, loose, or worn knob can restore both the appearance and functionality of your appliance while ensuring accurate heat adjustment during cooking. Installation is quick and requires no tools?simply pull the old knob straight off the shaft and push the new knob securely into place. For best results, inspect the burner control shaft and surrounding knobs for signs of wear or damage and replace any worn components as needed to maintain consistent performance. Please note, this part is a replacement for the original and may not be compatible to your unit. Please check model compatibility as well as the shaft of the switch this knob will fit on. Because of the substitution this knob may not work with older units.
Read less

$21.45
In Stock
Screw
Part #W11233072
This is a multi-use and multi-appliance screw. It can be used on a microwave, refrigerator, range/oven, air conditioner, dehumidifier, washer, or dryer. The measurements of this screw are 8 x 1/2 inch. It has 6 threads. Refer to the manual provided by the manufacturer for further information on repair and accurate guidance. Remember to wear work gloves as a safety precaution.

$84.39
In Stock
Surface Unit Infinite Switch Kit
Part #700855K
This is a push-and-turn switch. This kit includes all necessary hardware to install the part. Switch comes with a D-shaped shaft.

$7.47
In Stock
Range Screw
Part #WP179051
Sold individually. Lock washers are used with screws when vibration from an appliance may cause the screw to loosen. Lock washers are also used in the electrical components of an appliance to ensure an electrical connection is not lost.

$12.81
In Stock
Fuel Line (25" Length)
Part #530069247
This 25-inch fuel line carries fuel from the tank to the carburetor, ensuring proper engine operation. Made from durable clear plastic, it is designed to withstand regular use but may become clogged or brittle over time. Replacing a worn or damaged line can help prevent leaks and restore reliable starting and performance.

$9.62
In Stock
Engine Fuel Filter
Part #530095646
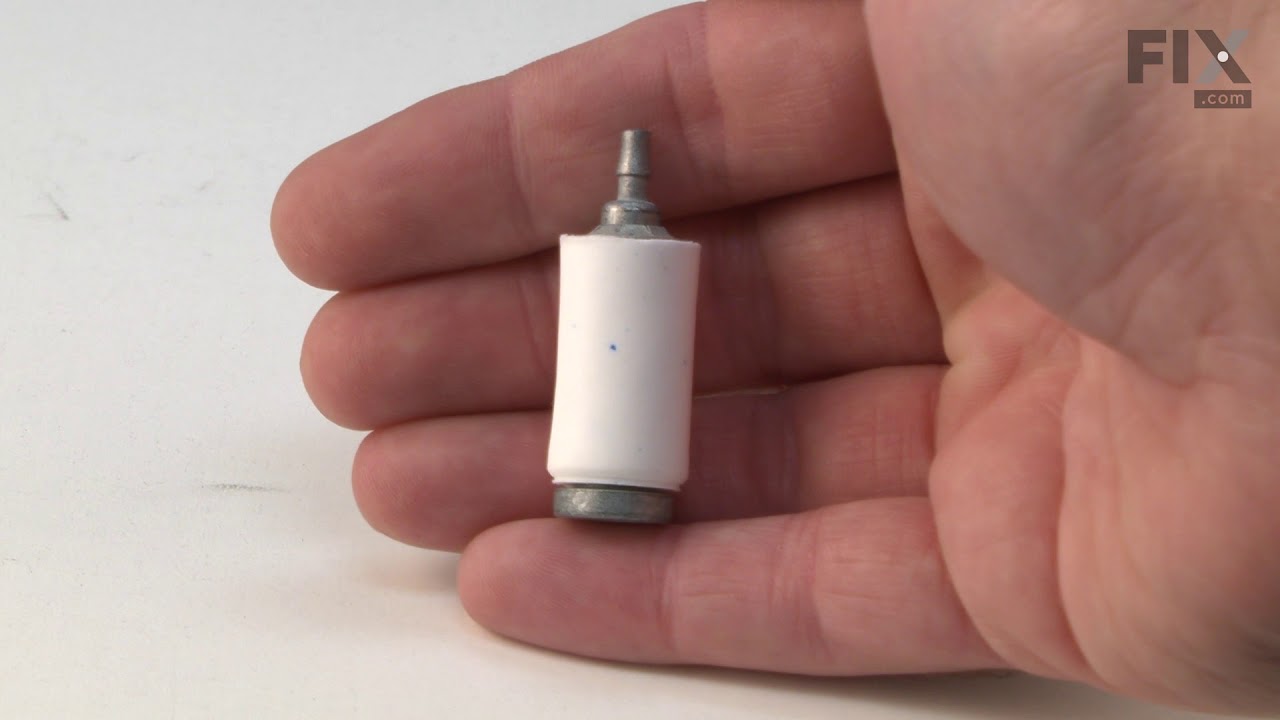
This Genuine OEM fuel filter is designed to maintain the performance and longevity of your equipment by preventing dirt and debris from entering the carburetor. Located inside the fuel tank, this essential component ensures clean fuel delivery, protecting the engine from potential damage caused by contaminants. Sold individually, the filt...Read moreer is built to meet original equipment standards for fit and function. Over time, the filter may become clogged, restricting fuel flow and making engine starts more difficult. For optimal performance, it should be replaced—not cleaned—at the first sign of blockage or wear.
Read less

$17.55
In Stock
Purge Line
Part #530069216
This is the Genuine Craftsman replacement part. It is made out of Flexible Rubber and is Sold Individually. The purpose of the 530069216 Tank Purge Line is to return the excess fuel that is in the carburetor after the primer bulb has been pushed. The excess fuel is forced through the purge line back into the fuel tank. Over time the Tank Purge Line will become brittle and crack and will need to be replaced.

No Longer Available

$55.29
On Order
Range Glass Grease Collecting Jar
Part #WPY707869
This jar is a little over five inches long. It is made of glass and is used for collecting the grease drippings of gas ranges.

$53.20
In Stock
Range Burner Cartridge Terminal Block
Part #WPY708730
No spades or wiring come with this part. To order the spades or wiring, please research by model# of appliance.

$12.85
In Stock
Exact Part matches for your search term

No Longer Available
No Longer Available
Common Symptoms of models starting with 2375
How this model fails, and the parts that fix it.
Will Not Start
Fixed by
these parts
these parts


Show All
Engine stops after a few seconds or minutes
Fixed by
these parts
these parts
Show All
Chain comes off guide bar
Fixed by
these parts
these parts

Show All
Watch our pros, then fix it yourself.
")
See how others fixed this model. Time, tools, difficulty, and steps that lead to victory!
View More
Search repair tips from other customers using simple keywords like "replace", "fit", "remove", "inspect". DIY doesn't mean you have to do it alone!
Search filter:
Clear Filter
Your search term must have 3 or more characters.
Deterioration of fuel line system
102 of 115 people
found this instruction helpful.
Removed the top cover (T25 torx), and side cover (T25 torx) with recoil starter. Drained all fuel, and removed all pieces of fuel old fuel line and the weighted filter from inside the tank by shaking out and the (long forceps). A spot headlamp makes it easier to see inside the tank for much of the procedure. Remove the foam filter to find
... Read more
the two 8mm nuts and remove the air filter housing and carburetor (nut driver, 8mm socket) the choke lever slides out of its slot with some wiggling and moving the carb back off the mounting studs. Leave the throttle cable attached to the filter housing and move both assemblies out of the way to access the top wall of the fuel tank. There is a cover over the carb adjust screws that wiggles out also. The fuel line and purge line both pass through the wall of the tank and need to be pulled out with some effort (long curved forceps) from inside the tank through the fuel fill port. They are a tight fit. Pay attention to the lines size and location. Large line is in the position away from the recoil starter with the little plastic fitting hanging near the top of the tank. The smaller line is closest to the recoil starter. Both new lines will need to pass through the tank wall (this is the most difficult part). To facilitate the initial entry through the wall of the tank, cut a tapered end on your new lines. Use a very slippery lube to coat the end of the line and push it into the tank as far as you can from the top (forceps or soft grip pliers) help. Look inside the tank and pull the lines through fully out of the tank fill (long curved forceps and head spot light). Don't pull all the way through the fuel fill, just enough to install the new fuel line fitting in the return purge line and the new weighted filter on the fuel line and pull the lines back inside the tank. The return line with fitting close to the top of the tank and the filter hanging so it lays at the bottom of the tank, and able to swing around so it keeps contact with fuel at all times. Remove the old purge/primer bulb two screws (Phillips). The short stem is suction, long stem is pressure. Don't mix them up and connect lines backwards, don't ask me how I know! Lol! If you have such a saw like mine, that has no fuel lines intact, it is difficult to vision the line routes. There are helpful schematics on the internet. Just remember that the purge bulb long fuel stem sends pressure back to the tank through the return line (larger line in the tank with the line fitting away from the recoil). That line can now be cut to length and pushed on the bulb long stem. The suction side of the bulb short stem, connects to the purge line on the side of the carburetor (short line). You need to cut that line to the same length as the old one. It has to curve twice to get to the suction side of the purge bulb without kinking. The only other line left is the fuel line with the filter attached hanging inside the tank. Be sure you have the filter able to lay on the floor of the tank and move around. That line connects to the carburetor opposit side from the purge bulb. Dont cut that one until the carb is installed for proper length. The fuel routes from that filtered line into the carb, then out of the carb to the purge bulb suction side, then out to the return line in the tank with the fitting end. That fitting installed into the line serves only to keep the line from pulling back out of the tank, nothing attaches to it. Make sure all lines are clear of the mounting area of the carb, and throttle function. Pass the bulb lines through the slot in the side of the case being sure the lines don't kink. Secure the bulb with the two phillips screws. Position the carb on the studs and slide the choke lever into its place in the case as you go. Place the filter housing on the studs and push the carb and housing down watching the fuel lines for any kinks, especially where the throttle cable is in close proximity to the short carb purge line. Check the throttle function for interferance, and Install the two 8mm nuts. Now route the fuel line around the throttle mechanism out of the way, hold it to the barb on the side of the carb and cut it to length and install. Put some fuel mix in the tank (dont fill it) to test. Press the primer bulb, tilting the saw with fill cap removed, and see if anything leaks, also watch fuel flow back to the tank inside as you press the bulb. You should see fuel and air bubbles from the purge line. When all air bubbles are gone the system is purged. Install the new foam filter in the housing and then the top and side cases. I did not reinstall the cover of the carb adjust needle screws so I could adjust the fuel/ air mixture to run at peak performance. Hope this helps! The kit that I got was perfect and there are some useful instructions included. Thank you! Respectfully Mark
Read less
Other Parts Used:

 – Part Number: 530069247")


Was this helpful?
Thank you for voting!
Both the Fuel line and the Engine fuel line, where dry rotted.
56 of 74 people
found this instruction helpful.
1) While still attached to the fuel tank, I first sized up the old fuel lines with the newer fuel lines.
2) With a pair of needle nose players, I then removed the old dry rotted fuel ?? lines, from the fuel tank.
3) I cleaned the fuel tank and around the carburetor area, to insure that there was no debris, that could possibly fa ... Read more ll into the path of the new fuel lines installation.
4) I then installed the smaller one of the fuel lines, so that it would be out of the way, of the larger fuel line. I Pulled the fuel line through the smaller hole in the fuel tank, with needle nose players. I pulled the smaller fuel line out through the fuel tank filler hole, attached the fuel filter to the smaller fuel line. I Made sure that the fuel filter was extended to the furthest end of the fuel tank bottom. Six inches in all. I then attached the smaller fuel line to the carburetor.
5) I Installed the larger fuel line, followed the same procedures as the smaller fuel line.
6) Both fuel lines where cut on an angle for easy installation. No lubricant was necessary.
7) I filled up the fuel tank with fresh fuel and oil, new air filter and spark plug. It started on the first pull. Amazing.
2) With a pair of needle nose players, I then removed the old dry rotted fuel ?? lines, from the fuel tank.
3) I cleaned the fuel tank and around the carburetor area, to insure that there was no debris, that could possibly fa ... Read more ll into the path of the new fuel lines installation.
4) I then installed the smaller one of the fuel lines, so that it would be out of the way, of the larger fuel line. I Pulled the fuel line through the smaller hole in the fuel tank, with needle nose players. I pulled the smaller fuel line out through the fuel tank filler hole, attached the fuel filter to the smaller fuel line. I Made sure that the fuel filter was extended to the furthest end of the fuel tank bottom. Six inches in all. I then attached the smaller fuel line to the carburetor.
5) I Installed the larger fuel line, followed the same procedures as the smaller fuel line.
6) Both fuel lines where cut on an angle for easy installation. No lubricant was necessary.
7) I filled up the fuel tank with fresh fuel and oil, new air filter and spark plug. It started on the first pull. Amazing.
Read less
Other Parts Used:
Was this helpful?
Thank you for voting!
Fuel line size - Important
13 of 19 people
found this instruction helpful.
Be sure the fuel line is the exact same size (id and od) as the one you are replacing. I had purchased a Fuel line from my local dealer - and after a few hours I figured out that it was the wrong size! He simply cut some line from a spool he had. Didn't bother to look it up! The line from this site was perfect! The id is important because
... Read more
the line has to Compress to go through the hole.
Read less
Other Parts Used:
Was this helpful?
Thank you for voting!