Your coupon for will be reflected when you check out!
✖
Your coupon for
✖
Hello!
You're visiting the PartSelect site in U.S.
Would you like to shop on the Canadian site?
Stay on this site
Go to Canadian site
✖
Model Number Locations
1Select Category Type
Select Category Type
2Select Product Type
Select Product Type
3Select {MODEL} Type
Select {MODEL} Type
Sample Model Number Tags
Model numbers can be made up of numbers (1005400, for example) or a combination of letters and numbers (LAT1000AAE). The model number will most likely appear on either a paper sticker or a metal plate. Your appliance's model number tag may look similar to the sample model number tags shown here (model number highlighted in yellow):
Model has been saved to My Models. If you're not signed in, your lists are available on this device and will expire within 30 days.
Model has been saved to My Models.
This an authentic OEM 40-Watt replacement light bulb, used in a number of household appliances. It is specially designed to withstand extreme temperatures, which is why these replacement bulbs are mos...
This is a multi-use and multi-appliance screw. It can be used on a microwave, refrigerator, range/oven, air conditioner, dehumidifier, washer, or dryer. The measurements of this screw are 8 x 1/2 inch...
The hinges control the rate that the oven door opens and closes, and allows the door to stay open at an angle. This hinge can be used on either the left or right hand side of your oven, and is approxi...
Sold individually. Lock washers are used with screws when vibration from an appliance may cause the screw to loosen. Lock washers are also used in the electrical components of an appliance to ensure ...
This broiler pan and roasting rack set is designed to help reduce mess while cooking by allowing grease to drain away from food. Its durable porcelain-coated construction stands up to high temperature...
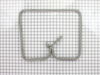
This lower bake element provides heat from the bottom of your electric oven, ensuring even cooking and baking. Made from a durable metal coil, it heats up as electricity flows through it. Located at t...
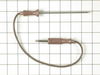
This temperature probe consists of two ends joined together by an insulated wire. The small end is almost four inches long, whereas the longer end is almost seven inches long. The small end, the jack,...
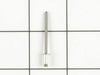
This rivet is an inch and a half long. It is used for many washing machines, microwaves, refrigerators, dryers, and ranges. Use of this rivet requires a rivet tool.
Parts arrived in three days and it was an easy swap of the hinges but the same problem still existed: the oven door wouldn't close completely, so the oven light stayed on and the convection wouldn't work either unless the door closed all the way. The replacement hinge's springs apparently aren't strong enough to close it and the springs a
... Read moreren't adjustable - which is a design flaw. I did correct the problem though, by using three dollars worth of 1" round magnets, which I placed inside the door: they stay put and are strong enough to pull the door tight.
Unscrewed and pulled the door off and then took the three layers of the door apart in order to clean off the burned-on goop and remove the old and insert the new seal. The last screw was rusted in and the drill stripped it so that it was impossible to remove. I levered the remaining two layers apart, holding them open with screw drive
... Read morers, and inserted the new seal. Had to be careful with the shaping of the metal core of the seal and the distribution of the sealing fabric. Phew! I saved the screws from each layer separately by taping them to the counter in the order of removal. This made reassembly easier. Getting the door back on was a bit difficult and I needed another pair of hands to help me.
One oven door hinge spring was broken. I ordered two hinges to complete the repair. The repair could not have been easier. I removed the door from the oven an unscrewed the outer frame of the door from the inner door assembly. I unscrewed the old hinge assembly and replaced them with the two new hinges. I set the door back on
... Read more the oven and replaced the oven door retaining hardware. After replacing the retaining hardware, I removed the temporary shipping pins that keep the spring assembly static. Very important: don’t remove these hinge pins until the door is on the oven an the oven retaining hardware is secured.