EasyApplianceParts is now PartSelect! We've merged our sites to provide a better shopping experience for you.   Full Details

Find Parts

Parts Departments

Top Model Types

Top Brands

Repair Help

Expert Repair Videos

Keep typing for more specific results...

2048778481 Kenmore Upright Vacuum - Overview

Diagrams for 2048778481

See every part. Know exactly what you need.

Enter a part description. DIY Heroes keep it simple, eg. "belt" or "pump".

Search filter:
Clear Filter
Your search term must have 3 or more characters.
Washer Direct Drive Water Pump – Part Number: WP3363394
$43.18
In Stock
Washer Direct Drive Water Pump
★★★★★
★★★★★
(115)
Part #WP3363394
The direct drive drain pump (Whirlpool Direct Drive Washer Pump, Drain Pump, Washer Drain Pump, Water Pump) removes water from the washer during the drain cycle without the use of a belt. The pump is supposed to drain the water from the washer; if the water isn’t draining or if there is a leak, you may have a problem with your pump. You must replace this part if there is a blockage or clog. Although the symptoms may point to a malfunctioning drain pump, there could actually be a problem with one of the connecting hoses. This pump connected directly to the motor, and comes in white plastic. This replacement part features 1 direct drive water pump with 2 ports for water to pass through: a large one and a smaller one.
Washer Bleach Dispenser – Part Number: WP3362952
$8.55
In Stock
Washer Bleach Dispenser
★★★★★
★★★★★
(7)
Part #WP3362952
This part holds the bleach until it is ready to be released into the cycle.
Gearcase – Part Number: 3360629
$299.77
In Stock
Gearcase
★★★★★
★★★★★
(7)
Part #3360629
This is used in your direct drive washer that has a neutral drain.
Washer Spin Tube Thrust – Part Number: WP63292
$9.62
In Stock
Washer Spin Tube Thrust
★★★★★
★★★★★
(2)
Part #WP63292
Fits under the basket drive assembly.
Agitator – Part Number: WPW10131112
$90.48
In Stock
Agitator
★★★★★
★★★★★
(4)
Part #WPW10131112
Introducing the genuine Whirlpool Agitator, a must-have OEM part optimized for an array of Whirlpool models. This agitator's primary function is to ensure optimal motion within your washer, shifting back and forth to properly stir and clean your clothes within the tub. Prior to installation, it is recommended to disconnect the washer from the power source and wear protective gloves for safety. Keep in mind, while parts may appear similar, size and shape may introduce subtle variations. Embrace this essential component for your washer's streamlined operation today; a world of clean clothes is just a Whirlpool Agitator away!
Top Burner – Part Number: Y0063147
No Longer Available
Top Burner
Part #Y0063147
DISCONTINUED – Part Number: 22038313
No Longer Available
DISCONTINUED
Part #22038313
SUPPORT PROTECTOR – Part Number: 686769
No Longer Available
SUPPORT PROTECTOR
Part #686769
USE MAC 12002012 – Part Number: 70102
No Longer Available
USE MAC 12002012
Part #70102
SELECTOR SWITCH – Part Number: Y63417
No Longer Available
SELECTOR SWITCH
Part #Y63417
THERMOSTAT, OVEN – Part Number: Y63415
No Longer Available
THERMOSTAT, OVEN
Part #Y63415
WIRING HARNESS & PRESSURE SWITCH HOSE – Part Number: 63509
No Longer Available

Common Symptoms of the 2048778481

How this model fails, and the parts that fix it.

Watch our pros, then fix it yourself.
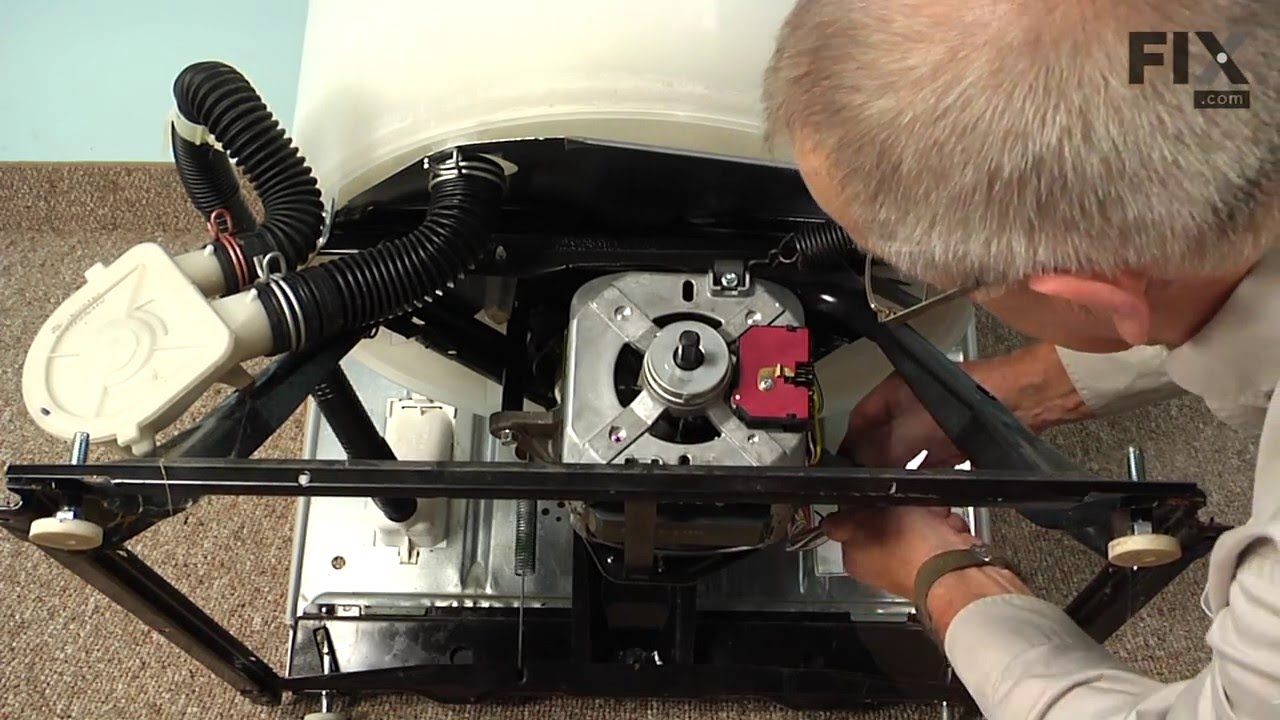
See how others fixed this model. Time, tools, difficulty, and steps that lead to victory! View More

Search repair tips from other customers using simple keywords like "replace", "fit", "remove", "inspect". DIY doesn't mean you have to do it alone!

Search filter:
Clear Filter
Your search term must have 3 or more characters.
Water leaking on floor
107 of 117 people found this instruction helpful.
  • Stanley from Warwick, RI
  • Really Easy
  • 15 - 30 mins
  • Pliers, Screw drivers
I removed the two spring clips that hold the pump and two wire spring clips that hold the hoses. Then I had to pry the pump off the shaft (it was frozen with rust). Then I cleaned the shaft with sandpaper and installed the new pump (which, by the way, came the next day, thank you very much) which made my wife very happy, and I thank you for that , too.
Was this helpful?
Thank you for voting!
bad water pump
55 of 62 people found this instruction helpful.
  • carrie from magna, UT
  • Easy
  • 30 - 60 mins
  • Nutdriver, Pliers, Screw drivers, Wrench (Adjustable)
We received the part we needed in a timely manner. First we took the back off the washer and found out later we didn't have to, because you can access the pump from the bottom of the Whirlpool washer and when we turned it on it's back a brass colored pin about 2" long fell out and we have no idea where it goes.Looking around the botto m frame we saw another pin in a plastic little cup mounted to the frame and another empty cup .So we changed the pump easy,put the pin in the empty cup and the washer runs great! That's our story.Still don't know what the pin is for,it's not on the parts schematic.
Was this helpful?
Thank you for voting!
The washer wouldn't spin or agitate.
50 of 53 people found this instruction helpful.
  • david from Monroe, MI
  • Very Difficult
  • More than 2 hours
  • Nutdriver, Pliers, Screw drivers, Socket set
Frist I disconnected the water lines and power cord. Then I leaned the washer back against the wall. Removed the 2 pump retainers and then the pump. Next removed the 2 screws from the motor retainers and pulled off the retainers and motor. Then removed the 3 bolts from the Gear case. Then removed the cap from the top of the agitator with a flat screw driver. Then removed the bolt from the top of the gear shaft. and removed the auger and agitator assembly. Then removed the gear case from the washer. Next removed the slip ring and then the clutch from the top of the gear case. Next removed the 1/4" screws from cover of gear case and removed the cover. Found the top gear bad. Ordered the new gear and pinion kit. Couldn't find any part #'s to match what PartSelect had. Ordered the gear that they should that fit most washers. The pics they had up looked the same as the one that was bad. Had the new gear in 3 days put it back together and it still wouldn't work right. Took it apart again and looked at it and found a small clip on the bottom side of the gear was upside down. Fliped it over put the gear back in and ran the washer with the gear case out and it worked. Put it back together again. And learned a good lesson always watch how you take things apart for when it's time to put it back together!
Was this helpful?
Thank you for voting!