EasyApplianceParts is now PartSelect! We've merged our sites to provide a better shopping experience for you.   Full Details
✖

Find Parts

Parts Departments

Top Model Types

Top Brands

Repair Help

Expert Repair Videos

Keep typing for more specific results...

110389246 Kenmore Washer - Overview

Diagrams for 110389246

See every part. Know exactly what you need.

Enter a part description. DIY Heroes keep it simple, eg. "belt" or "pump".

Search filter:
Clear Filter
Your search term must have 3 or more characters.
Gearcase – Part Number: 3360629
$299.77
In Stock
Gearcase
★★★★★
★★★★★
(7)
Part #3360629
This is used in your direct drive washer that has a neutral drain.
Spin Pinion Seal – Part Number: WP356427
$9.62
In Stock
Spin Pinion Seal
Part #WP356427
This seal is for the top of basket drive tube shaft.
Washer Gear Case Cover Seal – Part Number: WP3349985
$20.37
In Stock
Washer Gear Case Cover Seal
★★★★★
★★★★★
(1)
Part #WP3349985
This part prevents the agitator shaft from leaking oil onto the transmission.
Oil Seal Kit for Gearcase Input Shaft – Part Number: 285352
$51.61
Special Order
Oil Seal Kit for Gearcase Input Shaft
★★★★★
★★★★★
(1)
Part #285352
This two piece oil seal kit comes in two pieces and is used for the gearcase input shaft of your washer.
NEUTRAL DRAIN KIT – Part Number: 388253A
$53.85
In Stock
NEUTRAL DRAIN KIT
Part #388253A
The neutral drain kit prevents the basket from spinning during the drain cycle.
Shaft, Agitator (Complete) – Part Number: WP389387
$158.35
In Stock
Shaft, Agitator (Complete)
Part #WP389387
This kit is used for direct drive washing machines and is found inside the gearcase.
Washer Screw Ground – Part Number: WP3351614
$7.47
In Stock
Washer Screw Ground
Part #WP3351614
Washer Sealer Gasket (.20 Fl. Oz.) ( – Part Number: WP285195
$64.69
Special Order
BEARING – Part Number: 285205
$9.62
Special Order
BEARING
Part #285205
WASHER – Part Number: 62619
$21.45
Special Order
WASHER
Part #62619
Ring, Retaining – Part Number: 90369
No Longer Available
Ring, Retaining
Part #90369
Shaft, Agitator – Part Number: WP389231
$139.46
Special Order
Shaft, Agitator
Part #WP389231
BULK OF 100 PCS.

Common Symptoms of the 110389246

How this model fails, and the parts that fix it.

Watch our pros, then fix it yourself.

See how others fixed this model. Time, tools, difficulty, and steps that lead to victory! View More

Search repair tips from other customers using simple keywords like "replace", "fit", "remove", "inspect". DIY doesn't mean you have to do it alone!

Search filter:
Clear Filter
Your search term must have 3 or more characters.
The washer wouldn't spin or agitate.
50 of 53 people found this instruction helpful.
  • david from Monroe, MI
  • Very Difficult
  • More than 2 hours
  • Nutdriver, Pliers, Screw drivers, Socket set
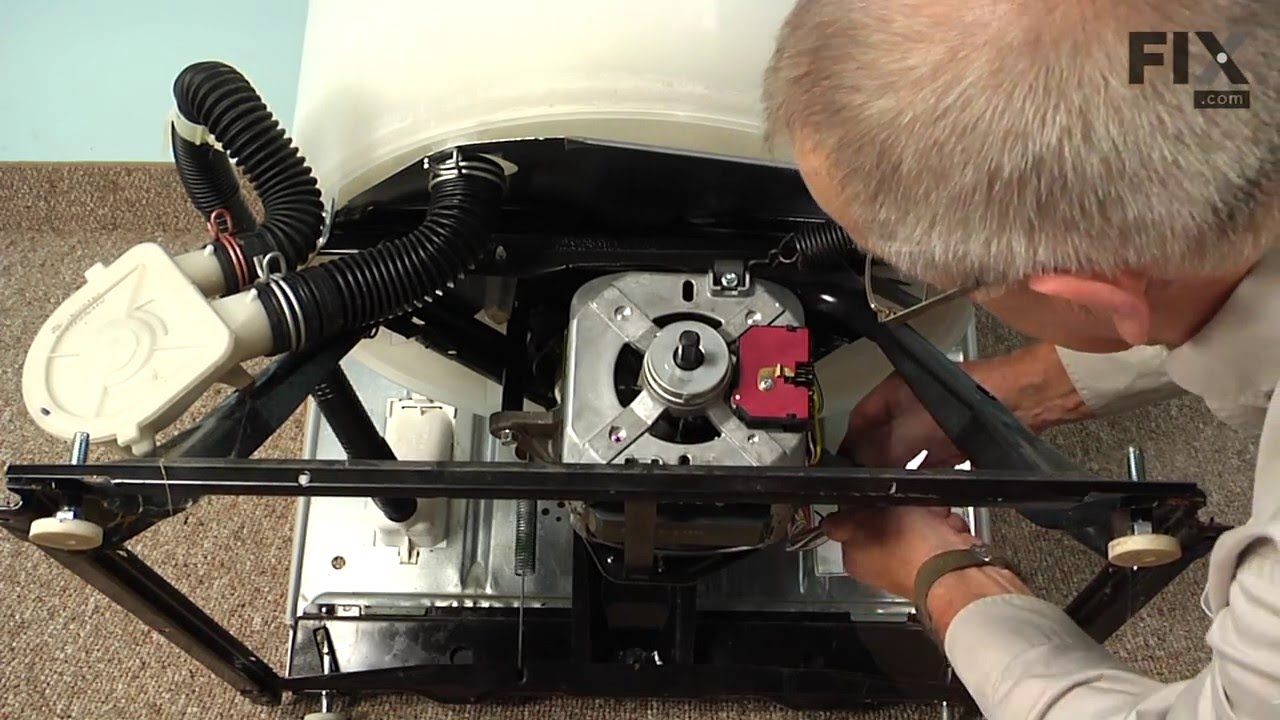
Frist I disconnected the water lines and power cord. Then I leaned the washer back against the wall. Removed the 2 pump retainers and then the pump. Next removed the 2 screws from the motor retainers and pulled off the retainers and motor. Then removed the 3 bolts from the Gear case. Then removed the cap from the top of the agitator with a flat screw driver. Then removed the bolt from the top of the gear shaft. and removed the auger and agitator assembly. Then removed the gear case from the washer. Next removed the slip ring and then the clutch from the top of the gear case. Next removed the 1/4" screws from cover of gear case and removed the cover. Found the top gear bad. Ordered the new gear and pinion kit. Couldn't find any part #'s to match what PartSelect had. Ordered the gear that they should that fit most washers. The pics they had up looked the same as the one that was bad. Had the new gear in 3 days put it back together and it still wouldn't work right. Took it apart again and looked at it and found a small clip on the bottom side of the gear was upside down. Fliped it over put the gear back in and ran the washer with the gear case out and it worked. Put it back together again. And learned a good lesson always watch how you take things apart for when it's time to put it back together!
Was this helpful?
Thank you for voting!
The spin gear was striped.
25 of 31 people found this instruction helpful.
  • Aaron from Lake Mills, WI
  • A Bit Difficult
  • 1- 2 hours
  • Pliers, Socket set
I had to take the motor and transmission out. They are one piece. Removed the clutch, take off trans. cover, remove a snap ring, take the striped gear off, and put the new one on. Then put put everything back on the way it came off.
Was this helpful?
Thank you for voting!
Slipping Spin clutch due to leaking gear-case seal.
21 of 23 people found this instruction helpful.
  • Thomas from Pascoag, RI
  • A Bit Difficult
  • 1- 2 hours
  • Pliers, Screw drivers, Socket set
1. Unplug the machine.
2. Turn the water off.
3. Disconnect the supply and discharge hoses.
4. Open the cover and remove the cap/cover of the agitator. Use socket wrench to remove the bolt securing the agitator. Pull up on the agitator and remove it.
5. Lay washing machine down on it's front. Remove the inlet and outl et drain hoses from the discharge pump.
6. Remove the 2 "faston" connectors from the motor start capacitor (looks like a D cell flashlight battery). Rock the connectors back and forth and pull gently until they come off. Polarity doesn't matter but to be safe make note of the positions.
7. Press the release clip on the motor connector and pull to disconnect it. Move the wiring harness out of harms way.
8. Remove the 3 bolt securing the motor and transmission assembly to the bottom of the tub. Pull the drive assembly out of the machine and place it on a suitable work surface.
9. Examine the tub brake assembly (still on the bottom of the tub), the clutch assembly (on the motor/transmission assembly you just removed and everything else for wear or damage. Now if you decide to proceed with repair continue with the following steps. If not you're done.
10. Remove the inverted cup washer from the agitator shaft of the assembly. Remove the "U" clip from the shaft and remove the clutch mechanism from the drive assembly. Make a sketch of the position of each of the removed components to aid in reassembly.
11. Now you can see the gear case cover and it's seal. If it is leaking (as mine was) you will need to replace it.
12. With the assembly level remove the bolts around the cover and remove the cover. Place the cover on a flat surface and with a screwdriver or punch drive the old seal out of the cover from the outside in.
13. Clean the seal area and check for damage. Clean the cover and transmission housing surfaces of old gasket material. There is a factory sealant available for reassembly but I chose an automotive RTF @ $4 vs $24 and it worked OK.
14. Installing the seal requires some tools and experience to done successfully. The right size sockets or piece of pipe, coupled with an arbor press or vise will get the seal in. The cover is delicate so if in doubt find a machine shop.
15. Support the outside of the cover on a hard surface and with a socket or short pipe length, PRESS (don't hammer) the new seal into the gear case cover.
16. Make sure there is lubricant in the gear case. Not overflowing but maybe 1/2 full when view with cover off on a level surface.
17. Apply some RTV sealant to trhe cover and install it. Tighten bolts evenly. Light torque (1-2 ft-lb).
18. Reassemble washing machine and test for leaks and proper operation.
Was this helpful?
Thank you for voting!