EasyApplianceParts is now PartSelect! We've merged our sites to provide a better shopping experience for you.   Full Details
✖

Find Parts

Parts Departments

Top Model Types

Top Brands

Repair Help

Expert Repair Videos

Keep typing for more specific results...

1101820296 Kenmore Washer Dryer Combo - Overview

Enter a part description. DIY Heroes keep it simple, eg. "belt" or "pump".

Search filter:
Clear Filter
Your search term must have 3 or more characters.
Direct Drive Motor Coupling – Part Number: 285753A
$21.45
In Stock
Direct Drive Motor Coupling
★★★★★
★★★★★
(169)
Part #285753A
This direct drive motor coupling (Direct Drive Washer Motor Coupling, Motor Coupling, Washer Motor Coupling, Coupling Kit) provides a cushioned connection between the transmission and the motor shaft. It attaches to the direct-drive transmission and the motor shaft. If this part is defective it will affect the agitator in your washer because of its direct connection with the motor. Your washer may not agitate, spin slowly, or not spin at all. The coupling must be replaced when there is no longer a consistent connection between the transmission and the motor shaft. The coupling can wear over time because of its location between two major parts of the dryer. It is subject to material fatigue over time from normal use, or breakage caused by frequent overloading. The part measures approximately 2 inches in diameter, and is constructed of plastic and metal. This model comes in black/white.
Door Catch Kit – Part Number: 279570
$8.55
In Stock
Door Catch Kit
★★★★★
★★★★★
(136)
Part #279570
This part replaces your appliances latch (Door Latch Kit, Door Catch, Dryer Door Latch Kit). On your appliance you will find both a strike and a catch. The strike is mounted on the body of the dryer, while the catch is mounted on the dryer door. These two parts work together to keep your dryer door closed. The catch holds the door strike to keep the door closed during the drying cycle. If the door does not latch closed, you won’t be able to start a drying cycle. If this part is malfunctioning, you may not be able to open or close your door. In some instances, it may seem like your door is closing, but if it is not latching properly you won’t be able to start your drying cycle. You should replace this part as soon as it’s malfunctioning. Your dryer may run even though the latch is malfunctioning, but it is unsafe if the dryer continues to run while the door is open. This replacement part features 1 door latch kit which includes 2 strikes, 3 catches, and a set of instructions. This model is constructed of plastic and metal, and comes in white/silver.
Water Inlet Valve with Mounting Bracket – Part Number: 285805
$32.63
In Stock
Water Inlet Valve with Mounting Bracket
★★★★★
★★★★★
(145)
Part #285805
The water inlet valve on your washing machine is used to fill the tub with cold, warm, or hot water for the wash and rinse cycles. This part could have either a blue or green-colored valve body. There are two ports for water to enter and this valve is compatible with a half-inch ID hose. It has two 3/4-11x1/2 NHT hose threads. You may have a faulty valve if your washer is leaking, has no hot or cold water, will not stop filling with water, will not fill with water, fills and drains at the same time, or is noisy. To confirm that the valve is faulty, unplug the washer when the symptom occurs. If the washer continues to fill, then the inlet valve is defective.
Washer Clutch Assembly – Part Number: 285785
$38.96
In Stock
Washer Clutch Assembly
★★★★★
★★★★★
(92)
Part #285785
A clutch assembly (Clutch, Washer Clutch) is found in your washing machine and is responsible for spinning the basket during the spin cycle. The clutch lining can wear over time. If the clutch lining is worn out, the clutch assembly will not rotate properly to release the brake. If you notice a burning smell, or the machine shaking and moving more than normal, this could indicate there is an issue with your clutch. If the washer spins when the washer basket is empty but not when it’s full, or if the assembly begins to turn blue, you may need to replace the clutch assembly. This assembly includes a brake cam driver, blue springs for large capacity washers, a black spring for compact washers, and the installation instructions. It’s constructed of plastic and metal, and comes in beige/silver.
Push-To-Start Switch – Part Number: WP3977456
$28.42
In Stock
Push-To-Start Switch
★★★★★
★★★★★
(20)
Part #WP3977456
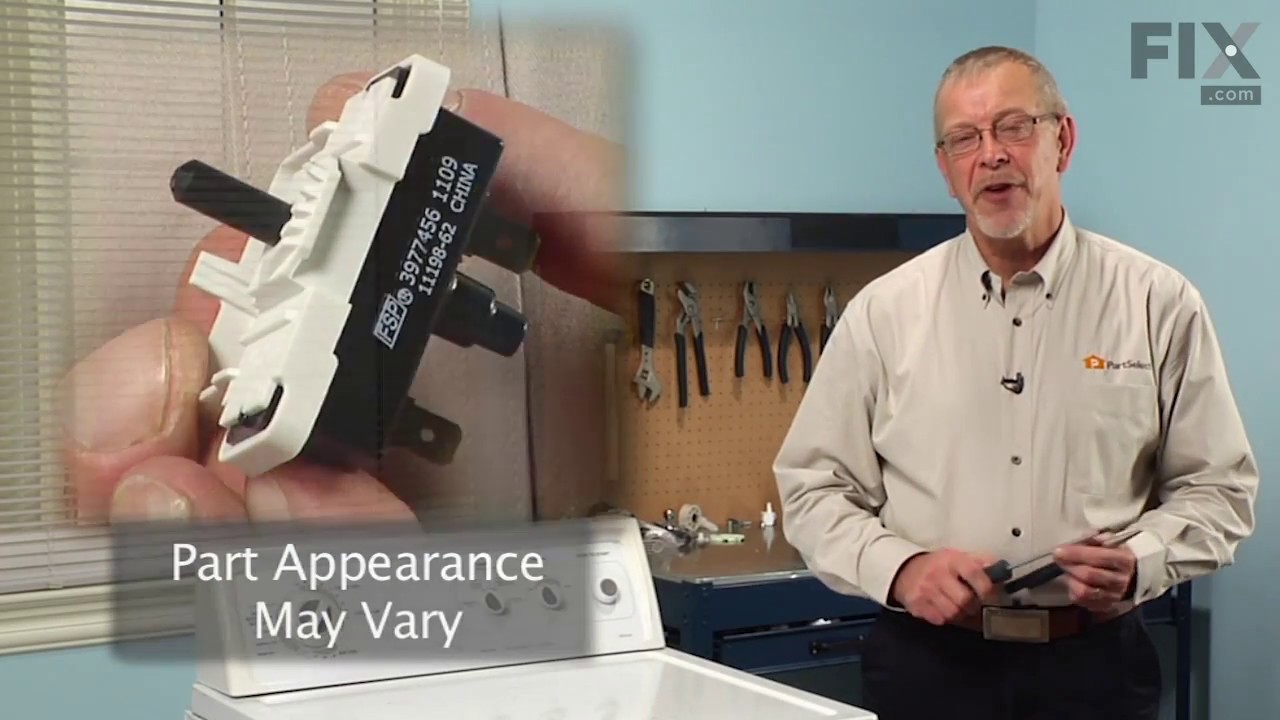
This push-to-start switch activates the dryer when the button is pressed and released. If your switch is not turning on or off, will not start, or the contacts inside the switch are shorted out, it is best to replace this part as a possible solution. Remember to unplug your appliance before beginning the installation process, as safety precaution. For installation instructions and accurate guidance, refer to the diagram provided by the manufacturer.
Dryer Screw – Part Number: WP90767
$7.47
In Stock
Dryer Screw
★★★★★
★★★★★
(2)
Part #WP90767
This screw is sold individually.
Washer Hose Clamp – Part Number: WP596669
$7.47
In Stock
Washer Hose Clamp
★★★★★
★★★★★
(1)
Part #WP596669
This hose clamp is used in a wide variety of household appliances. Most often it is found in washers, dishwashers, refrigerators, freezers, dehumidifiers, garbage disposals, or air conditioners. This clamp is used to securely attach a hose to another part of your appliance, which helps prevent leaks from those connections. Depending on the appliance, it can attach hoses to drain pumps, water inlet valves, pressure switches, and injector nozzles. We recommend you refer to model-specific diagrams for appropriate uses and exact placement. This hose clamp is made of metal, and is sold individually. To access and replace this part you will need a nut driver, pliers, and screwdrivers. Before you begin any repair work, make sure you have unplugged your appliance, and shut off the water supply if applicable.
Door Catch – Part Number: WP3389441
$9.62
In Stock
Door Catch
★★★★★
★★★★★
(3)
Part #WP3389441
This white female door catch is attached to the dryer door.
Single Front Panel Cip – Part Number: W10854425
$16.07
In Stock
Single Front Panel Cip
★★★★★
★★★★★
(4)
Part #W10854425
This part is the replacement single front panel clip for your dryer. It is made of metal and is approximately 2 inches long and ¾ inch wide. The front panel retainer clip is what holds the front panel on to the dryer. If the clip is damaged or missing, or if the front panel appears loose, you may need to replace the clip. This part is sold individually and is an authentic OEM part.
Pump Retainer – Part Number: WP8546127
$9.62
In Stock
Pump Retainer
★★★★★
★★★★★
(2)
Part #WP8546127
Sold Individually.
Hose Clamp – Part Number: WP285655
$9.62
In Stock
Hose Clamp
★★★★★
★★★★★
(2)
Part #WP285655
The hose clamp is used to hold the water hose in place which will prevent the hose from leaking water. Sometimes the clamp may lose its ability to latch on, causing a leaking washer. For the installation, you will need a flat head screw driver to replace the clamp and a drill to access the screws to remove the front of the washer. Be careful if you do not have specific clamp pliers as the clamp could fly off. Once the front of the washer has been removed, take a quick look for water damage or any obvious signs of where the leak is coming from. If it is not obvious, run water to test.
Gearcase – Part Number: 3360629
$299.77
In Stock
Gearcase
★★★★★
★★★★★
(7)
Part #3360629
This is used in your direct drive washer that has a neutral drain.

Questions And Answers for 1101820296

Ask our experts a question about this model and we'll get back to you as soon as possible!

Sort by:
  • 1
Sorry, we couldn't find any existing answers that matched.Try using some different or simpler keywords, or submit your new question by using the "Ask a Question" button above!
Ted - For model number 1101820296
July 23, 2021
Temp. Won't come up on dryer
Chris Boyle Profile
Hello Ted, Thank you for the question., if the Dryer has a low heat, we suggest testing the High Limit Thermostat, Thermal Limiter and the Cycling Thermostat. They can be tested with a Multi Meter to check for continuity. We hope this helps!
$57.38
In Stock
Dryer Cycling Thermostat
$63.64
In Stock
Dryer High Limit Thermostat
$57.38
In Stock
Thermal Limiter
Was this helpful?
Thank you for voting!
  • 1

Common Symptoms of the 1101820296

How this model fails, and the parts that fix it.

Watch our pros, then fix it yourself.

See how others fixed this model. Time, tools, difficulty, and steps that lead to victory! View More

Search repair tips from other customers using simple keywords like "replace", "fit", "remove", "inspect". DIY doesn't mean you have to do it alone!

Search filter:
Clear Filter
Your search term must have 3 or more characters.
No movement from Basket & agitator
1124 of 1228 people found this instruction helpful.
  • Jeff from Wayne, NJ
  • Easy
  • 30 - 60 mins
  • Pliers, Screw drivers, Socket set
The job looked intimidating but turned out to be very easy.
First take off the water pump by removing the two clips that hold it in place. Place a shallow pan under the pump to catch the water that is in the pump and hoses. Open the hose clamps with a pair of pliers or channel locks (better) and slide the hoses off of the water pum p.
The motor comes off next. Unplug the electrical connector from the motor and two wires from the capacitor. Remove the two screws holding the clamps in place and then pop off the two clamps. You will need to hold up the motor with one hand while you remove the clamps or it will fall to the floor once the clamps are removed.
One piece of the coupling assemble will be attached to the motor and the other will be attached to the gearcase drive shaft. If you want to clean up the mess created by the shredded rubber center piece of the coupling assembly you will have to take off the motor mounting plate. It is held on by two bolts and removing it makes installing the coupling easier but probably not necessary.
Push the back half of the coupling on to the gearcase drive shaft until the shaft is flush with the face of the coupling. Install the new rubber center piece on to the coupling then re-install the motor mounting plate. Install the other half of the coupling on to the motor shaft and lift the motor up to the coupling. You have to rotate the motor shaft by spinning the fan blades until the coupling lines up so you can slide it into the other half of the coupling. Then just reattach the motor, connectors and water pump in the reverse order of disassembly.
Was this helpful?
Thank you for voting!
Door Catch part had fallen out,/ was missing
676 of 740 people found this instruction helpful.
  • Terri from Saint Augustine, FL
  • Really Easy
  • Less than 15 mins
Received your parts, Popped them both right into place, Even though only one side needed to be replaced, I wanted them to match up. It was amazing how easy this was. My husband was quite impressed I had ordered these rather then look for either a new or used dryer from some other source.
Was this helpful?
Thank you for voting!
spin cycle did not engage
500 of 540 people found this instruction helpful.
  • Andrew from SLC, UT
  • Easy
  • 30 - 60 mins
  • Nutdriver, Pliers, Socket set
researched potential causes, found cluch dust under the washer and determined that it wouldn't engage because clutch was too worn. ordered the assembly, removed agitator from inside the tub as it is connected to the gear shaft, turned washer on it's back for access to motor, unattached the direct drive water pump from the motor drive, unb olted the 3 gearcase mounting bolts and took the entire gearcase, shaft, motor, etc... together, out from under the washtub. the clutch slides off the gearshaft with a little fidgeting and the new assembly is easily installed where the previous was. put everything back together... then... spin spin! worked perfectly
Was this helpful?
Thank you for voting!