


 My Orders




033 Poulan Trimmer - Overview

Enter a part description. DIY Heroes keep it simple, eg. "belt" or "pump".
Search filter:
Clear Filter
Your search term must have 3 or more characters.

$12.81
In Stock
Fuel Line (25" Length)
Part #530069247
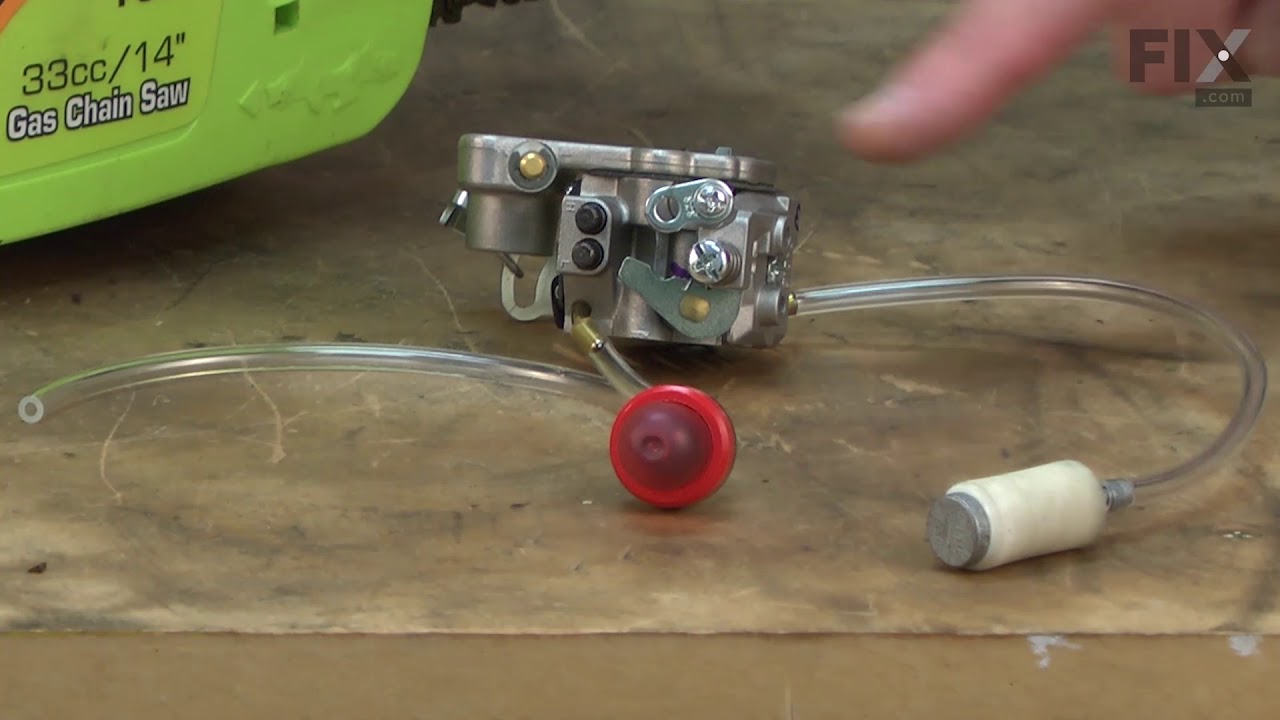
This 25-inch fuel line carries fuel from the tank to the carburetor, ensuring proper engine operation. Made from durable clear plastic, it is designed to withstand regular use but may become clogged or brittle over time. Replacing a worn or damaged line can help prevent leaks and restore reliable starting and performance.

$9.62
In Stock
Engine Fuel Filter
Part #530095646
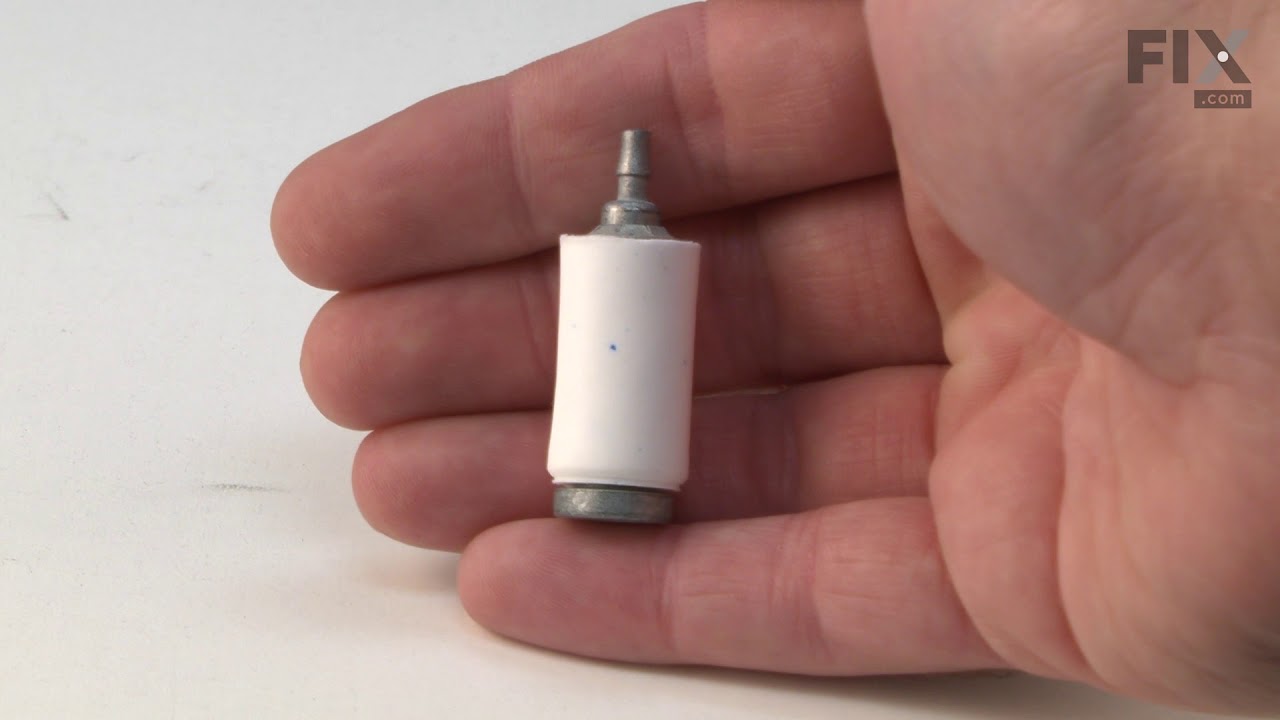
This Genuine OEM fuel filter is designed to maintain the performance and longevity of your equipment by preventing dirt and debris from entering the carburetor. Located inside the fuel tank, this essential component ensures clean fuel delivery, protecting the engine from potential damage caused by contaminants. Sold individually, the filt...Read moreer is built to meet original equipment standards for fit and function. Over time, the filter may become clogged, restricting fuel flow and making engine starts more difficult. For optimal performance, it should be replaced—not cleaned—at the first sign of blockage or wear.
Read less

$17.55
In Stock
Purge Line
Part #530069216
This is the Genuine Craftsman replacement part. It is made out of Flexible Rubber and is Sold Individually. The purpose of the 530069216 Tank Purge Line is to return the excess fuel that is in the carburetor after the primer bulb has been pushed. The excess fuel is forced through the purge line back into the fuel tank. Over time the Tank Purge Line will become brittle and crack and will need to be replaced.

$12.05
In Stock
Purge Bulb
Part #530047721

$6.72
In Stock
Trimmer Screw
Part #530015805

$5.95
In Stock
Screw Catcher
Part #530015814
This is a standard hardware which has multiple applications based on your tool. It is sourced from original equipment manufacturer for use with a variety of power equipment. Please refer to diagrams for proper application. This screw is made out of metal and it is sold individually. Requires a hex key or an allen wrench to install or remove it.

$9.95
Special Order
Switch
Part #530071356
This replacement switch is a high quality item that is supplied from original equipment manufacturer for use with handheld string trimmers. It is the main switch that allows user to turn the equipment on and off. Please note this durable plastic item is sold individually, replacing this switch is a simple task that does not require any tools.

$6.72
In Stock
Screw-10-14 x 13/16
Part #530015886
This replacement screw is a high quality hardware that is designed for use with Paramount, Poulan and Weed Eater power equipment. It has multiple applications depending on your equipment, please make sure to check appropriate diagrams for correct location and use of this item. One durable hex socket head screw is included per order.

$14.25
In Stock
Rewind Spring
Part #545008011
The recoil starter spring is a genuine item that is supplied by the original equipment manufacturer for use with trimmers and blowers made by Poulan and Weed Eater. It attaches to the fan housing assembly and helps to retract the starter rope. To replace this item it may require the use of a screwdriver, a set of pliers, and a wrench. This high-quality part is made of metal and is priced individually.

$30.81
In Stock
Gasket Diaphragm Kit
Part #D10-WAT
This is a Genuine OEM rebuild kit designed for Walbro Carburetors. This kit contains all the necessary Gaskets and Diaphragms needed to rebuild your carburetor. If your engine runs sluggish or it dies shortly after starting it, you may need to rebuild your carburetor. Replacing these items you would need a Screwdriver and Pliers.

$6.55
In Stock
Screw
Part #530016386
This is a genuine OEM sourced replacement tapping screw which is specially designed for use with Paramount and Poulan lawn and garden equipment. It is a standard hardware which has multiple applications depending on the model of your unit, please make sure to refer to the appropriate diagrams for the correct location and application of th...Read moreis part. This high-quality hex socket head screw is made of durable metal and it is sold individually.
Read less

$6.72
In Stock
Screw 1/4-20x7/8
Part #530015771
It is a genuine OEM sourced replacement screw that is specially produced for use with handheld lawn and garden equipment. This screw is a standard hardware which has multiple applications depending on your unit, for please refer to the appropriate diagrams for the correct location and use of this part. It is a high-quality hex socket head screw which is sold individually.
Common Symptoms of the 033
How this model fails, and the parts that fix it.
Will Not Start
Fixed by
these parts
these parts


Show All
Engine stops after a few seconds or minutes
Fixed by
these parts
these parts
Show All
Watch our pros, then fix it yourself.
")
See how others fixed this model. Time, tools, difficulty, and steps that lead to victory!
View More
Search repair tips from other customers using simple keywords like "replace", "fit", "remove", "inspect". DIY doesn't mean you have to do it alone!
Search filter:
Clear Filter
Your search term must have 3 or more characters.
Both the Fuel line and the Engine fuel line, where dry rotted.
55 of 73 people
found this instruction helpful.
1) While still attached to the fuel tank, I first sized up the old fuel lines with the newer fuel lines.
2) With a pair of needle nose players, I then removed the old dry rotted fuel ?? lines, from the fuel tank.
3) I cleaned the fuel tank and around the carburetor area, to insure that there was no debris, that could possibly fa ... Read more ll into the path of the new fuel lines installation.
4) I then installed the smaller one of the fuel lines, so that it would be out of the way, of the larger fuel line. I Pulled the fuel line through the smaller hole in the fuel tank, with needle nose players. I pulled the smaller fuel line out through the fuel tank filler hole, attached the fuel filter to the smaller fuel line. I Made sure that the fuel filter was extended to the furthest end of the fuel tank bottom. Six inches in all. I then attached the smaller fuel line to the carburetor.
5) I Installed the larger fuel line, followed the same procedures as the smaller fuel line.
6) Both fuel lines where cut on an angle for easy installation. No lubricant was necessary.
7) I filled up the fuel tank with fresh fuel and oil, new air filter and spark plug. It started on the first pull. Amazing.
2) With a pair of needle nose players, I then removed the old dry rotted fuel ?? lines, from the fuel tank.
3) I cleaned the fuel tank and around the carburetor area, to insure that there was no debris, that could possibly fa ... Read more ll into the path of the new fuel lines installation.
4) I then installed the smaller one of the fuel lines, so that it would be out of the way, of the larger fuel line. I Pulled the fuel line through the smaller hole in the fuel tank, with needle nose players. I pulled the smaller fuel line out through the fuel tank filler hole, attached the fuel filter to the smaller fuel line. I Made sure that the fuel filter was extended to the furthest end of the fuel tank bottom. Six inches in all. I then attached the smaller fuel line to the carburetor.
5) I Installed the larger fuel line, followed the same procedures as the smaller fuel line.
6) Both fuel lines where cut on an angle for easy installation. No lubricant was necessary.
7) I filled up the fuel tank with fresh fuel and oil, new air filter and spark plug. It started on the first pull. Amazing.
Read less
Other Parts Used:
 – Part Number: 530069247")
Was this helpful?
Thank you for voting!
Fuel line deterioration and carb overhaul
8 of 9 people
found this instruction helpful.
The machine was offered for free on FB marketplace. The person tried a rebuild of the carb, but could not figure out how to connect the fuel line, which feeds from the tank above the carb. I couldn’t either, so I went to a local parts dealer, who could not find a diameter the same size (it’s tiny). I assumed there may have been a fitting
... Read more
in the tank, but if so, it was absent. The only parts that were found in the tank: a large filter in a 3/4”piece of larger tubing and this tiny fuel line was inserted into the other end. The resulting arrangement was long enough to reach the hole in the tank.Since the machine looked spectacularly clean, I used these parts to make it run.
1. Using diagonal cutters, I cut a very sharply angled end on the small line.
2. I generously lubricated the new line and the hole in the tank. I then took angled end of the new line and inserted it into the hole. Using a screwing type motion , I slowly worked it into the tank, using generous amounts of lubricant, until the line was far enough into the tank to grab from the fill hole with needle nose pliers. I then pulled and twisted until the line came out of the top of the tank.
3. I cut the angled end square at this point. I then inserted the filter into the larger tubing the cut about an inch longer than the filter Barb.I then lubed the larger line and the smaller line and pulled the line back into the tank from the bottom until the filter laid flat on the bottom of the tank.
4. At this point, I cut the end of the small line so that about an inch protruded from the bottom of the tank. I then re-lubed that line and inserted into a well lubricated length of larger line of sufficient length to reach the inlet on the carb.
About the carb: the donor of the machine had apparently attempted a rebuild. While it was very clean, he assembled it incorrectly. The metering diaphragm was pinched and he left off two of the four screws which held it together. I disassembled it, and using the correct parts assembled in the correct order, (there are parts for multiple applications included in the kit), mounted it back to the machine, and after about six or eight pulls, it roared to life. I did not get into the jets etc, because they seemed to work. This Walbro carb only has one inlet and no purge bulb, and after adjusting the carb it starts on the third pull every time using the choke as it was designed to.
1. Using diagonal cutters, I cut a very sharply angled end on the small line.
2. I generously lubricated the new line and the hole in the tank. I then took angled end of the new line and inserted it into the hole. Using a screwing type motion , I slowly worked it into the tank, using generous amounts of lubricant, until the line was far enough into the tank to grab from the fill hole with needle nose pliers. I then pulled and twisted until the line came out of the top of the tank.
3. I cut the angled end square at this point. I then inserted the filter into the larger tubing the cut about an inch longer than the filter Barb.I then lubed the larger line and the smaller line and pulled the line back into the tank from the bottom until the filter laid flat on the bottom of the tank.
4. At this point, I cut the end of the small line so that about an inch protruded from the bottom of the tank. I then re-lubed that line and inserted into a well lubricated length of larger line of sufficient length to reach the inlet on the carb.
About the carb: the donor of the machine had apparently attempted a rebuild. While it was very clean, he assembled it incorrectly. The metering diaphragm was pinched and he left off two of the four screws which held it together. I disassembled it, and using the correct parts assembled in the correct order, (there are parts for multiple applications included in the kit), mounted it back to the machine, and after about six or eight pulls, it roared to life. I did not get into the jets etc, because they seemed to work. This Walbro carb only has one inlet and no purge bulb, and after adjusting the carb it starts on the third pull every time using the choke as it was designed to.
Read less
Other Parts Used:
Was this helpful?
Thank you for voting!
installing fuel through fuel tank wall
10 of 17 people
found this instruction helpful.
To start, remove the plastic carburetor grill. DO NOT remove the carburetor. The fuel line has to be sliced down to fit through the tank hole and get it in far enough up into the tank to grab with needle nose pliers.( need long needle nose pliers which I didn't have) I placed about six inches of the plastic tubing in the jaws of vice so t
... Read more
hat half of the tube was squeezed in the vice jaws. I then used a razor blade to shave off the exposed tube. I slipped the shaved end of the tube up through the tank hole far enough to grab with long tweezers and pulled it up to where I could grab it in the tank with needle nose pliers. I put light lube oil on the remaining tubing and pulled it through. It takes a steady firm pull to pull it in. Install the filter and pull the tube back down into the tank. I also used a small diameter drill bit and with my fingers slightly reamed the tube ends to ease the tube over the filter and carburetor nipples. To prime the engine, spray starting fluid into the carburetor and start. Repeat until the engine will run on fuel. It took me hours to figure this out, but will take less than an hour with this method.
Read less
Other Parts Used:
Was this helpful?
Thank you for voting!