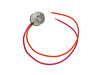
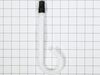
This sensor (Temperature Sensor, Thermistor, Refrigerator Temperature Sensor) sends the temperature reading of the compartment to the control board. If you notice your refrigerator is too warm, too co...
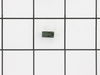
This defrost termination thermostat (Defrost Limiter Thermostat, High Limit Thermostat, Refrigerator Defrost Bi-Metal Thermostat) acts as a safety device to stop the evaporator coil from overheating, ...
This 10 by 5 inch ice maker (Electromechanical Icemaker Kit, Ice Maker Assembly) produces ice. This particular model will produce seven crescent shaped cubes every cycle. It is constructed of plastic ...
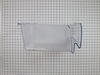
Also called Vegetable Drawer. It is a compartment located within a refrigerator designed to prolong the freshness of stored produce.
Crisper drawers have a different level of humidity from the rest o...
The interior light of your refrigerator is controlled by a switch that is activated when the door is opened and closed. If your refrigerator light will not turn on, there could be an issue with the sw...
This compression ring is meant to hold the evaporator fan motor in place in the freezer compartment of your refrigerator. This is is a genuine OEM part. The tools needed to complete this repair are a ...
The lid bumper or evaporator fan motor bumper in your refrigerator prevents the fan motor from scraping against the side bracket. If your refrigerator/freezer is noisy, the bumper could be worn down o...
This 40-Watt light bulb is sold individually and is a genuine OEM replacement option for your home appliances. It is specially designed to withstand extreme temperatures, so this bulb is compatible wi...
This evaporator fan blade is for your refrigerator, and it circulates air so that the temperature of the fridge is regulated. This model has 3 blades, and is a little more than 4 inches in diameter. I...
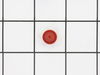
This is a replacement evaporator fan grommet for your refrigerator. The fan grommet absorbs the vibration from the evaporator fan motor for quiet operation while it runs. If your evaporator fan is unu...
This is a replacement set screw for your refrigerator door. The set screw attaches the door handle to the stud on the refrigerator door. The screw is approximately ¼ of an inch in length and unlike so...
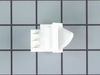
This part is the replacement drawer slide rail for your refrigerator. The crisper draw will slide in and out along this rail. If the rail is damaged or missing, the crisper will either hang from one s...
$19.17
In Stock
Questions And Answers for GDSL3KCYCRLS
We're sorry, but our Q&A experts are temporarily unavailable.
Please check back later if you still haven't found the answer you need.
1 question answered by our experts.
Sort by:
< Prev
1
Next >
Search filter:
Clear Filter
Your search term must have 3 or more characters.
Keep searches simple. Use keywords, e.g. "leaking", "pump", "broken" or "fit".
Sorry, we couldn't find any existing answers that matched.Try using some different or simpler keywords, or submit your new question by using the "Ask a Question" button above!
Barbara
March 8, 2023
Can't open the bottom freezer door. It's stuck
For model number GDSL3KCYCRLS
Hi Barbara, thank you for reaching out. Based on our research, first, we would recommend checking that the door gasket surface is fully cleaned and that no obstructions are present on it because sometimes an obstruction on the gasket surface makes it difficult to pull and open the door. Try to press your finger into the inside of a corner of the door seal to release some suction; this makes it easier to open the door. There might be ice buildup around the gasket, beneath the door, and in the slide rails. Put hot water in these areas to clean the parts, and this helps you open the door easily. If this does not solve your problem, most likely the issue is with the slide rail holder kit, part number PS8768480. If this is bad or broken, replace it. Thank you for your inquiry, good luck with this repair!
The freezer in my side-by-side kept warming up -- often 20 degrees or more, which of course caused the fresh food side to warm up also. I do a lot of jump-in-with-both-feet home repairs, but never on a large appliance. Not having an ohmmeter, which cost about $100 for a reliable one, I took the symptoms to the internet. Countless self-hel
... Read morep sites and U-Tube videos later, I was positive it was one of two possible problems, either the defrost thermostat was broken and the defroster wasn't coming out of its cycle or the temperature sensor wasn't reading the correct temp and thus kicking in the fan motor when needed. Fortunately I found both parts easily on PartSelect.com and the total cost for both, including shipping, was $30, less than 1/3 of the cost of an ohmmeter. Not knowing for sure which part it was that was bad, I ordered both, figuring, since I had to pull out the panel anyway, I might just as well replace them both ... the price was right. (In retrospect I should have order 4 Temperature Sensors as my fridge has two in both the freezer side and the Fresh Food side. Any one of them being bad could have caused the same problem. Fortunately, I was lucky because it was either ONLY the Defrost Thermostat or I just happened to pick the right Sensor, but the repair worked.)
The repair was easy: Unplug the power. A Nut Driver removed the four screws holding on the panel in the back of the freezer. A screw driver removes the one screw holding the lamp cover in place. Remove the light bulbs, pull off the panel and right above the freezer coils you'll see both parts -- plain as day. (If your coils are clogged with ice, you will probably need de-ice first.) Cut the wires to both parts as close to the parts as you can to leave as much wire exposed as possible. Strip the ends of all four wires about 1/2 inch and also on the new parts. Match up the wires in the fridge to the wires on the parts and twist the ends together (Note: both wires on the Sensor are white so they match up either way, but the two wire on the thermostat will need to match up orange to orange and pink to pink.) I used silicone filled wire nuts, which you can buy at any hardware store or use your own wing nuts and fill them with silicone or shoe goo which works just as well ... anything to keep the moisture out and prevent the wires ends from corroding. Tuck the wires up and replace the panel, light bulbs and light cover That's it. Very easy. By far the hardest part was wedging my wide body into the narrow freezer compartment. Some one-handed work added a little extra time to the project.
In my case the freezer fan didn't kick in for about twenty minutes after I plugged it back in, but I assume that it either begins in the defrost mode or it takes that long for it to reset itself ... either way the repair worked great.
I went to a GE repair center to explain my problem, the service center reccomended that I have a techinician come out o look at it. $75.00 for the visit and what ever labor and materials wuld cost.
I went on line to see if there were others having this same problem and found that there were many with the same problem.
... Read more />After reading some of the ways that people found out what was wrong ...it became a matter of three components, the timer, heater or thermostat.
I tried the most common component and the less expensive one first , the thermostat switch I installed it very easily snipping two wires and attaching the news using wire nuts I used the diagram on this website to pinpoint the component and there has not been a problem since.