


Models
>
PFWS4600L0WW
PFWS4600L0WW General Electric Washer - Overview
Sections of the PFWS4600L0WW
[Viewing 5 of 5]


Manuals & Care Guides for PFWS4600L0WW
Click to downloadKeep searches simple, eg. "belt" or "pump".

PUMP
PartSelect #: PS16743374
Manufacturer #: WH11X34740
The drain pump removes water from the washer during the drain portion of the cycle.
$93.26
In Stock


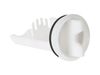
Door Strike
PartSelect #: PS2322437
Manufacturer #: WH01X10356
This part is the replacement door plunger or door strike for your washer. It is made of white plastic and is approximately 2 inches by 1.5 inches. The door strike attaches to the washer door and activ...
No Longer Available


Questions And Answers for PFWS4600L0WW
We're sorry, but our Q&A experts are temporarily unavailable.
Please check back later if you still haven't found the answer you need.
Sort by:
- < Prev
- 1
- Next >
Search filter:
Clear Filter
Your search term must have 3 or more characters.
Keep searches simple. Use keywords, e.g. "leaking", "pump", "broken" or "fit".
Sorry, we couldn't find any existing answers that matched.Try using some different or simpler keywords, or submit your new question by using the "Ask a Question" button above!
Alejandro
December 10, 2019
When spinning, why does my washer violently shake and move? And does the front panel require removal to fix this? Thanks you
For model number PFWS4600L0WW
Hello Alejandro and thanks for writing.
Washing machine is not level – A shaking/vibrating washer is most commonly caused by the washer not being level. If the washer is slightly tilted to one side, the washer can shake and move around when running the spin cycle. There may be missing or damaged leveling legs.No, you do not have to open the front panel for this fix. We hope this helps. Please contact us anytime.
1 person found this helpful.
Was this helpful?
Thank you for voting!
- < Prev
- 1
- Next >
Common Symptoms of the PFWS4600L0WW
[Viewing 4 of 4]Leaking
Fixed by
these parts
these parts


Show All
Lid or door won’t close
Fixed by
these parts
these parts


Show All
Will not drain
Fixed by
these parts
these parts

Show All
Will Not Start
Fixed by
these parts
these parts
Show All

Keep searches simple. Use keywords, e.g. "leaking", "pump", "broken" or "fit".
"Door Locked" light always on. Washer would not run
Remove bottom kick plate of washer. Remove 4 screws behind door that hold the latch/lock assembly. Reach up inside the washer from underneath to unplug 3 wire connectors. (This is a very tight spot). Once wires are off, part comes right out. Connect wires to the new part - this is by far the most difficult part of the job because it
... Read more
is way up inside the washer. Replace all bolts.
Overall, pretty easy to do - just reconnecting the wires is a pain, but if you are patient it is not a big deal.
Overall, pretty easy to do - just reconnecting the wires is a pain, but if you are patient it is not a big deal.
Read less
Parts Used:
-
Robert from Dallas, PA
-
Difficulty Level:Easy
-
Total Repair Time:15 - 30 mins
-
Tools:Nutdriver, Screw drivers
36 of 56 people
found this instruction helpful.
Was this instruction helpful to you?
Thank you for voting!
Door plunger broken so could not lock.
Part came quickly, was exactly what I needed, 2 minutes later, washing clothes again.
Parts Used:
-
Scott from Spring Branch, TX
-
Difficulty Level:Really Easy
-
Total Repair Time:Less than 15 mins
-
Tools:Screw drivers
7 of 9 people
found this instruction helpful.
Was this instruction helpful to you?
Thank you for voting!
Washer stopped during wash cycle and wouldn't open.
Removed three 7mm sheet metal screws from the bottom front panel.
The drain pump is in the front right.
Removed the manual drain screen to drain residual water from the system. A bucket was necessary to collect all the water.
Disconnected the inlet and outlet hose.
Disconnected the electric supply.
Removed two Phi ... Read more llips screws holding the pump to the bottom of the machine.
Slid the pump towards the rear to clear the support pegs and removed it from the front opening.
Installation is the reverse of those steps.
Read less
Parts Used:
-
Jason from HARRIMAN, TN
-
Difficulty Level:Easy
-
Total Repair Time:15 - 30 mins
-
Tools:Nutdriver, Pliers, Screw drivers
7 of 9 people
found this instruction helpful.
Was this instruction helpful to you?
Thank you for voting!