This genuine OEM washer has a 3/4 inch outside diameter. This thrust washer can be used on most makes and models of dryers. A complete list of compatible dryers is available below. The washer is found...
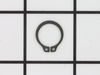
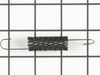
The metal retaining ring, which is under an inch long, holds the rear wheels on the axels of the dryer. The main reason why it would need to replaced is if the retaining ring has sprung out of place o...
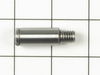
This is a multi-use and multi-appliance screw. It can be used on a microwave, refrigerator, range/oven, air conditioner, dehumidifier, washer, or dryer. The measurements of this screw are 8 x 1/2 inch...
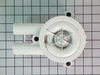
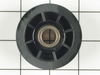
This pump is attached to the motor and helps expel water from the washing machine. It is activated after the spin speed is maintained for a specific period of time.
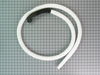
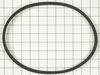
This hose clamp is used in a wide variety of household appliances. Most often it is found in washers, dishwashers, refrigerators, freezers, dehumidifiers, garbage disposals, or air conditioners. This ...
If your washer shakes or vibrates loudly when it reaches its max speed, make sure the 4 levelling legs are even. Adjust the legs so that the machine is level, and tighten the locking nuts on the legs ...
The hose clamp is used to hold the water hose in place which will prevent the hose from leaking water. Sometimes the clamp may lose its ability to latch on, causing a leaking washer. For the installat...
Water was leaking on the floor during the wash cycle and especially during draining of the washer. I removed the front panel at ground level and watched while draining after a rinse.
I t was obvious that water was spraying from a hole in the rubber end of the hose (the hose is a fused assembly of a plastic section and a rubber
... Read more section).
So, I finished draining, removed the hose (required pliers to squeeze off a hose clamp).
Upon inspecting the hose, it was also apparent that the hole was caused by rubbing against a support bracket for the motor. This should not happen, but it did because the plastic standoff supposed to keep the hose away from the bracket was installed 180 degrees backwards.
So, I simply replaced the hose and turned the bracket around to the correct orientation.
Everything worked as planned and my repair cost was much less than if I had called someone out.
Removed the front of the washer, then lifted the top up and held it up with a prop. Pulled the agitator straight up and started the disasembly. Using the photos in the hub and seal kit was a big help. The large nut on the output shaft had to be cut off with my dremel tool and the hub removed with a wheeler puller. Assembly was pretty
... Read moremuch straight forward. Primed the pump and started the machine for the stated time and was a sucess.
firsted layed washer back On A Angle For Easy Acess To Motor Removed Both Hoses And Four bolts pulled Motor Assembly out replced belt @ idler Pulley Reinstalled Motor.


.gif "MISCELLAEOUS INFORMATION Diagram and Parts List for PLWD70AW Amana Washer")