


Models
>
5KSB1340CPA0
5KSB1340CPA0 Whirlpool Blender - Overview
Sections of the 5KSB1340CPA0
[Viewing 2 of 2]

Keep searches simple, eg. "belt" or "pump".

Dome and Blade Assembly
PartSelect #: PS11746926
Manufacturer #: WP9704291
This is a replacement dome and blade assembly for your blender. This part connects to the bottom of the blender, and contains the blade. When the blender is running, the blade will rotate to chop any ...
$88.98
In Stock


Questions And Answers for 5KSB1340CPA0
We're sorry, but our Q&A experts are temporarily unavailable.
Please check back later if you still haven't found the answer you need.
Common Symptoms of the 5KSB1340CPA0
[Viewing 1 of 1]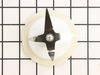
Keep searches simple. Use keywords, e.g. "leaking", "pump", "broken" or "fit".
blade wouldn't rotate
All I had to do was replace the part! Service was excellent! Ordered the part and had it the next day and my blender was up and running!!
Parts Used:
-
Nora from Lodi, OH
-
Difficulty Level:Really Easy
-
Total Repair Time:Less than 15 mins
12 of 21 people
found this instruction helpful.
Was this instruction helpful to you?
Thank you for voting!
Blades On Blender Locked Up
Piece of cake. Part was expensive and shipping likewise. Very fast
Parts Used:
-
PAUL from LAWRENCE, KS
-
Difficulty Level:Really Easy
-
Total Repair Time:Less than 15 mins
4 of 10 people
found this instruction helpful.
Was this instruction helpful to you?
Thank you for voting!
Slow, Intermittant Discharge
First I disconnected the washer and used a shop vac to suck out remaining water throught the effluent tube. I then pulled the washer out from the wall and opened up the panel in the back where I saw a penney in the baffeled catch basin and, a wad of lint wrapped around what looked like three 7" wires. I opened up the top with the putty
... Read more
knife and flipped it bacl. I then proceded to remove the top sections of the tub (soap/bleach dispenser, etc) then I removed the dome using a stubby screwdriver to 'pop' the internal catches. The next thing to come out was the perforated baffel. I could see the blockage through the drain holes in the bottom of the tub. I made a hook out of a coat hanger to extract the wad and 'wires'. Also, a pair of needle nose plires were used to pull the wires through the tub holes. Rhe unit was then re-assembled and has worked fine since. The 'wires', it turned out, were identified by my wife as the wires from some of her underwire bras! They will get handwashed henceforth!
Read less
Parts Used:
-
DAVID from GLEN MILLS, PA
-
Difficulty Level:A Bit Difficult
-
Total Repair Time:More than 2 hours
-
Tools:Nutdriver, Pliers, Screw drivers
4 of 27 people
found this instruction helpful.
Was this instruction helpful to you?
Thank you for voting!