The “Icemaker Control Assembly” (Module & Motor Assembly, Ice Maker Control Module, Icemaker Module, Refrigerator Ice Maker Module) is what controls the actions of your ice maker. The control turns th...
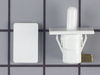
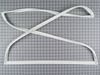
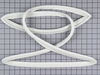
This door shelf end cap set contains two white end caps. Each end cap can be used as either the right or the left side. These end caps also come with adhesive strips and an instructions sheet.
This condenser fan motor kit is designed for use with refrigerators. This fan draws air through the condenser coils and over the compressor. It does this with the goal of cooling the warm refrigerant ...
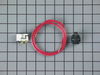
The icemaker water fill tube provides water to the icemaker so it can produce ice and dispense water. If you notice that your ice maker is not making or dispensing ice, or is leaking, you may need to ...
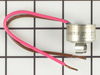
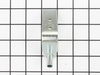
This is a bimetal defrost thermostat for your refrigerator. It stops the fridge from overheating during the defrost cycle by protecting the evaporator. This clip-on thermostat will sense the temperatu...
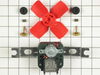
The single water inlet valve, also known as a water solenoid valve, is used for refrigerators. This part is a solenoid-operated switch that releases water from the supply line to the water valve and i...
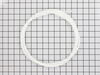
This refrigerator ice maker fill cup dispenses the water into the ice cube mold during the fill cycle. Replacing the water fill cup is a possible solution if you notice that the ice maker is leaking, ...
This is the replacement water tube kit for your refrigerator. This tubing is made of plastic, is 1/4 inch in diameter, and comes with 2 inserts. This tube may be longer than the original tube, and may...
The evaporator is found in the back of the freezer. This kit comes with two mounting grommets, two sleeves (not to be used on porcelain models), two #8 mounting screws, and a push-on fan blade. If you...
This touch-up paint can be used on a wide variety of household appliances. It is most often used on washers, dryer, refrigerators, dishwashers, ranges, freezers, trash compactors, or microwaves. It is...
$8.00
In Stock
Questions And Answers for ET20DMXBW00
Ask our experts a question about this model and we'll get back to you as soon as possible!
1 question answered by our experts.
Sort by:
< Prev
1
Next >
Search filter:
Clear Filter
Your search term must have 3 or more characters.
Keep searches simple. Use keywords, e.g. "leaking", "pump", "broken" or "fit".
Sorry, we couldn't find any existing answers that matched.Try using some different or simpler keywords, or submit your new question by using the "Ask a Question" button above!
Doug
December 12, 2022
ICE MAKER LEAKING WATER BAD.
FILLED TRAY AND THEN SOME
For model number ET20DMXBW00
Hi Doug, thank you for reaching out. You need to check the water inlet valve, part number PS11740365, and the icemaker control assembly, part number PS2341896. We hope this solves your problem! If you need help placing an order, customer service is open 7 days a week. Thanks again for your great question.
removed flap door in front of icemaker...removed 3 screws with bolt heads...removed one additional screw with bolt head and ice unit slid out. I removed motor unit (pops out no screws). Replaced and had ice within 3 hours.
Unplug the appliance. Removed the screws holding the back panel. Removed the fan blade. removed 3 screws holding the condenser fan. Remove the 3 metal brackets attached to the fan. (First note which studs the brackets are attached to. Attach the 3 metal brackets to the new fan. (New screws were supplied) Cut
... Read moreand strip the wire about two inches from the fan. Cut and strip the new wire. I cut the new wire in half (about 6 inches.) Connect the two wires, twist and used 2 wire nuts. Tie wrap the wire to the wire harness. Mount the new fan (three screws) Screw the back panel back on. Mount the new
With socket wrench un-screwed the 3 screws and pulled out the ice maker assembly.
Pulled off white plastic end-cap and noticed the plastic gear disk had snapped off (sub part # R0167202)
However, it is all-one-part of the motor assembly unit # w10190935 (part # PS2341896) which must be ordered as a complete part.
... Read more /> Unscrewed the motor assembly (3 screws) with phillips head screw driver.
Screwed in the new unit.
Placed ice maker back into location and tightend the bacing srews.