


Cake Decorating Like a Pro:
Celebrations and parties wouldn’t be complete without a festive cake. And while they’re extremely tasty, cakes also double as amazing canvases for creativity. These days, cake decorating has become an art, highlighting the creative potential of food. Furthermore, a decked-out cake is a magnificent way to emphasize a theme, holiday, or event.
Typically, fondant, buttercream, and sugar decorations are used to create a one-of-kind edible creation. There are endless combinations: think of it like paper and scrap-booking. Luckily, you don’t have to be a professional baker to spruce up a cake. This complete guide will get you started right in your own home.
Cake Decorating Tools
https://www.realsimple.com/food-recipes/tools-products/cookware-bakeware/cake-decorating-suppliesWhile it’s tempting to get your hands right into the frosting and sprinkles, there are essential tools for performing the standard techniques. In some cases, you can use ordinary items from your own kitchen as decorating tools. It all comes down to knowing the function of the basic equipment. From there, you can experiment with alternatives. And as with many creative activities, the necessary tools depend on the material – in this case, the type of icing. Choose the tools that serve your design plans best.
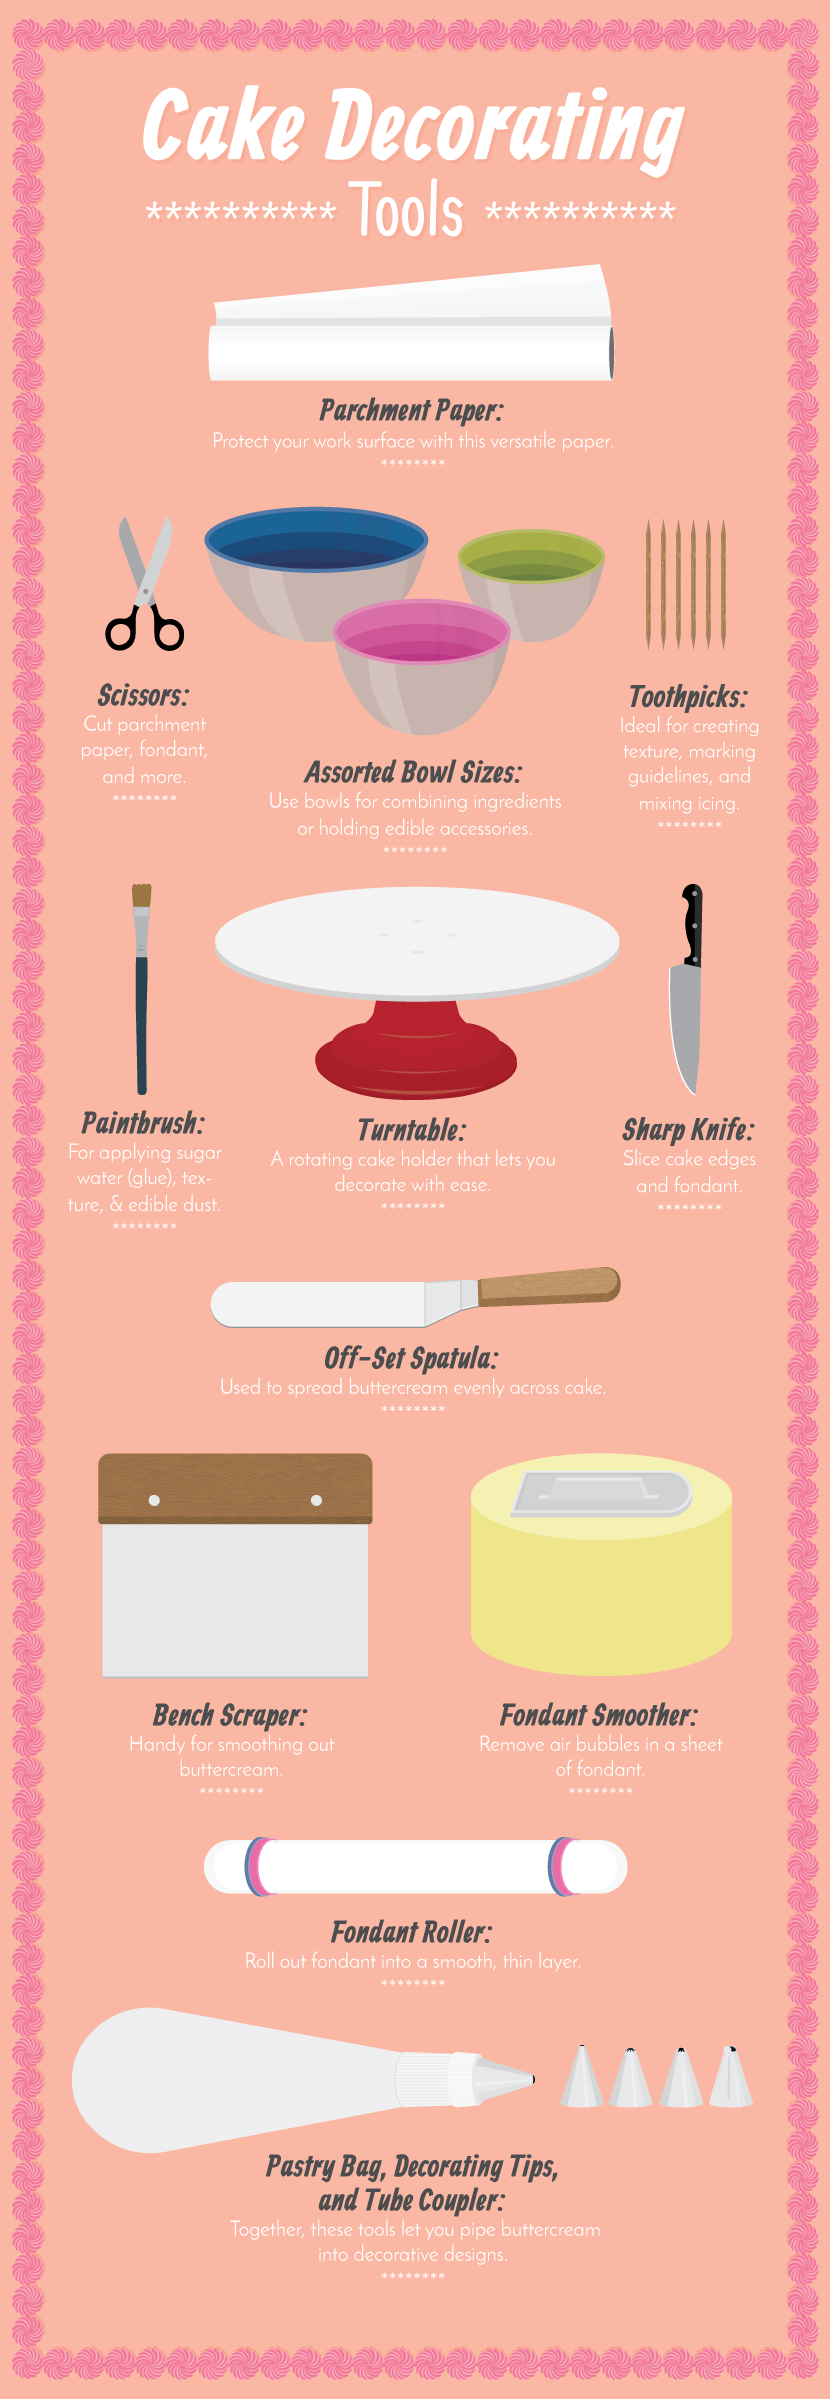
Parchment Paper: It’s not just for lining cake pans! As a versatile kitchen component, parchment paper is handy for protecting your work surface. It provides a clean, smooth area for your ingredients.
Turntable: Also known as a lazy Susan, this tool is a cake holder that rotates, allowing you to work on all sides of the cake with ease.
Scissors: This useful tool can be used to cut parchment paper, fondant, and more.
Bowls: Keep an assortment of bowls and containers in different sizes nearby. These are exceptionally suitable for mixing frosting or housing edible accessories while you work.
Toothpick: A toothpick serves as the perfect tool for creating texture, indentations, and guides. It’s also perfect for mixing colors into icing.
Offset Spatula: The elongated surface of an offset spatula covers more surface area that a normal spatula. This one is used to spread buttercream evenly across a cake.
Bench Scraper: After buttercream has been spread out, a bench scraper can smooth it further.
Pastry Bag, Decorating Tips, and Tube Coupler: The top edge of a pastry bag has a wide opening so it can be easily filled with buttercream; the opposite narrow end has a small hole. A decorative tip is attached to this end and secured with a tube coupler. Decorative tips are available in different shapes, each one producing a unique design.http://oldrecipebook.com/cakedecoratingtools.shtml
Sharp Knife or X-ACTO® Blade: These simple tools are ideal for slicing cake edges and fondant. They can also be used for creating texture and indentations.
Fondant Rollers: Rollers made specifically for fondant have smooth, firm surfaces. They’re essential for rolling fondant into a layer that is thin enough to work with. Unlike traditional wooden rolling pins, fondant rollers won’t leave grooves or lines.
Fondant Smoother: After applying a sheet of fondant, a fondant smoother can be used to remove pesky air bubbles.
Paintbrush: A basic craft paintbrush is useful for adding sugar water (“glue”) and applying edible glitter or powder. It can also be used to create texture.
Time to Decorate!
If you’re decorating a cake for a huge event, do a test run. This will give you the chance to practice techniques and get to know the tools. You’ll be glad you did. Don’t forget to use the internet to your advantage; there are many video tutorials and guides available around the web.

Frosting
Buttercream Frosting Recipe
Known for its rich and soft texture, buttercream is easy to pipe and spread. And while it can be purchased at the grocery store, it’s extremely easy to make at home.https://www.craftsy.com/blog/2013/12/buttercream-vs-fondant/ Since many prefer the sweet taste of buttercream, it’s often the go-to for both fillings and decoration. It also provides a surface for fondant to stick to. Here’s how to make homemade buttercream.
Ingredients:
- 1 cup unsalted butter, softened
- 3 cups confectioners’ sugar
- ½ to 1 teaspoons clear vanilla extract (to taste)
How-To:
- 1. With an electric mixer, beat the butter at medium speed until smooth.
- 2. Slowly add the sugar in increments, mixing at low speed.
- 3. Add the vanilla and mix at medium speed until thoroughly combined.
Adapted from The Kitchn
Tips:
- Use clear, not brown, vanilla extract to make a pure white buttercream. This will create an ideal base for adding color.
- Buttercream is susceptible to heat and humidity. Work in a cool, dry area.
- If the buttercream is too thin, add more confectioners’ sugar. If it’s too tough, bring in milk or water.

Classic Fondant Recipe
While it may sound like a fancy treat, fondant is made of simple ingredients. This smooth and sweet candy dough is similar to clay and is placed over buttercream. It’s exceptionally fun to shape and mold. And while it’s a little tricky to work with, it offers so much design potential.
Once applied to a cake, fondant stays put and does not budge easily. Like buttercream, it can be purchased in the store or made at home. Ready-made versions can be purchased by roll or in a tub; the latter needs to be rolled out into a thin sheet. Fondant can also be made at home, but requires at least one hour. If you’re up to the challenge check out this recipe.
Ingredients:
- 2 cups granulated sugar
- ½ cup water
- 2 tablespoons corn syrup
How-To:
- 1. Over medium heat, combine sugar, water, and corn syrup.
- 2. Stir the mixture until the sugar dissolves completely.
- 3. Bring to a boil.
- 4. Do not stir the mixture as the corn syrup cooks.
- 5. Use a candy thermometer to check the temperature. Once it reaches 234-240 degrees F, pour the mixture onto clean, hard surface that has been sprinkled with water. A baking sheet or marble countertop are ideal options.
- 6. Let cool for 3 minutes.
- 7. Dampen a wooden spoon or fondant smoother with water. Vigorously work the fondant by pushing it around in a figure-eight pattern. It will begin to cream and become opaque.
- 8. Once it becomes stiff, knead it like dough with moistened hands.
- 9. Eventually, it will become smooth and stiff. Your fondant is now ready.
Tips:
- Make sure your hands are free of dirt and debris before handling fondant.
- If you mess up while working with a fondant shape, just roll it up and try again.
Adapted from About Food and Food Network.

Royal Icing Recipe
Royal icing is a type of frosting that starts out soft and hardens over time. The finished texture is dry and firm, making it a travel-friendly choice. However, royal icing is primarily used for decoration and doesn’t have much flavor. Here’s how to make it.
Ingredients:
- 2 cups confectioners’ sugar
- 1 large egg white
- ½ teaspoon water or 1 teaspoon vanilla extract
How-To:
- 1. Combine sugar, egg white, and liquid in a bowl.
- 2. Mix with a wooden spoon or electric mixture until smooth and thick.
Adapted from Food Network and Real Simple.
Tips:
- If the icing is too thick, add a small amount of water.
- Use the “10 second rule” to determine if your icing is ready. Drag a butter knife across the surface. If it takes more than 10 seconds to smooth over, add a bit of water. If it takes less than 5 seconds, add some sugar. If it takes 5-10 seconds to become smooth, it’s ready.

Food Dyes
Since basic frosting is white, you have the freedom to liven things up with concentrated edible dyes. And much like mixing paints, different color combinations will yield different hues. It’s enough to make any color theory nerd swoon.
Gel or Paste: Available at grocery and craft stores, this option is ideal for fondant. A little goes a long way.
Liquid: With a lighter consistency than gel and paste, liquid dye is excellent for buttercream. It’s also available at grocery and craft stores in batches of primary colors. Combine with buttercream using a toothpick. Learn more abouthow to color icing for all your baking needs!
Tips:
- Avoid adding more vanilla extract (regular or clear) to the icing. This may alter the finished shade.
- Need help creating the perfect color? Refer to a color-mixing guide designed just for icing.

Edible Acccessories
You can upgrade your cake with ready-made edible accessories. They can add intriguing texture, eye-catching details, and extra dimension. And since they’re usually made of sugar and food coloring, edible accessories can be found in a wide assortment of shapes, colors, and finishes.
Royal Icing Decorations: These firm, tasteless shapes are available in shapes like pumpkins and flowers. They are sturdy and dry.
Piping Gel: This colored gel comes in a small plastic tube. It’s handy for creating words, patterns, and drawings.
Sprinkles: Aside from the traditional “jimmies,” you can find sprinkles in a wide variety of shapes and colors. Many bottles of themed sprinkles contain an assortment of different sprinkles.
Dust: Edible dust is amazing for adding a fairy-like, metallic finish. It can be brushed or sprinkled onto a cake.
Glitter: Often made of colored sugar crystals, edible glitter is another superb option for adding sparkle and shine to your creation.
Pearls: Small and shiny round “beads” made of sugar are known as edible pearls. They’re frequently used to create borders or jewel-like details.
Edible Photos: Pre-made edible photos of sports teams and cartoon characters can be found around the web and in stores. Alternatively, you can order a custom-made version that, for example, displays an image of the celebrant or a team mascot.
Now that you’re armed with pro-level knowledge, all you need is some practice. Don’t be afraid to experiment with small cakes in the comfort of your own home. Before you know it, you’ll be transforming cakes into beautiful works of art.


Find out which cut of ribs to buy and how to prepare them, as well as our r...

A properly opened bottle of Champagne or sparkling wine should let out a si...

Nothing beats the convenience of adding a shot of cream that also sweetens ...
