


Deep Clean Your Chest Freezer
Did you know that frost and ice buildup can affect the efficiency of your freezer? If your freezer isn’t running efficiently, it can lead to fluctuations in temperature, which in turn can lead to damaged or spoiled food. Having a properly cleaned and maintained chest freezer is the best way to ensure the quality of your food isn’t negatively impacted.

Step One: Remove the Food
The first step is to remove all the food from the freezer. The food should be kept in iceboxes or coolers so that it stays cold. If you don’t have access to those, cardboard boxes will also work, but you may want to wrap them in some blankets for extra insulation. When removing items from the freezer, inspect them for signs of damage like freezer burn. Typically, there will be a layer of frost or ice crystals on the surface if the food has freezer burn. Another sign is if the food looks dried out or shriveled up.
Freezer burned food is still safe to eat, but it won’t taste the same - the flavor, texture, and color will all likely have changed for the worse. To prevent future freezer burn, make sure you are properly wrapping and storing your food in the freezer. Use designated containers, bags, or wraps, and ensure that any air has been removed from the packaging. A vacuum sealer can be a great choice if you regularly freeze a large quantity of food.

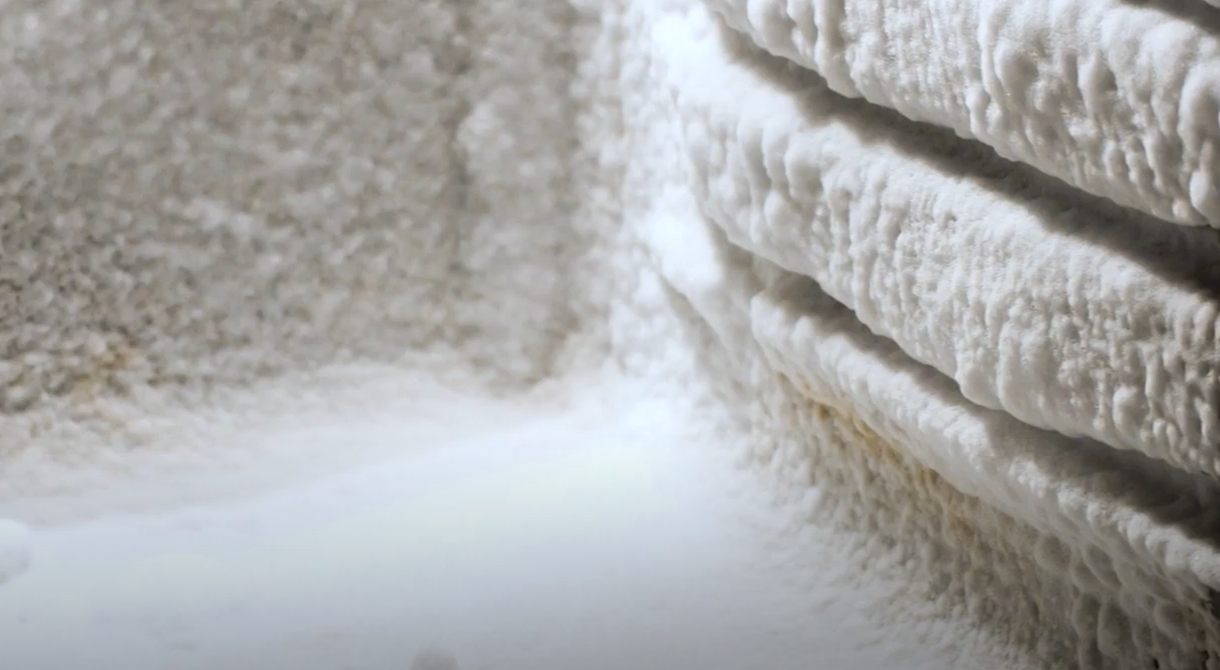
Step Two: Defrost the Freezer
Once the freezer has been emptied, it can be defrosted. If there is a large buildup of frost on the interior liner, you may be tempted to use a heat gun or a putty knife to scrape it off. We do not recommend you use these tools – just let it melt on its own! A hairdryer set to a low heat setting may be used to help speed up the process. A heat gun is much too powerful and will damage the interior lining of your freezer, whether it is plastic or metal. A putty knife can also damage the surface of the liner, or potentially puncture the refrigeration lines which would render your freezer useless. When any ice or frost has melted, remove the plugs and drain the water from the freezer.
Step Three: Clean the Main Compartment
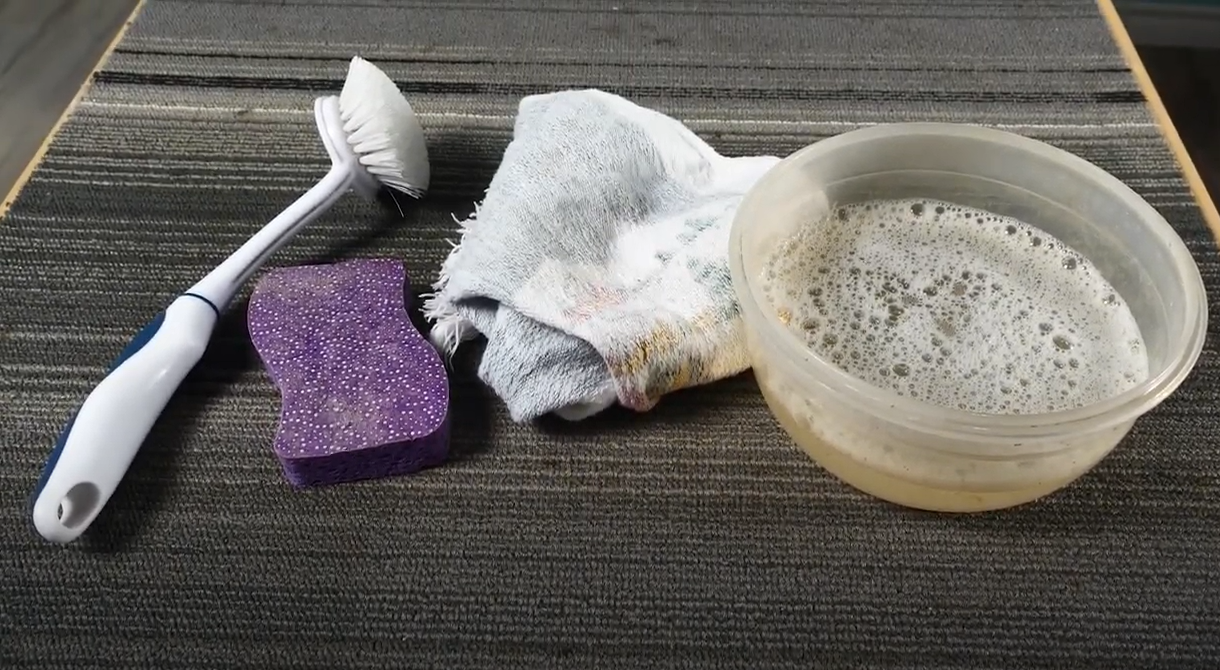
To clean the interior of the freezer, simply use dish detergent and warm water with a soft scrub brush or washcloth. Start with the top area of the freezer opening, then the interior walls, and finish at the bottom. Once it is thoroughly scrubbed, it should be rinsed well with freshwater, in the same top to bottom order. Unless the food has leaked inside the freezer, this step shouldn’t require much elbow grease.
Step Four: Clean the Lid Liner and Gasket
Next, we’ll turn our attention to the lid liner and the gasket. Carefully inspect the gasket for any signs of deformity or damage and replace it if necessary. This will ensure your freezer door keeps a tight seal. Then look over the lid liner for any cracks, repairing or replacing if necessary. Once the lid has been inspected, it can be cleaned up. The same soap and water mixture, or a spray-on cleaner can be used here along with a soft cloth or sponge.

Step Five: Clean the Freezer Exterior
The exterior surface of the freezer can be cleaned with the dish detergent and water solution, or with a spray-on cleaner that is safe to use on painted surfaces. Give it a good wipe down and leave it to dry.

Step Six: Clean the Freezer Grill
On chest style freezers, there is likely a grill on the side of the freezer located next to the compressor. Give it a look over to make sure there is no debris or lint buildup. If so, it will need to be cleared out so that air can flow freely over the compressor to keep things running smoothly.

Step Seven: Turn the Freezer Back On
With all the components cleaned up, both the exterior and interior drain plugs can be put back in place. Once that is done it is safe to turn the freezer back on. The frozen items you stored in the icebox should be able to be placed back inside the freezer after it has been running for half an hour.
If you need replacement freezer parts, you can find them by searching for your model number on our site. Be sure to follow our YouTube channel so you stay up to date on all our repair tips!


New appliances not in the budget? We'll show you how to deep clean your ran...
Keep your freezer ice-cold and free of frost by checking these most common ...

Don't let a power outage ruin your good food! Stay safe with these tips.
