Wall Oven Switches
- Search your model number to find:
- Genuine OEM parts guaranteed to fit
- Free manuals and guides
- Repair instructions and videos
Popular Wall Oven Switches
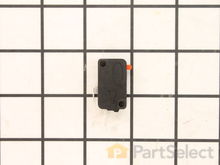
Wall Oven Primary Door Interlock Switch
PartSelect Number PS237015
Manufacturer Part Number WB24X10047
This interlock switch is located in the door latch.
Fixes these symptoms
- Doesn’t shut off
- No heat
- Tray won’t turn
- See more...
Installation Instructions
Steven from Manassas, VA
Microwave not heating
Rmovd top vent screen. Removed control panel. Removed fuse cover panel. Replaced fuse. Removed housing of door switches. Removd wiring from door switches and and removed door switches from housing. Replaced with new switches and re-connectd wiring. Re-attached panels.
Read more...
Your Price
$23.69
In Stock
Wall Oven Lid Switch
PartSelect Number PS11723153
Manufacturer Part Number W10820036
This 3 prong lid switch is used for washing machines that do not have a tub light.
Fixes these symptoms
- Will not agitate
- Will not drain
- Will Not Start
- See more...
Installation Instructions
Peter from Westbury, NY
washer would not start
To see if the lid switch was the problem I first jumped it out and tried to start the washer. That was the problem. I removed the main controll so I could get to the lid switch. I made the mistake of removing the screws all the way out and the metal clip fell into the body of the washer, no problem since I was changing the drive beld anyway. I realized that you do not remove the screws all the way out, you just have to loosen them and then slide out the lid switch & then replace it.
Read more...
Wall Oven Surface Burner Infinite Switch - 240V
2. Unscrew all four plastic "nuts" found under each knob holding front
panel to stove.
3. Lift front panel off.
4. Removed all Phillips screws holding metal shield to which control
switches are fastened.
5. Lift entire assembly up.
6. Remove two screws holding bad switch to metal shield.
7. BEFORE REMOVING ANY WIRES LABEL EACH WIRE
ACCORDING TO CODE EMBOSSED ON BACK OF BAD
SWITCH. These will be H1, H2, L1, L2 and P. They are not in
the same place on the new switch as they are on the old one.
The reason for labeling is that in case you make a mistake you
have this back-up to go by. Also to double check your finished
job.If just one wire is connected to the
wrong terminal a disaster will happen.
8. Remove each wire, one at a time from the old switch and connect
it to the correct terminal on the new switch as indicated by the
codes on the back of the new switch. When done double check
to be certain the labels on each wire match the code for the
connected terminal.
9. Slide furnished bushing onto the new switch.
10. Insert new switch through the back of the metal shield and attach
with the supplied screws. The old screws were too short in my
case so be certain to use the ones supplied with the new switch.
11. Re-attach the shield assembly to the stove.
12. Install the front panel back over the switch stems.
13. Secure the front panel with the four plastic nuts.
14. Install the control knobs.
15. Test the new switch. Read more...
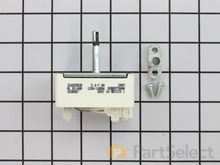
PartSelect Number PS2350014
Manufacturer Part Number 903136-9020
This is a 240-volt surface burner infinite switch for a range or oven. It is for an 8-inch element. This part turns your surface element on and off, and regulates the desired heat of your element. The switch is made of off-white plastic and metal.
Fixes these symptoms
- Element will not heat
- Oven not heating evenly
- Will Not Start
- See more...
Installation Instructions
Ronald from FRENCH VLG, MO
No power to burner until after dial setting 3 reached and would not reach highest setting.
1. Remove all four control knobs.2. Unscrew all four plastic "nuts" found under each knob holding front
panel to stove.
3. Lift front panel off.
4. Removed all Phillips screws holding metal shield to which control
switches are fastened.
5. Lift entire assembly up.
6. Remove two screws holding bad switch to metal shield.
7. BEFORE REMOVING ANY WIRES LABEL EACH WIRE
ACCORDING TO CODE EMBOSSED ON BACK OF BAD
SWITCH. These will be H1, H2, L1, L2 and P. They are not in
the same place on the new switch as they are on the old one.
The reason for labeling is that in case you make a mistake you
have this back-up to go by. Also to double check your finished
job.If just one wire is connected to the
wrong terminal a disaster will happen.
8. Remove each wire, one at a time from the old switch and connect
it to the correct terminal on the new switch as indicated by the
codes on the back of the new switch. When done double check
to be certain the labels on each wire match the code for the
connected terminal.
9. Slide furnished bushing onto the new switch.
10. Insert new switch through the back of the metal shield and attach
with the supplied screws. The old screws were too short in my
case so be certain to use the ones supplied with the new switch.
11. Re-attach the shield assembly to the stove.
12. Install the front panel back over the switch stems.
13. Secure the front panel with the four plastic nuts.
14. Install the control knobs.
15. Test the new switch. Read more...
Your Price
$57.14
In Stock
Wall Oven Range Infinite Burner Switch - 8 Inch
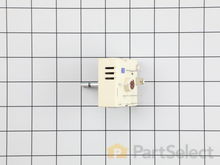
PartSelect Number PS11744487
Manufacturer Part Number WP7403P239-60
This infinite switch is for 8-inch range burners. When an element is unable to produce any heat on a modern oven, the problem may lie with the infinite switch. This switch is responsible for sending power to the surface elements. Check the element and terminal block to ensure they are working properly. If they are in working order, check the infinite switch at the control panel for any wires that have overheated, or broken terminals to or from the infinite switch. If the infinite switch is damaged or malfunctioning, it will need to be replaced. Remember to unplug your range before beginning this repair.
Fixes these symptoms
- Element will not heat
- See more...
Installation Instructions
Dennis from Hagerstown, MD
The Burner was getting too hot and you could not regular the tempature
Moved the Appliance out unplugged it and removed the backing plate then Remove the Knob and unscrew the infinite switch then marking the 5 wires to know where the go on the new switch, removing and replaced it with the new one
Read more...
Wall Oven Surface Burner Infinite Switch Kit
disassembly than actually necessary. Turns out, simply removing the
threaded plastic securing rings around the bases of the controls frees
up the faceplate, and allows access to the phillips screws that hold down
the bracket. Then it's a simple matter to replace the control unit by
swapping out the leads one at a time from old to new. Be careful when
re-attaching those plastic securing rings, they can cross-thread pretty
easily. Read more...
PartSelect Number PS2350013
Manufacturer Part Number 903136-9010
This is a surface burner infinite switch kit for your range or oven. This replacement part activates and deactivates your burner, and controls the burner heat. If you are not getting any heat to your burner or it is not the right temperature, you may need to replace this part. It is about 2.75 inches wide and 1.5 inches tall.
Fixes these symptoms
- Element will not heat
- Will Not Start
- See more...
Installation Instructions
David from AVON, NY
Burner control failed, needed replacement
Drawings on web site somewhat hard to read, resulting in moredisassembly than actually necessary. Turns out, simply removing the
threaded plastic securing rings around the bases of the controls frees
up the faceplate, and allows access to the phillips screws that hold down
the bracket. Then it's a simple matter to replace the control unit by
swapping out the leads one at a time from old to new. Be careful when
re-attaching those plastic securing rings, they can cross-thread pretty
easily. Read more...
Wall Oven Burner Switch Kit
Use a nut driver or Phillips screwdriver. Remove rear panel.
Pull out control knob. If it is stuck, wrap a small rag around the back of it and pull the rag steadily.
Carefully match marked terminals on the replacement switch with those on original. Switch terminals may not be in the same location. Replace wires one for one, one at a time.
Carefully select the correct knob filler for the switch post. Several are supplied. Proceed with logic and measure the shaft length and the filler length and type to match. Read more...
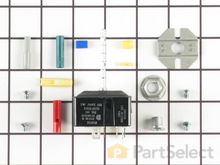
PartSelect Number PS470145
Manufacturer Part Number 5303935086
This is a burner switch kit, also known as the surface element control switch repair kit, for ranges. This burner switch kit sends voltage to the surface element coil and it controls the stove top surface burner. If the following symptoms occur, installing the switch could be the solution to the problem: surface element not heating, overheating, or inconsistent heating. Usually, if the element is not defective, that is a sign there is an issue with the switch. The kit comes with several insert sizes, and includes screws as well. The tools needed for this project are a nut driver, pliers, and screwdrivers.
Fixes these symptoms
- Element will not heat
- See more...
Installation Instructions
George from New Port Richey, FL
High heat reluctant to turn down.
Most of the job is simple fastener mechanics.Use a nut driver or Phillips screwdriver. Remove rear panel.
Pull out control knob. If it is stuck, wrap a small rag around the back of it and pull the rag steadily.
Carefully match marked terminals on the replacement switch with those on original. Switch terminals may not be in the same location. Replace wires one for one, one at a time.
Carefully select the correct knob filler for the switch post. Several are supplied. Proceed with logic and measure the shaft length and the filler length and type to match. Read more...
Wall Oven Dual Infinite Switch
and unplug wires and plug new switch in... Saftey first gentlemen, there is no ifs and buts or maybes when it comes to your life.. make sure you turn your power off.. works like a charm , can adjust heat from 1 to hi..thanks for partselect great price and speedy shipping...James K. Luper Read more...
PartSelect Number PS820835
Manufacturer Part Number 318191023
This switch allows you to choose which size burner you require according to the size of the pots and pans you're using.
Fixes these symptoms
- Element will not heat
- See more...
Installation Instructions
James from Kentwood, LA
range has inner and outer eye(hot plate) . outer eye would turn wide open and off
ordered switch for on, off. Turned power off at breaker.opened oven door, underneath top console there are four philip screws.. remove top and take slotted screwdriver and unscrew four plastic nuts. I used pocket knife..remove plastic cover , and then remove four more philip screws to remove metal plate that holds all four control switchs. remove two screws that held switch in placeand unplug wires and plug new switch in... Saftey first gentlemen, there is no ifs and buts or maybes when it comes to your life.. make sure you turn your power off.. works like a charm , can adjust heat from 1 to hi..thanks for partselect great price and speedy shipping...James K. Luper Read more...
Wall Oven Surface Burner Switch
Note: My new switches shaft was 1/8 of an inch longer so it does put the dial a little further away from the control panel. Wife says: It's OK, don't worry about it. Read more...
PartSelect Number PS2342883
Manufacturer Part Number 318293827
Fixes these symptoms
- Element will not heat
- See more...
Installation Instructions
Gary from Herrick, IL
Burner would consistantly go to high no matter where the dial was positioned.
First I unplugged the stove.Removed the upper control panel back (10 phillips screws). Removed the plastic dial( pulls straight off). Removed the 2 screws behind the dial that is holding the switch in the control panel. Took one wire at a time off the old switch and put them on the new switch according to each electrical spade marking. L1, L2, H1, H2 and P. Installed the new switch in the control panel securing it with the 2 screws. Installed the dial, installed the upper back panel using the old screws. Plugged the stove back in and tested it.Note: My new switches shaft was 1/8 of an inch longer so it does put the dial a little further away from the control panel. Wife says: It's OK, don't worry about it. Read more...
Wall Oven Surface Burner Switch - 240V
PartSelect Number PS2361515
Manufacturer Part Number 318293831
Wall Oven Infinite Switch Control
PartSelect Number PS236751
Manufacturer Part Number WB24T10026
This surface element control switch is for ranges.
Surface element control switch turns the surface element on and off and controls how much heat the element produces.
Unplug the range or shut off the house circuit breaker for the range before installing this part. Wear work gloves to protect your hands.
Fixes these symptoms
- Element will not heat
- See more...
Installation Instructions
manuel from key west, FL
left front burner would not turn on
Removed panel to gain access, removed wires from switch from burner that was not operating and attached them to switch for burner that was working. Burner worked, problem identified. Replaced bad switch with new switch. Problem solved.
Read more...


