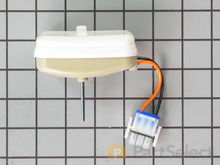
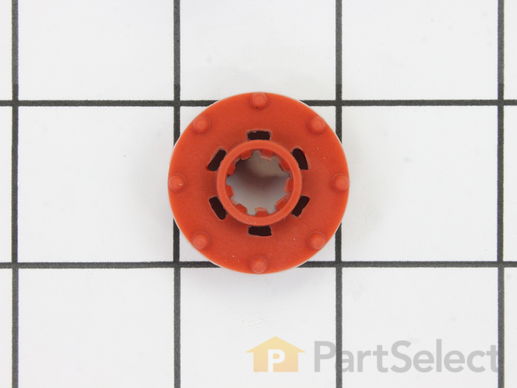
Part Location Diagram of WR02X12008 GE Evaporator Fan Grommet - Red
See part 615 in the diagram
Replacing your General Electric Refrigerator Evaporator Fan Grommet - Red
( Grid squares measure 1x1 inch )
Customer Service Representative

Get in touch, we're here to help!

Daily 8am - 9pm EST

customerservice@partselect.com

Evaporator Fan Grommet - Red WR02X12008

 Fits your GTH18GBDERWW!
★★★★★
★★★★★
21 Reviews

Rated by 29 customers 

Easy 

30 - 60 mins 

Ratings submitted by customers like you who bought this part.

$ 13.21
  In Stock
Get FREE EconoShip on orders over $100! T&C apply

Get this part fast! Average delivery time for in-stock parts via standard shipping: 1.8 days.

 Fits your GTH18GBDERWW!
PartSelect Number PS963756
Manufacturer Part Number WR02X12008
Manufactured by GE
Product Description

Evaporator Fan Grommet - Red Specifications

If you notice that your refrigerator or freezer is noisy or too warm, you may need to replace the evaporator fan grommet. This part is red in color, and is about 1 inch in diameter. The evaporator fan grommet is located behind the evaporator fan cover in the back of the freezer. You will need to remove the evaporator fan cover to access the evaporator fan and complete this repair. Before you begin this repair, ensure the power to the refrigerator is disconnected. You will need a pair of needle nose pliers, a small flat blade screw driver and both a 1/4 and 5/16-inch nut driver to complete this repair.
How Buying OEM Parts Can Save You Time and Money

How Buying OEM Parts Can Save You Time and Money

Part Videos

Replacing your General Electric Refrigerator Evaporator Fan Grommet - Red

Replacing your General Electric Refrigerator Evaporator Fan Grommet - Red
Troubleshooting
This part fixes the following symptoms:
Noisy | Fridge too warm | Clicking sound | Freezer section too warm
This part works with the following products:
Refrigerator, Freezer.
This part works with the following products:
General Electric, Hotpoint.
Part# WR02X12008 replaces these:
AP3795810, 1091586, WR02X10519, WR2X10519
Back to Top
Customer Reviews
Average Rating:
★★★★★
★★★★★
21 Reviews
4.9
Filter By Rating:
  • 5 Stars
    19
  • 4 Stars
    1
  • 3 Stars
    1
  • 2 Stars
    0
  • 1 Star
    0
Sort by:
  • 1
  • 2
  • 3
Sorry, we couldn't find any existing reviews that matched. Try using some different or simpler keywords.
  • 1
  • 2
  • 3
Customer Repair Stories
 Average Repair Rating: 3.4 / 5.0, 29 reviews. What's this?
Sort by:
  • 1
  • 2
  • 3
Sorry, we couldn't find any existing installation instruction that matched.
noise from fan blade hitting refrigerator interior panel.
The hardest part of the repair was emptying the freezer, next was getting the fan off of the motor shaft, The only reason the job was difficult is because i am 67 years old and not as flexible as i used to be.I had a tough time getting the fan off of the motor shaft, but i got it off with the use of a vise, and had to use the hammer and a socket to install a new fan blade.
Other Parts Used:
Evaporator Fan Blade Evaporator Fan Grommet - Red Evaporator/Condensor Fan Grommet
  • Dennis from LEHIGHTON, PA
  • Difficulty Level:
    A Bit Difficult
  • Total Repair Time:
    1- 2 hours
  • Tools:
    Nutdriver, Pliers, Screw drivers, Socket set
2 of 2 people found this instruction helpful.
Was this instruction helpful to you?
Thank you for voting!
Refrigerator fan motor died
It has been my experience that these motors sometimes die when the refrigerator is overfilled and motor strains to keep refrigerator cold. And this motor is used in several models of refrigerators. That said, sometimes the hook-up is slightly different between other units. The available video is good, but like I said, circumstances will be slightly different between various models.

After cleaning out freezer (plug disconnected first), start to remove outer plastic covers. If you want to keep track of the different steps, you can take pictures with your cellphone. And if there are any connecting wire attachments you think you might not remember, again, you can take a picture, or label with tape (colored tape, or by writing on the tape). And for keeping track of the different-size screws, I place them in a muffin tin, keeping an order of left to right and top to bottom in the tin. When removing Styrofoam blocks in bottom center, make sure you remove any remaining ice underneath in the hole so refrigerator can "breathe". Freezer air is moved below to refrigerator compartment, so a blocked vent hole will strain refrigerator as it tries to maintain its temperature setting and can be the cause of your failed motor.

After replacing motor onto bracket with grommets and blade, don't completely tighten. Position plastic cover with hole opening over motor and blade assembly. Twirl motor blade to see if there is any interference with cover. If not, take away cover and tighten motor on bracket. If there is any rubbing, adjust motor/blade assembly accordingly before tightening in place. Putting everything back together is in reverse order.
Other Parts Used:
Evaporator Fan Motor Evaporator Fan Blade Evaporator Fan Grommet - Red
  • Kevin A. from CONCORD, NH
  • Difficulty Level:
    A Bit Difficult
  • Total Repair Time:
    15 - 30 mins
  • Tools:
    Screw drivers, Socket set
5 of 5 people found this instruction helpful.
Was this instruction helpful to you?
Thank you for voting!
Noisy freezer fan
Fast and easy-great video instructions for each part ordered.
All parts perfect fit.
My refrigerator is running like new again-good for another 10 years!
Other Parts Used:
Evaporator Fan Motor Evaporator Fan Grommet - Red Lid Bumper Evaporator/Condensor Fan Grommet
  • Robert from PITTSBURGH, PA
  • Difficulty Level:
    Really Easy
  • Total Repair Time:
    30 - 60 mins
  • Tools:
    Nutdriver, Pliers, Screw drivers
2 of 4 people found this instruction helpful.
Was this instruction helpful to you?
Thank you for voting!
The fan motor on our 48" GE Monogram refrigerator was making a lot of noise
Emptying the refrigerator and freezer and sliding that beast out of the cabinet was half the battle. Once the unit was out, it was a bit difficult removing the top and back panel to gain access to the fan motor (all of that is on top on our fridge). Once I gained access, replacing the fan motor was relatively simple. Although the video on Parts Select showed a model where the fan motor was located in the freezer compartment, the rest of the instructions in the video for changing out the fan motor and splicing the new motor wires to the existing wire harness (different connection) were very helpful. I was glad I purchased new rubber bumpers and grommets and a new compression ring to hold the fan in place. The old rubber grommets were pretty worn. I also took the opportunity to vacuum out all the dust that had accumulated over the years in areas that aren't accessible from the front. The next most difficult part of the repair was maneuvering the unit back into the cabinet. Probably would have been easier if I had a helper. The new fan has been running well and quietly since the repair. Thanks Parts Select!
Other Parts Used:
Evaporator Fan Motor Evaporator Fan Grommet - Red Lid Bumper Condenser Fan Blade Compression Ring
  • David from NEW ORLEANS, LA
  • Difficulty Level:
    A Bit Difficult
  • Total Repair Time:
    More than 2 hours
  • Tools:
    Screw drivers, Socket set, Wrench (Adjustable)
4 of 4 people found this instruction helpful.
Was this instruction helpful to you?
Thank you for voting!
NOISY
I FOLLOWED YOUR VIDEO............WAS EASY. THANKS
Other Parts Used:
Evaporator Fan Motor Evaporator Fan Grommet - Red Lid Bumper
  • Paul from NANTUCKET, MA
  • Difficulty Level:
    Really Easy
  • Total Repair Time:
    30 - 60 mins
  • Tools:
    Nutdriver, Pliers, Screw drivers
2 of 2 people found this instruction helpful.
Was this instruction helpful to you?
Thank you for voting!
Fan was not centered in the middle of the back panel opening.
Bent the motor bracket down, then using a rat tail file, elongated the holes in the back panel of the refrigerator to secure the fan in the "centered" position. This was a problem that was with the refrig. since it was made. The parts involved were perfect. NO problem at all installing them.
  • James from GREENSBORO, NC
  • Difficulty Level:
    Easy
  • Total Repair Time:
    30 - 60 mins
  • Tools:
    Screw drivers, Socket set
1 person found this instruction helpful.
Was this instruction helpful to you?
Thank you for voting!
the evaporator fan motor was making noise sometimes, but not all the time during the cooling cycle
after watching how easy it was to get to the evaporator fan motor on u-tube, I took out the motor to inspect it......the motor had about 1/8 inch shaft end play and a slight amount of play on the shaft, the rubber grommets looked OK.....I then put it back together......since the motor was the only moving part in this location I figured it had to be the part making the noise, so I ordered a motor and 2 grommets …...the replacement motor also had 1/8 inch end play on the shaft, but no play on the shaft....I installed the new parts and it has been a week now and no noise.....SUCCESS!...….the shaft on the motor protrudes from the motor, and the fan is mounted about 1 1/4 inch away from the bearing in the motor and the fan is unsupported, so I ASSUME that the slight amount of play on the shaft caused some harmonics which caused it to make noise some of the time, but not all of the time......
Other Parts Used:
Evaporator Fan Motor Evaporator Fan Grommet - Red
  • Kenneth from SEATTLE, WA
  • Difficulty Level:
    Really Easy
  • Total Repair Time:
    15 - 30 mins
  • Tools:
    Socket set
1 person found this instruction helpful.
Was this instruction helpful to you?
Thank you for voting!
Noisy Freezer Evaporator
Find a video on youtube. Remove 6 screws. Pull the Styrofoam part up before removing the panel. Unplug and Remove the fan assembly.
You will need a NUT DRIVER to take the bracket off the backing plate.
I ordered the red grommet and the red bumper. You need TWO of the red grommets if that is the problem. My freezer was about 8 years old, and the grommets were worn and compressed, the bumper was not. Replacing these parts DID NOT FIX the problem. I needed a new motor.
I probably disassembled and reassembled this stuff about 7 times before I got all the parts and tools. Each time I had to unload the freezer.
Other Parts Used:
Evaporator Fan Grommet - Red Lid Bumper
  • Brian from BOZEMAN, MT
  • Difficulty Level:
    A Bit Difficult
  • Total Repair Time:
    15 - 30 mins
  • Tools:
    Nutdriver, Screw drivers
1 person found this instruction helpful.
Was this instruction helpful to you?
Thank you for voting!
Fan making noise.
Remove ice maker and all of it's accessories in order to remove the panel covering the fan. Don't drop the screws!
Unscrew the lower fan bracket. You will see the lower red rubber grommet. Hold fan motor with one hand and push the fan off the shaft and into the compartment above. Then remove the round retainer thing below it by holding it and pulling down on the motor assembly. Install new grommet on upper part. and put it all together.
REMEMBER where the fan is on the shaft. It has about one inch of shaft placement. I put mine so that most of it was above the hole that the fan goes into and about 20 percent showing below the sheet metal.
Also check to see if your fan is damaged. Mine was not.
This refrigerator has been awesome! I have had many issues but have been able to fix all of them for the last 15 years!
  • Matthew from Escondido, CA
  • Difficulty Level:
    Really Easy
  • Total Repair Time:
    30 - 60 mins
  • Tools:
    Screw drivers
1 person found this instruction helpful.
Was this instruction helpful to you?
Thank you for voting!
Fan became noisy
First unplug freezer and empty contents, then remove the screws from the air deflector, carefully remove styrafoam air deflector block then remove back panel for easy access. Fan will be easy to switch out from there. I highly recommend the You Tube video which is where I got my basic instructions.
Other Parts Used:
Evaporator Fan Motor Evaporator Fan Grommet - Red
  • Mark from CHAMBERSBURG, PA
  • Difficulty Level:
    Really Easy
  • Total Repair Time:
    15 - 30 mins
  • Tools:
    Nutdriver, Screw drivers
1 person found this instruction helpful.
Was this instruction helpful to you?
Thank you for voting!
  • 1
  • 2
  • 3
Questions and Answers

Ask our experts a question about this part and we'll get back to you as soon as possible!

13 questions answered by our experts.
Sort by:
  • 1
  • 2
Sorry, we couldn't find any existing answers that matched.Try using some different or simpler keywords, or submit your new question by using the "Ask a Question" button above!
Terry
December 30, 2017
At times we hear a whirring sound that is not smooth. It seems to go slow then faster then will slow down again (never did this before, quite noticeable)--freezer does freeze food but ice cream seems always a little too soft. Can you help?
For model number gcl22kgresv
PartSelect logo
Hello Terry, Thanks for your question. Check the grommets for the evaporator fan motor and replace them if they are loose or broken. Aside from that, check the evaporator fan motor itself. It may have ice clogging it or the fan blades may be damaged. I hope this helps.

18 people found this helpful.

Was this helpful?
Thank you for voting!
Related Parts:
Walter
November 22, 2017
My fan is contacting the evaporator housing cover when it spins and making a lot of noise. I have replaced the fan blade already. Could it be the grommets worn out and not causing the blade to turn properly centered? The fan turns freely. Could the cover itself have warped over time and now contacts the blade as it turns? I assume the motor itself is ok, since it works. Thanks and you guys have a great site. It’s helped me many times!!!
For model number PSHS6MGZBESS
PartSelect logo
Hi Walter, Thank you for your inquiry. If the grommet has worn out they could cause this issue where they are not properly securing the fan blade. If you would like place an order for the grommet, you may order it online, through one of online chat sessions or by calling our customer service line and anyone would be happy to assist you. I hope this helps. Thank you and have a great day!

13 people found this helpful.

Was this helpful?
Thank you for voting!
Margaret
October 19, 2017
How do I know if the grommets need to be replaced. There is a terrible noise coming from the freezer. The fan spins freely, so I believe the problem is not the fan motor. Aside from the grommet, what else could cause the noise.
For model number GTH17DBDFRWW
PartSelect logo
Hi Margaret, Thank you for the question. If the grommets needed to be replaced the fan blades would have a wobble to them as they spun. If they spin smoothly and freely I suggest replacing the motor. Hope this helps!

8 people found this helpful.

Was this helpful?
Thank you for voting!
Ken
January 15, 2018
The freezer is making a loud noise. It lasts for a little bit, then it stops. We had it fixed once for the same problem when it was under warranty. What would make that happen ?
For model number PTS25LHSARWW
PartSelect logo
Hello Ken, Thank you for your inquiry. We would recommend checking the following parts to fix your issue: evaporator fan blade, evaporator fan motor, the red and blue evaporator fan grommets, the fan bracket, and the condenser fan motor and fan blade Hope this helps!

3 people found this helpful.

Was this helpful?
Thank you for voting!
Wayne
December 11, 2017
How do you test control board to ensure that it is not fault for not starting
For model number HSS25GFPHWW
PartSelect logo
Hi Wayne, Thank you for the question. You can check to make sure that the overload and relay are getting 120 vac to it with a multi meter. If it is then the most likely cause would be a defective compressor. If no power then the control board would likely be the issue. Hope this helps!

2 people found this helpful.

Was this helpful?
Thank you for voting!
Marissa Castro
June 25, 2019
My freezer is not freezing, could it be the evaporator fan?
For model number GSS251FRE
PartSelect logo
Hello Marissa, thank you for your question. I would recommend testing the following parts first. It sounds like the defrost cycle is not cycling off. The parts are : Defrost Thermostat Part Number: WR50X10068, Temperature Sensor Part Number: WR55X10025, Defrost Heater and Bracket Assembly Part Number: WR51X10055, and Evaporator Fan Motor Part Number: WR60X10185 first. If those parts are tested and are functioning correctly the issue would be with the electronic control board. I hope this helps!

2 people found this helpful.

Was this helpful?
Thank you for voting!
Shane
November 2, 2021
Is the part PS963756 (Red Grommet) interchangeable with part PS284555 (Black Grommet)? The video under the title Evaporator/Condenser Fan Grommet seems to indicate this. Due to back order delays I cant seem to get a red grommet. With my make and model of fridge do I need two reds, two blacks or a red & black? The evaporator fan in the freezer part of the fridge is noisy and I wanted to change the motor and grommets at the same time. Thanks
For model number MTS17BBSERWW
PartSelect logo
Hello Shane, Thank you for the question. The Black Grommets can replace the Red for the Evaporator Fan Motor. We hope this helps!

1 person found this helpful.

Was this helpful?
Thank you for voting!
Joe
May 25, 2022
Are f+r grommets the same size on condenser
For model number GTS18XCSARWW
PartSelect logo
Hello Joe, thank you for the question. The Evaporator Fan Grommets, PartSelect Number PS963756 are the same size and part for the front and rear. If you need help placing an order, customer service is open 7 days a week. Please feel free to give us a call. We look forward to hearing from you!

1 person found this helpful.

Was this helpful?
Thank you for voting!
Didiet
November 8, 2018
Which freezer fan grommets should i get for my model? Thanks
For model number A3316ABSERWW
PartSelect logo
Hi Didiet, Thank you for your question. The part number for the grommet that you would use in the freezer for the evaporator fan motor is PS963756. I hope this helps. Thank you and have a great day!

1 person found this helpful.

Was this helpful?
Thank you for voting!
ROD
October 25, 2023
TOP ICE MAKER IS TRYING TO DUMP ICE, BUT IT ACTS LIKE IT IS TOO FROZEN TO MOVE FREELY.
For model number RF268ABBP
PartSelect logo
Hi Rod, thank you for contacting us. You can use a hair dryer to melt down the frozen ice. If you find your ice maker making ice but not dumping, check the auger motor, part number PS4173183. This part is responsible for pushing ice through the system and into the ice bucket. We hope this helps, good luck with this repair!

1 person found this helpful.

Was this helpful?
Thank you for voting!
Related Parts:
  • 1
  • 2
You May Also Need ?
Model Cross Reference
This part works with the following models:
PartSelect Number: PS963756
Manufacturer Part Number: WR02X12008
Brand
Model Number
Description
General Electric
36211XBMBRWW
Refrigerator
General Electric
36211XBMDRWW
Refrigerator
General Electric
36211XBMERWW
General Electric
36211XBMFRWW
General Electric
36211XBRERWW
General Electric
36211XBRFRWW
General Electric
36411XBRERWW
Refrigerator
General Electric
36411XBRFRWW
Refrigerator
General Electric
37511KBSARWW
Refrigerator
General Electric
37511KBSERWW
Refrigerator
General Electric
38181KBRARWW
General Electric
38185KBRARBB
General Electric
38187KBRARCC
General Electric
38341FBMERWW
General Electric
38341FBMFRWW
Refrigerator
General Electric
38351HBMERWW
General Electric
38351HBMFRWW
Refrigerator
General Electric
38351HBRERWW
General Electric
38351HBRFRWW
General Electric
38451HBRERWW
Refrigerator
General Electric
38451HBRFRWW
Refrigerator
General Electric
38481KBRARWW
Refrigerator
General Electric
38481KBRCRWW
Refrigerator
General Electric
38481KBRDRWW
General Electric
38481KBRKRWW
General Electric
38481KBRORWW
General Electric
38481KBRTRWW
General Electric
38481KBRVRWW
General Electric
38485KBRARBB
Refrigerator
General Electric
38485KBRCRBB
Refrigerator
Customer Service Representative

Get in touch, we're here to help!

Daily 8am - 9pm EST

Contact Customer Service