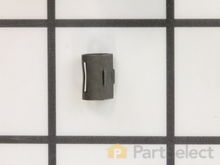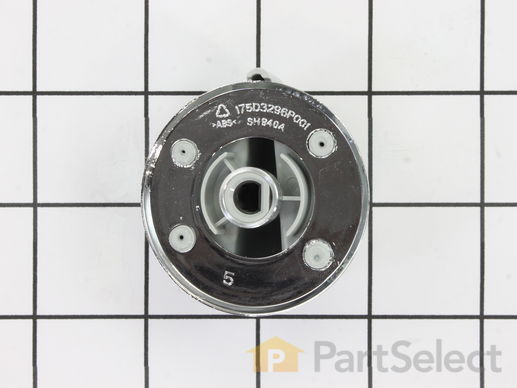
Control Knob - Grey WE01X20380
Rated by 12 customers
Very Easy
15 - 30 mins
Ratings submitted by customers like you who bought this part.
Get this part fast! Average delivery time for in-stock parts via standard shipping: 1.8 days.
Control Knob - Grey Specifications

How Buying OEM Parts Can Save You Time and Money
-
5 Stars 47
-
4 Stars 7
-
3 Stars 1
-
2 Stars 4
-
1 Star 1
- < Prev
- 1
- 2
- 3
- Next >
- < Prev
- 1
- 2
- 3
- Next >
- < Prev
- 1
- 2
- Next >
2. Line up knob with post and push new knob on to post.
3. Quietly drink a beer and watch NFL mobile on your phone In the laundry room for a minimum of thirty minutes. ( For best results and to keep you from walking into the kitchen, stash a beer in the laundry room before you begin.) ... Read more
4. Before leaving laundry room, do fifteen jumping jacks and twenty push ups-- enough to get your face red. Sprinkle some dryer lent in your hair. Crush can and throw it behind the dryer, no one ever looks there.
5. Immediately find your wife upon leaving the laundry room, and explain to her that the dryer is now fixed, you are exhausted, and need to take a nap.
-
Eric from MINONK, IL
-
Difficulty Level:Very Easy
-
Total Repair Time:Less than 15 mins
Expensive for a knob.
But it fixed the problem better than switching another knob from the machine.
-
Gayle from STURBRIDGE, MA
-
Difficulty Level:Very Easy
-
Total Repair Time:Less than 15 mins
1. Unplug dryer from wall and remove existing control knob.
2. Remove three screws on back of control compartment and fold the front forward.
3. Remove tiny anchor screw for ti ... Read more mer and twist loose.
4. Transfer wire from old to new one at a time. (Extra comment - I thought at first there was problem with new timer because there were more wires than connectors. Some of the wires had double connectors. That hiccup in installation was caused by my inexperience with this first time effort.)
5. Reconnect timer to dryer compartment with tiny screw.
6. Replace three screws on back.
7. Add new control knob, plug up dryer, and it is done.
-
Joseph from MONROE, NC
-
Difficulty Level:Really Easy
-
Total Repair Time:30 - 60 mins
-
Tools:Pliers, Screw drivers
-
Sandra from WHITE HAVEN, PA
-
Difficulty Level:Really Easy
-
Total Repair Time:30 - 60 mins
-
Tools:Screw drivers
1 Ordered Part Received in 3 days Great Service
2 Used Scissors to open the package (not tough to do)
3 Used 1 hand to put the knob on Works Great !!!
Start to Finish 3 min. 16 seconds !!!!
-
james from FALLSTON, MD
-
Difficulty Level:Very Easy
-
Total Repair Time:Less than 15 mins
-
Randy from E LIVERPOOL, OH
-
Difficulty Level:Really Easy
-
Total Repair Time:Less than 15 mins
Matched up the flat side
Popped on the new one
Dry clothes! Hurray!!
-
Karen from FINDLEY LAKE, NY
-
Difficulty Level:Very Easy
-
Total Repair Time:Less than 15 mins
We were seriously trying to decide whether to call a repairperson or buy a new dryer, since dryer is over 5 years old, and it does not seem that appliances last any more. (New dryer: probably over $700)
Read a ... Read more bout issue on PartSelect. Found clear and easy to follow explanations. Thought we needed a new timer, and considered buying one. Installation instructions seemed clear and simple enough for even us to do. Pulled off old timer knob to discover the back was cracked, which was why it was spinning.
Bought control knob. Pushed it on. Perfect!
Total time for repair: about 10 seconds
Total cost (including shipping) about $33
-
Dina from HILLSDALE, NJ
-
Difficulty Level:Very Easy
-
Total Repair Time:Less than 15 mins
-
Melissa from CHARLOTTESVLE, VA
-
Difficulty Level:Very Easy
-
Total Repair Time:Less than 15 mins
-
Patricia from HENDERSON, NV
-
Difficulty Level:Very Easy
-
Total Repair Time:30 - 60 mins
- < Prev
- 1
- 2
- Next >
Ask our experts a question about this part and we'll get back to you as soon as possible!
- < Prev
- 1
- 2
- Next >

9 people found this helpful.

3 people found this helpful.

2 people found this helpful.

1 person found this helpful.


- < Prev
- 1
- 2
- Next >


Manufacturer Part Number: WE01X20380

Item is in stock and will ship today if your order is placed before 4:00 PM Eastern Standard Time.
If your order is placed after 4:00 PM EST, the in stock items will ship on the next business day.
Item is not in stock and usually ships 3-5 business days from the time you place your order.
Item is not in stock and usually ships 10-15 business days from the time you place your order.
This item is no longer being made by the manufacturer, and cannot be added to your shopping cart.


