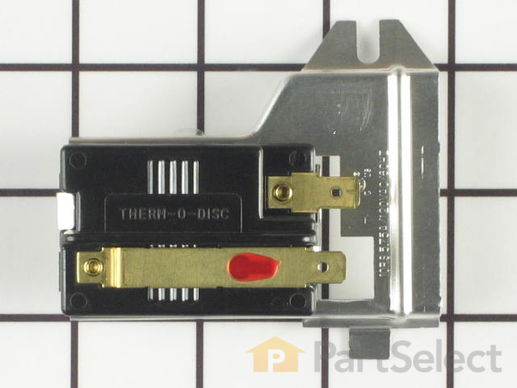
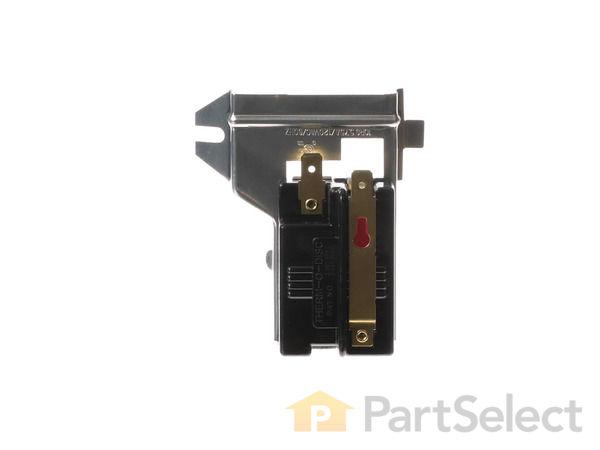
Part Location Diagram of 5303281135 Frigidaire Flame Sensor
See part 79 in the diagram
( Grid squares measure 1x1 inch )
Customer Service Representative

Get in touch, we're here to help!

Daily 8am - 9pm EST

customerservice@partselect.com

Flame Sensor 5303281135

 Fits your EIMGD60JMB0!
★★★★★
★★★★★
4 Reviews

Rated by 7 customers 

Easy 

30 - 60 mins 

Ratings submitted by customers like you who bought this part.

$ 28.57
  In Stock
Get FREE EconoShip on orders over $100! T&C apply

Get this part fast! Average delivery time for in-stock parts via standard shipping: 1.8 days.

 Fits your EIMGD60JMB0!
PartSelect Number PS459818
Manufacturer Part Number 5303281135
Manufactured by Frigidaire
Product Description

Flame Sensor Specifications

This part senses the flame for heat allowing the gas valve to open. The most common issue that might arise that would indicate the flame sensor needs to be replaced is your dryer is not giving off enough heat. If your clothes are not drying at a reasonable time, this might be your first indication of an issue. You will need to remove the two screws underneath the lint cover to remove the top of the appliance. Release the door switch wiring, remove the front panel, and remove the belt off the pully. You should now be able to completely remove the drum from the dryer. This will give you access to the sensor for the repair.
How Buying OEM Parts Can Save You Time and Money

How Buying OEM Parts Can Save You Time and Money

Troubleshooting
This part fixes the following symptoms:
Not Heating
This part works with the following products:
Dryer, Washer Dryer Combo.
This part works with the following products:
Frigidaire, Kenmore, Gibson, Kelvinator.
Part# 5303281135 replaces these:
AP2142636, 3574, 00635993, 08001684, 08015393, 08015688, 3281135, 635993, 75303281135, 8001684, 8015393, 8015688, F000078913, F078913-000, F078913000, F78913, FL00078913, G078913-000, Q000600651, Q600651 , WQ600651 Show less
Back to Top
Customer Reviews
Average Rating:
★★★★★
★★★★★
4 Reviews
5.0
Filter By Rating:
  • 5 Stars
    4
  • 4 Stars
    0
  • 3 Stars
    0
  • 2 Stars
    0
  • 1 Star
    0
Sort by:
  • 1
Sorry, we couldn't find any existing reviews that matched. Try using some different or simpler keywords.
  • 1
Customer Repair Stories
 Average Repair Rating: 3.2 / 5.0, 7 reviews. What's this?
Sort by:
  • 1
Sorry, we couldn't find any existing installation instruction that matched.
No heat to dry clothes.
There was a lot of screws. And I cleaned everything well. The one part was bad so I replaced them all to make sure it'll last.
Other Parts Used:
Igniter M Series Ignition Coil Kit Flame Sensor
  • James from SAGINAW, MI
  • Difficulty Level:
    Easy
  • Total Repair Time:
    30 - 60 mins
  • Tools:
    Nutdriver, Screw drivers
1 person found this instruction helpful.
Was this instruction helpful to you?
Thank you for voting!
Flame would come on and go out,and little or no heat
Unhooked power,shut off gas, pulled top cover off,two Philips screws one on each side hold the front panel in.took belt off, pulled drum,than change out, flame sensor,M coils,and igniter,be careful igniter breaks very easy,I broke my new one so had to use my old one so really the problem with no heat was either the Mcoils or the flame sensor
Other Parts Used:
Igniter Upper Drum Glide M Series Ignition Coil Kit Flame Sensor
  • Gary from Columbus, MI
  • Difficulty Level:
    Really Easy
  • Total Repair Time:
    30 - 60 mins
  • Tools:
    Screw drivers
1 person found this instruction helpful.
Was this instruction helpful to you?
Thank you for voting!
The igniter glowed red and the gas did not come on !
Read your article on possible repairs for different symptoms and after dis assembling and cleaning certain parts took a chance on the flame sensor, which turned out to be the culprit. Your help was a valuable tool in the repair process ! What would be the bee's knee's would be the resistance reading on the sensors that monitor the system for a more accurate diagnostic approach. But none the less you definitely aided in the repair of my propane gas dryer. Thank you very much ! And by the way the 3-4 day wait for the part was well worth the half price I paid versus our small town repair facility, Thanx again
  • stefan from alpena, MI
  • Difficulty Level:
    Really Easy
  • Total Repair Time:
    30 - 60 mins
  • Tools:
    Nutdriver, Pliers, Wrench (Adjustable)
1 person found this instruction helpful.
Was this instruction helpful to you?
Thank you for voting!
Dryer would not ignite
Make Sure Dryer is off and disconnected from power! Also, beware of sharp edges on dryer parts and cabinet.
1) Popped-off top lid with flat-blade screw driver (Insert screw driver in joint between top and front of dryer above door) Spring clips are all that's holding top on in front
2) Unplugged plastic electrical connector located just along the top-right side of dryer
3) Removed one sheet metal screw located about 8" down from top on either side of dryer - total of two screws
4) Pull front of dryer back and pull up at bottom of dryer (Remember that when you replace front you will have to make sure plastic bearing surfaces on dryer tub are centered back in cut-out on front panel. Plastic tabs fit inside the cut-out or else you'll ge a swishing noise when tub rotates)
5) Set front panel to side
6) Flame sensor is located on the left side of the burn chamber sheet metal cover. It has a red and white wire with flat connectors that must be pulled off. Note which color goes to what terminal
7) Unscrew fastener. Note: this screw/fastener needs a non-standard driver to get it out. I have a variety of other drivers beyond phillips/flat types and non of them worked.
8) I ended up using a pair of pliers to just work it out from under the screw. I bent it, as it has a tab that slips in along left bottom edge of burn chamber cover.
9) Finish taking screw out by hand
10) Put new flame sensor in by inserting tab on bottom first. Then, screw in fastener to top of sensor bracket and reconnect wires. White on top and red on bottom terminal.
11) Replace front panel with door by placing in tabs on bottom front of dryer. Again, make sure plastic bearing surfaces are inside of circular flange on front panel
12) Make sure to reconnect plastic cable connector. Note: I added a tie-wrap because it looked like the connector might rub against drum. There are some holes through which you can run the tie-wrap
13) Replace the two sheet-metal screws
14) Push top down so spring clips re-engage with dryer body
  • David from Murrieta, CA
  • Difficulty Level:
    A Bit Difficult
  • Total Repair Time:
    30 - 60 mins
  • Tools:
    Screw drivers, Socket set
17 of 20 people found this instruction helpful.
Was this instruction helpful to you?
Thank you for voting!
Gas flame turns off after a while. No more heat.
Fixed it eventually with part PS470049 ('M' Series Ignition Coil Kit). See separate story.

The flame sensor did not fix it but read on for info on how to replace this part. Before replacing this part, I should have read another posting in a different web site about the ignition coils: if you see a red glow inside the burner unit but the flame does not come on, then the problem is likely to be with the coils, not the flame sensor. However since some users here had solved the problem by replacing the flame sensors, I figured I'd try it. The setting for "More dry, less dry" never worked either so maybe this would fix two problems at once.

This dryer is a stacked front loader sitting on top of our washing machine. Opening the little front door (lower left side) is easy once you figure out that a little screw below needs to be removed. I almost broke the door trying to pull it open. The sensor is attached to the side of the flame area cylinder. It was hard to remove both the screw and the part itself from the slots as it's very springy. In fact when I finally removed it, it dropped to the base of the unit and sparks went flying as one of the electrical clips touched the metal (ground). Tip: first disconnect the electrical lead coming from the back of the unit to the ingnition block and later I used rubber gloves just in case. (I could not access the plug/outlet in the back). I installed the new part easily, though I was confused by the electrical leads: the white wire connects to the lead that has a red plastic dot on the side, but I think that must be a mechanical part and not a (wrong) marking, while the red connects to the other lead. Anyway, I connected it the same way I found it and put it back. Reconnected the other electrical wires and closed the door.

This did not fix the problem which turned out to be with the gas valve coils: as they get old, they turn off the flame when they get hot, even though the dryer keeps on turning. To read how to replace that part, search for comments under part number PS470049 ('M' Series Ignition Coil Kit). I don't know whether replacing the flame sensor is going to fix the "more dry-less dry" function, will have to see. Still, this website is great. Our dryer is a Westinghouse bought in 1991 (almost 20 years old!) and with this fixes it's just like new.
  • Giuseppe from San Francisco, CA
  • Difficulty Level:
    Difficult
  • Total Repair Time:
    15 - 30 mins
  • Tools:
    Screw drivers
22 of 26 people found this instruction helpful.
Was this instruction helpful to you?
Thank you for voting!
dryer won't stay hot, gas smell
Pulled unit out from wall to access back panel. Top needs to be removed to get to the screws that hold on the front panel and door. These need to be removed to get to the valve and burner.

Once your in, the sensor, thermostat, and igniter are right up front. Sensor and thermostat were easy, the igniter breaks very easily...how do I know? Cause I broke the one I bought and had to get a new one.

I also replaced the coil set for the gas valve, because I had read that they can go bad and cause a gas fume smell. The coils are cheap, so you may as well as do them at the same time.

Anyway, once the repair was complete, I reassembled the unit and hooked up the vent.

Runs like new, and the clothes dry quickly.
Other Parts Used:
Igniter Flame Sensor Cycling Thermostat
  • Dirk from Sonoma, CA
  • Difficulty Level:
    A Bit Difficult
  • Total Repair Time:
    30 - 60 mins
  • Tools:
    Pliers, Screw drivers
64 of 74 people found this instruction helpful.
Was this instruction helpful to you?
Thank you for voting!
no heat in the dryer
unplugged the dryer, discontected the sensor and unscrewed the bracket, replaced the new one and put the connectors back on, screwed the bracket back on and that was it. Very easy fix for a female who does not do much of these sort of repairs but learning.
  • Joy from Lakeville, MN
  • Difficulty Level:
    A Bit Difficult
  • Total Repair Time:
    15 - 30 mins
  • Tools:
    Screw drivers
16 of 19 people found this instruction helpful.
Was this instruction helpful to you?
Thank you for voting!
  • 1
Questions and Answers

Ask our experts a question about this part and we'll get back to you as soon as possible!

7 questions answered by our experts.
Sort by:
  • 1
Sorry, we couldn't find any existing answers that matched.Try using some different or simpler keywords, or submit your new question by using the "Ask a Question" button above!
Jordan Kopanidis
January 17, 2018
1. Igniter ps975823. This is unreasonably expensive part. How to test it to be sure it is ok or needs replacement (oms? Other test?). 2. Safety thermostat ps474188. Same question as no.1
For model number AGQ6000CES0
PartSelect logo
Hello Jordan, Thank you for your inquiry. We base our prices on what we have to pay the manufacturers for the parts. To test the igniter and safety thermostat with a multimeter, set the selection to the lowest setting for ohms of resistance. Make sure the meter is calibrated. For the ignitor touch the probes to the terminals, the meter reading for continuity should be between 50 and 400 ohms of resistance. For the safety thermostat, it should be tested at room temperature and you should touch the probes to the outer terminals. The reading should be around 0 ohms of resistance. Hope this helps!

8 people found this helpful.

Was this helpful?
Thank you for voting!
Tom
December 11, 2017
Gas dryer will initially fire up correctly, shut off Flame when up to temp, but when trying to re light to heat dryer back again, the ignitor glows good and after approx. A minute the ignitor turns off, no Flame. I have also just replaced the control thermistor, but it did not correct the issue. I am now suspecting the Flame sensor. I think if bad solenoid coils, it would not heat up initially. What do you advise? To test this Flame sensor, what is the ohms for a good unit?
For model number FGQBB30DS0
PartSelect logo
Hi Tom, Thank you for the question. You can test the thermostats and the flame sensor and make sure they read closed for continuity. Hope this helps!

1 person found this helpful.

Was this helpful?
Thank you for voting!
Bob
February 26, 2024
My dryer has two issues: 1) When I spin the dial to change settings (e.g., heavy duty, normal) the dial spins but the light stays on heavy duty. 2) When I use the manual buttons to set temperature and "very dry" it still doesn't completely dry the clothing. I have to run it a few times to get the clothes dry.
For model number AGQB7000ES0
PartSelect logo
Hello Bob, thank you for reaching out. According to our research, the issue is most probably with the electronic control board, part number PS12728776. It manages the functions of the dryer such as drying time and temperature. You may need to replace it to fix the issue. We hope this solves your problem!

1 person found this helpful.

Was this helpful?
Thank you for voting!
Related Parts:
Maximino
June 27, 2019
Tengo este modelo de lavadora y he probado los termostatos y la lectura está bien.El control de llamas le lectura esta bien y cuando enciendo la secadora se queda encendidas y no hace pausas.Que puede ser?
For model number WGR211ES0
PartSelect logo
Hola Maximino, gracias por la pregunta. En la mayoría de los casos, si la secadora no se apagó después de terminar el ciclo, es un temporizador defectuoso, Número de selección de pieza: PS462363. Busqué la parte y aparece como Ya no está disponible / Descontinuado. No hay sustituciones de partes en la lista. Mi sugerencia aquí sería llamar al fabricante y ver si pueden proporcionarle una sustitución para estos números de pieza. ¡Espero que esto ayude!

Was this helpful?
Thank you for voting!
Samuel
November 8, 2019
Dryer is running good buy Flame don't glow i took test it work but no glow why?
For model number Fflg3911qw1
PartSelect logo
Hello Samuel, Thank you for your question. If the sensor has no glow but the its still functioning, and there is no other issues, the light might just be malfunctioning which is why it isn't glowing, and there shouldn't be any problems leaving it be. If you wanted the light to be fixed, you would need to replace the sensor itself under part PS459818 for your model. Hope this helps!

Was this helpful?
Thank you for voting!
Iawata
February 4, 2023
How would I test the flame sensor?
For model number 417.71712511
PartSelect logo
Hello Lawata, thank you for reaching out. You can use a Multi meter to test the Sensor. Set the meter on the lowest setting for Ohms of resistance. Remove the Sensor from the appliance and touch the probes to each terminal. If there is no Continuity the Sensor will need to be replaced. We hope this solves your problem!

Was this helpful?
Thank you for voting!
LUIS
September 8, 2023
HI, I HAVE A GAS DRIER, WHEN OPEN TE DOOR THE DRIER NOT TURN OFF AND IF PUT SOMETHING BY TEMPERATURE NEVER TURN OFF. THANKS
For model number WGR211ES0
PartSelect logo
Hello Luis, thank you for reaching out. If the dryer does not turn off when the door opens, you may need to replace the door switch, part number PS2330879, to fix the issue. Safety thermostat shuts off the heating element when the dryer overheats. If the dryer is overheating, you may need to replace the safety thermostat, part number PS474188, to fix the issue. Glad to be of help!

Was this helpful?
Thank you for voting!
Related Parts:
  • 1
You May Also Need ?
Model Cross Reference
This part works with the following models:
PartSelect Number: PS459818
Manufacturer Part Number: 5303281135
Brand
Model Number
Description
Kenmore
41759012890
Dryer - Kemore Dryer 41759012890
Frigidaire
41759022890
Dryer - Gas
Kenmore
41771712510
Washer Dryer Combo - LAUNDRY CENTER
Kenmore
41771712511
Washer Dryer Combo - LAUNDRY CENTER
Kenmore
41771712512
Washer Dryer Combo - Laundry Center
Kenmore
41771722510
Washer Dryer Combo - LAUNDRY CENTER
Kenmore
41771722511
Washer Dryer Combo - LAUNDRY CENTER
Kenmore
41771722512
Washer Dryer Combo - Laundry Center
Kenmore
41771723510
Washer Dryer Combo - LAUNDRY CENTER
Kenmore
41771723511
Washer Dryer Combo - LAUNDRY CENTER
Kenmore
41771723512
Washer Dryer Combo - Laundry Center
Kenmore
41771732810
Washer Dryer Combo - Laundry Center
Kenmore
41771733810
Washer Dryer Combo - Laundry Center
Kenmore
41771733811
Washer Dryer Combo - Laundry Center
Kenmore
41774182300
Dryer
Kenmore
41774182301
Dryer
Kenmore
41779042900
Dryer - Kenmore Dryer Model 417.79042900 (41779042900, 417 79042900) Parts
Kenmore
41779042990
Dryer
Kenmore
41779042991
Dryer
Kenmore
41779052990
Dryer
Kenmore
41779052991
Dryer
Kenmore
41788980100
Dryer - Kenmore Dryer Model 417.88980100 (41788980100, 417 88980100) Parts
Kenmore
41788989100
Dryer
Kenmore
41788989800
Dryer
Kenmore
41790032990
Dryer
Kenmore
41790042990
Dryer
Kenmore
41790042991
Dryer
Kenmore
41790052990
Dryer
Kenmore
41790052991
Dryer
Kenmore
41790142000
Dryer
Customer Service Representative

Get in touch, we're here to help!

Daily 8am - 9pm EST

Contact Customer Service