Part Location Diagram of 5300622034 Frigidaire Heater Coil with 5/16 Inch Terminals
See part 37 in the diagram
( Grid squares measure 1x1 inch )
Customer Service Representative

Get in touch, we're here to help!

Daily 8am - 9pm EST

customerservice@partselect.com

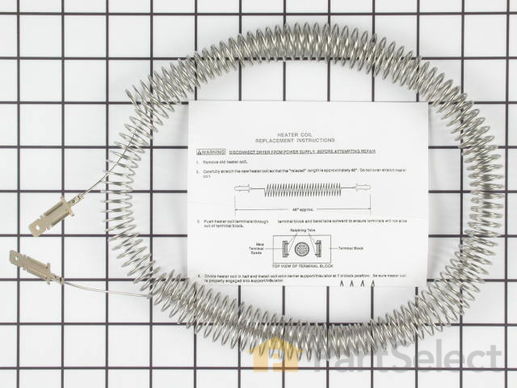
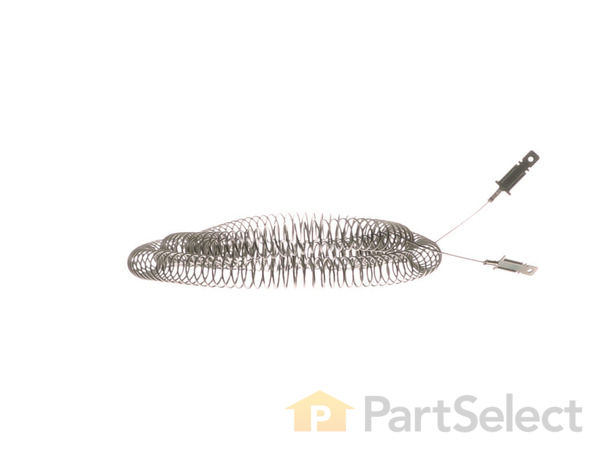
Heater Coil with 5/16 Inch Terminals 5300622034

 Fits your TDE336RBW1!
★★★★★
★★★★★
4 Reviews

Rated by 5 customers 

A Bit Difficult 

1- 2 hours 

Ratings submitted by customers like you who bought this part.

$ 80.45
  In Stock
Get FREE EconoShip on orders over $100! T&C apply

Get this part fast! Average delivery time for in-stock parts via standard shipping: 1.8 days.

 Fits your TDE336RBW1!
PartSelect Number PS451032
Manufacturer Part Number 5300622034
Manufactured by Frigidaire
Product Description

Heater Coil with 5/16 Inch Terminals Specifications

Coil only.
How Buying OEM Parts Can Save You Time and Money

How Buying OEM Parts Can Save You Time and Money

Troubleshooting
This part fixes the following symptoms:
Noisy
This part works with the following products:
Dryer, Washer Dryer Combo.
This part works with the following products:
Frigidaire, Gibson, Tappan, Kelvinator.
Part# 5300622034 replaces these:
AP2135128, 351, 5300622034
Back to Top
Customer Reviews
Average Rating:
★★★★★
★★★★★
4 Reviews
5.0
Filter By Rating:
  • 5 Stars
    4
  • 4 Stars
    0
  • 3 Stars
    0
  • 2 Stars
    0
  • 1 Star
    0
Sort by:
  • 1
Sorry, we couldn't find any existing reviews that matched. Try using some different or simpler keywords.
  • 1
Customer Repair Stories
 Average Repair Rating: 2.3 / 5.0, 5 reviews. What's this?
Sort by:
  • 1
Sorry, we couldn't find any existing installation instruction that matched.
Replaced heater coil and thermal limiter switch
Followed the excellent instructions for the heater coil. There weren’t any for the TL switch as to which of the two TL terminals gets power. Took a guess, reassembled the dryer (many hours) and it worked. I was either lucky, or it didn’t matter. Wish it had come with specific installation instructions.
  • Chuck from STERLING, VA
  • Difficulty Level:
    A Bit Difficult
  • Total Repair Time:
    More than 2 hours
  • Tools:
    Nutdriver, Screw drivers
2 of 2 people found this instruction helpful.
Was this instruction helpful to you?
Thank you for voting!
No heat, element bad
With the excellent replacement parts sold by this site, it went like silk. The dryer is not only working great, but actually quieter.
Other Parts Used:
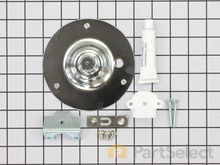
Heater Coil with 5/16 Inch Terminals Dryer Drum Bearing Bracket
  • John from O FALLON, IL
  • Difficulty Level:
    Really Easy
  • Total Repair Time:
    30 - 60 mins
  • Tools:
    Pliers, Screw drivers
2 of 2 people found this instruction helpful.
Was this instruction helpful to you?
Thank you for voting!
No Heat From Dryer
Repair requires nearly complete dis-assembly of the cabinet.Starting with the steel panel directly below the control panel, remove 2 screws. Next, remove the screws on the lower corners of the control panel. The control panel can drop down now and be removed from the cabinet. The door frame must be removed next. Start by disconnecting the door interlock connector from the wiring harness and then removing the screws on the top of the cabinet that hold the frame. remove the frame. The dryer tub is next and is removed by extracting the three screws in the back of the tub that bolt it to the bearing. The tub is now free and is pulled out of the front of the cabinet. Now comes the challenging part. The actual bearing is a sphere that is held in place by a spring loaded socket. The bearing must be removed in order to access and heater assembly. The bearing is removed by pushing it with considerable force upward toward the top of the cabinet. This strong force is necessary in order to overcome the force of the springs that hold the ball bearing in in place. I found removal of this bearing perplexing because no mention is mentioned anywhere of the amount of upward force that it takes to remove it and I was afraid of breaking it by forcing it. Now the heater assembly can be easily removed and replaced. This whole process is challenging and time consuming. At the same time you can feel a degree of satisfaction when you are done.
  • C. William from Milford, NY
  • Difficulty Level:
    Difficult
  • Total Repair Time:
    More than 2 hours
  • Tools:
    Pliers, Screw drivers, Wrench (Adjustable)
29 of 32 people found this instruction helpful.
Was this instruction helpful to you?
Thank you for voting!
Dryer would not heat
First..kudos to PartSelect for their fantastic support! Great work folks.

While greasing the bearing in the back of the drum, I found my heating coil was broken. Steps to replace:

1) Unplug the unit
2) Remove the top panel. Note, do not remove the center front screw that does not go into the door.
3) Remove front outer panel
4) Remove interior front panel
5) Remove front control panel 6 screws, pushing downward the panel and disconnecting connection to door.
6) Remove door by removing the screws on the top and pull door straight off. (I left the air duct attached to the door)
7) Remove the back access panel to the motor
8) Release the belt from the idler pulley and remove the belt.
9) I removed the three screws in the center of the drum as I found it difficult to remove the drum from the bearing. Remove the drum.
10) disconnect the coil terminals by first bending the tabs outward to allow you to be able to pull them off the block
11) remove the old coil
12) carefully stretch the new coil so that it measures 48 inches (no more)
13) Plug new coil into terminals and bend tabs to lock in place.
14) Divide heater coil in half and install coil onto center support on the opposite side from where it connects to the block/back wall of dryer
15) Install remaining coils onto supports.
16) reinstall all parts in reverse order.
  • Mark from Normalville, PA
  • Difficulty Level:
    A Bit Difficult
  • Total Repair Time:
    30 - 60 mins
  • Tools:
    Pliers, Screw drivers
107 of 126 people found this instruction helpful.
Was this instruction helpful to you?
Thank you for voting!
drum turns but no heat
Frigidaire / electrolux stack washer dryer
Removed door panel,top,control panel not sure all needed to be removed except door then removed 3 screws in center at rear of drum this disconnects the drum to shaft that secures it in place ( could not find info on that step and is the reason for writing this hope it helps , reassemble in reverse
  • Reed from Seatac, WA
  • Difficulty Level:
    A Bit Difficult
  • Total Repair Time:
    1- 2 hours
  • Tools:
    Screw drivers
19 of 27 people found this instruction helpful.
Was this instruction helpful to you?
Thank you for voting!
  • 1
Questions and Answers

Ask our experts a question about this part and we'll get back to you as soon as possible!

3 questions answered by our experts.
Sort by:
  • 1
Sorry, we couldn't find any existing answers that matched.Try using some different or simpler keywords, or submit your new question by using the "Ask a Question" button above!
Leeann
July 12, 2019
My heating element coil is broke. Do I have to replace the whole element; or can I just replace the coil?
For model number FER641FS0
PartSelect logo
Hello Leeann, Thank you for the question. You can replace just the Coil, PartSelect Number PS451032. Thank you for your inquiry, good luck with this repair!

8 people found this helpful.

Was this helpful?
Thank you for voting!
Binh
February 8, 2022
Is this an OEM Coil?
For model number FDE336RES2
PartSelect logo
Hello Binh, Thank you for your inquiry. All of the parts we sell are OEM parts direct from the manufacturer and have a 1 year warranty. We hope this helps and if you need help placing an order, customer service is open 7 days a week. Please feel free to give us a call. We look forward to hearing from you!

1 person found this helpful.

Was this helpful?
Thank you for voting!
Chuck
December 27, 2023
Which heating element coil will fit my Frigidaire dryer?
For model number FEQ332CES0
PartSelect logo
Hi Chuck, thank you for reaching out. The compatible heating element coil for your model is part number PS451032. We hope that helps!

1 person found this helpful.

Was this helpful?
Thank you for voting!
  • 1
You May Also Need ?
Model Cross Reference
This part works with the following models:
PartSelect Number: PS451032
Manufacturer Part Number: 5300622034
Brand
Model Number
Description
Kenmore
41799570100
Washer Dryer Combo
Kenmore
41799570800
Washer Dryer Combo
Gibson
DE27A8WAFC
Dryer - Residential, 27", Electrical
Gibson
DE27S8WAGC
Dryer - Residential, 27", Electrical
Frigidaire
DE600ADD3
Dryer - 27" Electric
Frigidaire
DE600ADW3
Dryer - 27" Electric
Frigidaire
F31C336CS0
Dryer - Residential, 27", Electrical
Frigidaire
F31C336CT0
Dryer - Residential, 27", Electrical
Frigidaire
F31C546CS0
Dryer - Residential, 27", Electrical
Frigidaire
F31C546CT0
Dryer - Residential, 27", Electrical
Frigidaire
F31C747CS0
Dryer - Residential, 27", Electrical
Frigidaire
F31C747CT0
Dryer - Residential, 27", Electrical
Frigidaire
FDE116RBW0
Dryer - Residential, 27", Electrical
Frigidaire
FDE116RBW1
Dryer - Residential, Electric
Frigidaire
FDE216RBS0
Dryer - Residential, 27", Electrical
Frigidaire
FDE216RBS1
Dryer - 27" Electric
Frigidaire
FDE216RBS2
Dryer - Residential, Electric
Frigidaire
FDE216RBT0
Dryer - Residential, 27", Electrical
Frigidaire
FDE336LBS0
Dryer - Residential, 27", Electrical
Frigidaire
FDE336LBS1
Dryer - Residential, 27", Electrical
Frigidaire
FDE336LBS2
Dryer - Residential, Electric
Frigidaire
FDE336NBS0
Dryer - Residential, 27", Electrical
Frigidaire
FDE336NBS1
Dryer - Residential, 27", Electrical
Frigidaire
FDE336NBS2
Dryer - Residential, Electric
Frigidaire
FDE336RBS0
Dryer - Residential, 27", Electrical
Frigidaire
FDE336RBS1
Dryer - Residential, 27", Electrical
Frigidaire
FDE336RBS2
Dryer - Residential, Electric
Frigidaire
FDE336RBT0
Dryer - Residential, 27", Electrical
Frigidaire
FDE336RBT1
Dryer - Residential, 27", Electrical
Frigidaire
FDE336RBT2
Dryer - Residential, Electric
Customer Service Representative

Get in touch, we're here to help!

Daily 8am - 9pm EST

Contact Customer Service