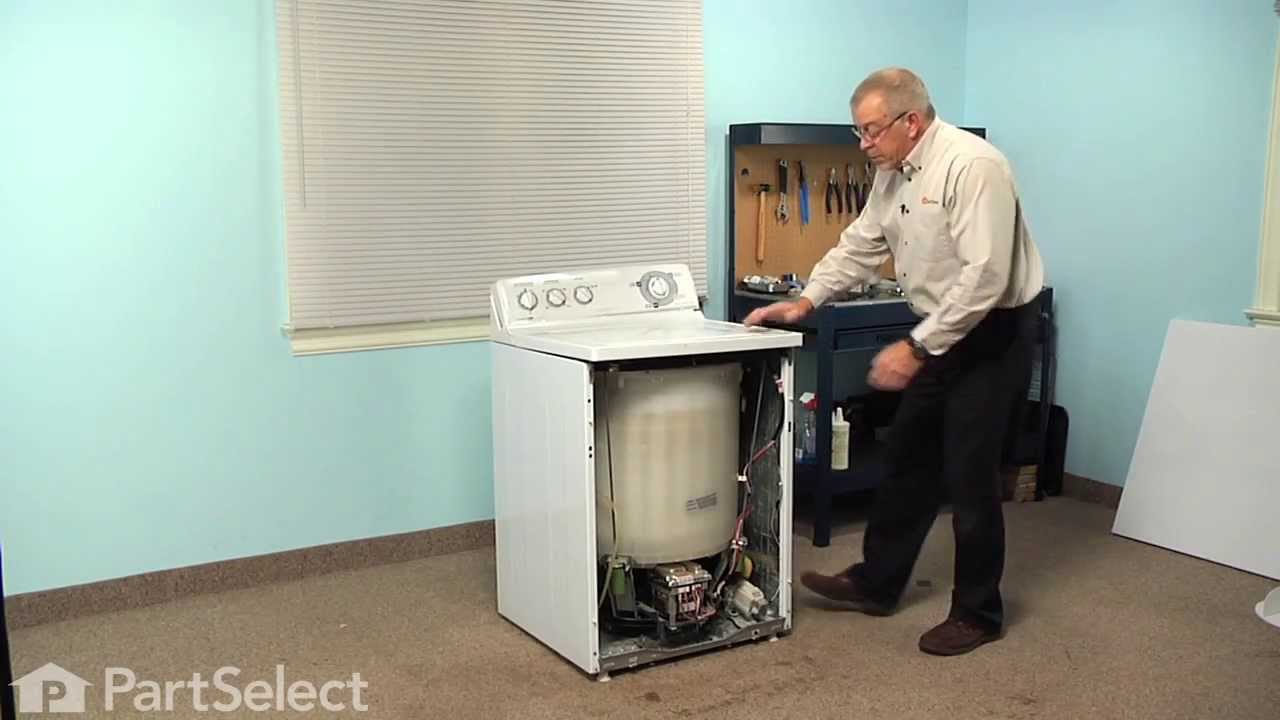
The spin bearing, used for your washer, is located at the bottom of the outer tub near the transmission. The spin bearing carries the transmission shaft in the drive system, therefore ensuring the shaft is spun properly during its spin cycle. If your spin cycle makes loud or odd noises, replacing the bearing could be a solution to your problem. Refer to the diagram provided by the manufacturer for further installation instructions. As a safety precaution make sure to unplug appliance from the power source.
How Buying OEM Parts Can Save You Time and Money
Troubleshooting
This part fixes the following symptoms:
Leaking
This part works with the following products:
Washer, Washer Dryer Combo.
This part works with the following products:
Frigidaire, Kenmore, Gibson, Westinghouse.
Part# 3204405 replaces these:
AP2131587, 508644
Customer Reviews
Average Rating:
★★★★★
★★★★★
1 Review
5.0
Filter By Rating:
5 Stars
1
4 Stars
0
3 Stars
0
2 Stars
0
1 Star
0
Sort by:
< Prev
1
Next >
Search filter:
Clear Filter
Your search term must have 3 or more characters.
Keep searches simple. Use keywords, e.g. "leaking", "pump", "broken" or "fit".
Sorry, we couldn't find any existing reviews that matched. Try using some different or simpler keywords.
★★★★★
★★★★★
Clifford C - November 17, 2018
Verified Purchase
squeal is gone
it was a challenge to remove the main drum from the washer/dryer stacked combo, but with help was able to remove the inner and main drum, in the base of the main drum is where the spin bearing lives, easy to remove the old warn out bearing and replace with the new, then reassemble, I did replace the drum main seal at the same time.
< Prev
1
Next >
Customer Repair Stories
Average Repair Rating: 2.0 / 5.0, 1 reviews.
What's this?
Sort by:
< Prev
1
Next >
Search filter:
Clear Filter
Your search term must have 3 or more characters.
Keep searches simple. Use keywords, e.g. "leaking", "pump", "broken" or "fit".
Sorry, we couldn't find any existing installation instruction that matched.
Noisy spin cycle
1) Unplugged washer and disconnected the hot and cold hoses. 2) removed the 2 phillips screws at the bottom of the front panel then removed front panel, you need enough clearance by the floor, this is tricky because you have to lean washer back and push down on the front panel. 3) removed the agitator from the washer 4) lif
... Read moreted top of washer and leaned back against the wall and removed the splash tub cover one clip at a time with a flat screw driver. 5) removed the trunion, this is difficult and will take some time due to the corrosion from many years of use use a hammer (3Lb short handle) and tap one side then the other. You will need to rock it back and forth awhile. 6) lift the basket out of splash tub 7) I removed the hose for water level and removed the 3 bolts that hold the splash tub to the three base mounts (support arms). 8) remove the splash tub 9)change the plastic washer that is between the splash tub and the transmission in the bottom of the splash tub 10) change the bearing(metal sleeve) on the bottom of splash tub and lightly grease w/ a thin film of teflon grease 11) install splash tub and install the 3 bolts along w/ the water level tube 12) install the larger seal (w/ spring in it) and push into the splash tub firmly 13) use some tub and faucet silicone grease on the smaller seal because you don't want to damage this main seal, install the main seal (sits on top of the larger one that's in the tub already) be careful when getting to flat part of the shaft when installing ( spin around the shaft as you pass this point) it will keep the seal from coming out. 14) install trunion (sits down on top of the seal) you will feel the tension of the spring when bolting the trunion back into place. 15) install basket and bolt it to the trunion (I installed a new filter on the bottom of the basket and required some special glue, ask for "3M" GMGA600 adhesive. 16) installed splash tub cover, agitator and front cover. Washer works great and is quieter than it was new.
Ask our experts a question about this part and we'll get back to you as soon as possible!
4 questions answered by our experts.
Sort by:
< Prev
1
Next >
Search filter:
Clear Filter
Your search term must have 3 or more characters.
Keep searches simple. Use keywords, e.g. "leaking", "pump", "broken" or "fit".
Sorry, we couldn't find any existing answers that matched.Try using some different or simpler keywords, or submit your new question by using the "Ask a Question" button above!
Nancy
August 12, 2019
Washer suddenly makes very loud screech in spin cycle...
For model number GLET1142SC0
Hi Nancy, thank you for your question. You may want to take a look at your Spin Bearing to see if it needs to be replaced. However if that part is fine then the issue might be in your transmission. I hope that helps. Good luck with your repair.
3 people found this helpful.
Was this helpful?
Thank you for voting!
Vince
October 30, 2019
Machine is very noisy when in spin cycle. Would replacing the spin bearing fix the problem?
For model number GCET1031FS4
Hello Vince, thank you for inquiring. Yes, this Spin Bearing may be the source of the problem. You may also want to consider either the Drive V-Belt, part number PS1146950, or the Tension Idler Pulley, part number PS418897 for your model. Good luck with your repair!
3 people found this helpful.
Was this helpful?
Thank you for voting!
Robert
January 14, 2019
How is the inner outer drum is remove from stakleble washer/dryer frigidare brand
For model number FGX831CS1
Hi Robert, thank you for your question. Removing the drum is fairly similar in a stackable and a stand alone machine. We have a video that will show you how it is generally done on a stand alone. You should be able to use that to removing the one on your model: https://www.youtube.com/watch?v=rwhgUmZ15eY&t=194s. I hope that helps. Good luck with your repair.
2 people found this helpful.
Was this helpful?
Thank you for voting!
Chad
May 14, 2019
Our washer (20 years old but still running strong) has developed a knocking sound during the spin cycle. Might this be an issue with the spin bearing, or belt/tension pulley? No leaks that i can detect; no excessive movement during the spin cycle. Just a constant knocking sound during the spin cycle, even if the tub is empty.
For model number FWS445RFS1 (Frigidaire)
Hello Chad, thank you for your question. We would recommend replacing the Upper Spin Bearing Washer Part #: PS473382 and Spin Bearing Part #: PS446536. I hope this helps.
1 person found this helpful.
Was this helpful?
Thank you for voting!
< Prev
1
Next >
✖
Ask a Question
Ask our experts a question on this part and we'll respond as soon as we can.