The dryer thermal limiter, also known as a thermal fuse, blows the fuse to cut off power to the dryer when the dryer begins to overheat. Once the dryer reached 220 degrees Fahrenheit, the heat cuts out. If the thermal fuse is defective, damaged, or blown up then the dryer wont start, especially since it cannot be reset. It must be replaced if the following symptoms occur: the dryer overheats, takes too long to dry clothes, or there is not enough heat in the dryer. The tools needed for this repair are, a screwdriver, putty knife and needle-nose pliers. This part is manufactured for both gas and electric dryers.
How Buying OEM Parts Can Save You Time and Money
Part Videos
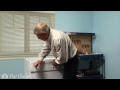
Replacing your Frigidaire Dryer Thermal Limiter - Limit 220
Keep searches simple. Use keywords, e.g. "leaking", "pump", "broken" or "fit".
Sorry, we couldn't find any existing reviews that matched. Try using some different or simpler keywords.
★★★★★
★★★★★
Allen G - August 22, 2022
Verified Purchase
Was what I needed
Was what I needed
★★★★★
★★★★★
Angela C - June 18, 2022
Verified Purchase
Thermal Limiter
It did what it was supposed to and the dryer works great once again.
★★★★★
★★★★★
Doug H - December 1, 2020
Verified Purchase
Fast and complete
I could not believe how quick my part showed up. Everything was was in great shape and was as advertised. What a pleasure doing business with a company like this.
Great job to all.
★★★★★
★★★★★
Brendan Z - February 4, 2019
Verified Purchase
Terrible experience
Would give 0 stars if possible, part was not in stock but no one said anything for 2 weeks, then my part was shipped to somebody else and neither the company or the shipping company will do a thing about it!! Shipping company has a website only in Chinese, and the company says it's my problem since it was delivered!!! What a joke. Lost a valued customer over this situation because of all the drama! Thanks for all your help!!!
February 4, 2019
Hello Brendan ,
Thank you for leaving a review on the part ordered. I am showing we offered to refund for the order but did not get a response back. I have sent you an email in regards to the order. Hope to hear from you!
★★★★★
★★★★★
Tammy W - October 30, 2018
Verified Purchase
Easy part, new part
New part, easy to put on.
★★★★★
★★★★★
Danielle C - October 22, 2018
Verified Purchase
3 tries, this dryer is out!
The first time I ordered this thermal limiter and replaced it, the dryer worked for a quick test run of 10 seconds. However, when it came time to do actual laundry, my dryer failed to run. Optimistic that the limiter was the issue, I ordered two more of these to try again. After the second and third replacements, the dryer never ran again. It was worth a try....
Delivery took a bit longer than expected (longer than the 1.8 average days I had seen advertised), but parts were as promised in good condition.
★★★★★
★★★★★
Steven W - October 17, 2018
Verified Purchase
Great
Came fast. Appliance back in working order
★★★★★
★★★★★
Bill W - September 11, 2018
Verified Purchase
dryer part
they sent the wrong one
★★★★★
★★★★★
Charles D - August 28, 2018
Verified Purchase
Part Happy
Part was a thermal limiter fuse. No complaints. Installed it in my dryer and the dryer has so far worked just fine .. Much cheaper than buying a new dryer !
★★★★★
★★★★★
Michael J - June 23, 2018
Verified Purchase
Replacing high temperture switch 134120900
Dryer would not start. After a little trouble shooting discovered bad high temperature safety switch. Replaced switch and cleaned dryer exhaust to prevent future problems. Tools needed: standard Phillips #2 screwdriver, and one stubby #1 Phillips screwdriver. Total time 1 hour.
< Prev
1
2
Next >
Customer Repair Stories
Average Repair Rating: 3.1 / 5.0, 20 reviews.
What's this?
Sort by:
< Prev
1
2
Next >
Search filter:
Clear Filter
Your search term must have 3 or more characters.
Keep searches simple. Use keywords, e.g. "leaking", "pump", "broken" or "fit".
Sorry, we couldn't find any existing installation instruction that matched.
May not have to take out the whole drum to replace the limiter!
After lifting the dryer top and finding the location of the thermal limiter on the back of the dryer, where it is difficult to get at, I carefully cut through the dryer cabinet with the multimaster on three sides to form a 'flap' upon which the limiter was mounted. By prying this flap open from the back, the two wires and two screws are e
... Read moreasily accessible to replace the limiter, without having to remove the whole drum. Afterwards, I just bent the flap back into place and taped the seams. If it ever blows again, the fix will take all of about two minutes.
Read less
Timothy from CRANBURY, NJ
Difficulty Level:
Really Easy
Total Repair Time:
15 - 30 mins
Tools:
Pliers, Screw drivers
1 personfound this instruction helpful.
Was this instruction helpful to you?
Thank you for voting!
quit heating
The repair went smoothly considering I am a rookie. The repair videos on your site are great. Followed the techs instructions and got thru it fine.
Thanks,
Jim
James from ALBUQUERQUE, NM
Difficulty Level:
A Bit Difficult
Total Repair Time:
1- 2 hours
Tools:
Screw drivers
1 personfound this instruction helpful.
Was this instruction helpful to you?
Thank you for voting!
lack of heat
Followed the video
ann from WALLA WALLA, WA
Difficulty Level:
Really Easy
Total Repair Time:
30 - 60 mins
Tools:
Screw drivers
1 personfound this instruction helpful.
Was this instruction helpful to you?
Thank you for voting!
dryer stopped in middle of cycle and wouldn't restart
followed video and replaced part( cleaned and vacuumed dryer while I had it apart),relatively easy repair
Michael from HUDSON, NY
Difficulty Level:
Easy
Total Repair Time:
30 - 60 mins
Tools:
Pliers, Screw drivers
5 of 5 peoplefound this instruction helpful.
Was this instruction helpful to you?
Thank you for voting!
Dryer would not turn on, no power. Since i already have replaced thermal limiter switch, i knew exactly what to do and also how to shorten installation
Remove 2 screws from back of unit, remove top by lifting and pulling up, set aside. Using pliers,needle-nose, remove the 2 wires from switch, then using a magitized philips screw driver, remove 2 screws holding switch to back of unit, replace switch, reassemble everything. 20 minutes, boom, ur done, dry some clothes now
Daniel from SAN ANTONIO, TX
Difficulty Level:
Very Easy
Total Repair Time:
15 - 30 mins
Tools:
Pliers, Screw drivers
2 of 2 peoplefound this instruction helpful.
Was this instruction helpful to you?
Thank you for voting!
Dryer would not even turn on. Removed 2 screws holding thermal limiter switch and removed t
Basically, i followed instructions on 1 video i seen, but was able to shorten repair by not removing drum, and was still able to access the thermal limiter switch to remove old one and install new one. Worked like a charm. Thanks Dan
Daniel from SAN ANTONIO, TX
Difficulty Level:
Really Easy
Total Repair Time:
30 - 60 mins
Tools:
Screw drivers
5 of 5 peoplefound this instruction helpful.
Was this instruction helpful to you?
Thank you for voting!
No Heat, Dryer Runs, But Right Side Of Timer Would Not Advance, Left Timer Would
I used the percentage scale on this website to try and determine the likely cause. After reading several sites, I couldn't make sense of the timer not working on just one type cycle. When I got the dryer drum off, I could plainly see that one of the heater coils was broken. They get heat stressed and break down over time and a hard shak
... Read moree probably finished this off. This unit is 5 plus years old. It was Saturday and I had no heater, so I actually found it at a local parts supplier. Also replaced the drum bearing and the bearing cup in the rear along with the heater. BTW, a new heater comes with a HIGH thermal switch attached to it so don't buy it extra. The bearing cone also comes with a new bushing in the pack. I DID use the Thermal Limiter that I order from the site because I was already in there. Everything works great now. I may have gotten most off my parts elsewhere but this site was the biggest help of them all. I will definitely be back here again.
Read less
STEPHEN from Nashville, TN
Difficulty Level:
Easy
Total Repair Time:
1- 2 hours
Tools:
Nutdriver, Pliers, Screw drivers
2 of 2 peoplefound this instruction helpful.
Was this instruction helpful to you?
Thank you for voting!
Dryer not heating
UNPLUG DRYER (this is key) Removed the top of dryer. used screwdriver and pliers to remove two screws and electrical connections then reinstalled new part stick the magnet behind the part to the back of the dryer to help control the small screws.
Steve from COVINGTON, KY
Difficulty Level:
Easy
Total Repair Time:
15 - 30 mins
Tools:
Pliers, Screw drivers
2 of 2 peoplefound this instruction helpful.
Was this instruction helpful to you?
Thank you for voting!
Had a professional do the install. He had difficulty aligning the cabinet so that it did not rub against the dryer drum. The parts you mailed me worked fine and resolved the problem. Thanks. Even having to pay the installer saved me 50% on the total job.
Installer unscrewed the screws on the upper panel, loosened the pulley holding the rubber drum cable, and pulled the drum up and out of the unit. With the rear heating element exposed, he unplugged the wire connections to the heating element, unscrewed the four screws holding the element to the rear panel and took the element out. Then
... Read morehe installed the new heating element by re-applying the four screws into the rear panel. He then replaced the thermal limiter which was directly at the right of the heating element by unplugging the wire connections to the thermal limiter and then unscrewing the thermal limiter from the rear panel. The process to install the new thermal limiter was the reverse process. He didn't install a new High Limit Thermostat because there was one attached to the new Heater. When all the new parts were installed, he reinstalled the drum by pushing the rear nub of the drum into the whole at the center of the heating plate. He then placed the rubber drum cable around the drum with the rough service facing the drum, placed the cable on the pulley and adjusted the tension of the cable with a screw driver. He then reinstalled the front panel by aligned the screw holes and reinserting and tightening the screws.
Dryer would not start. When turning on, I could hear faint humming, but the motor would not start.
1) Unplug the unit. 2) Remove all screws from top of the unit except for the one in the center front that does not go through the outer casing. 3) Find the Thermal Limiter which is on the back wall near the top on the left side when looking from the front. 4) Disconnect the two wires 5) Remove the two screws that mo
... Read moreunt the limiter to the back wall. 6) Use an ohmeter to test if a current flows through the unit. If no current flows through (an open switch), then the unit will need to be replaced. 7) Clean any lint that you can at this point. 8) Use two screws to mount new Thermal Limiter 9) Reconnect the two wires to the Limiter. 10) Attach the top of the dryer case.
Read less
Mark from Normalville, PA
Difficulty Level:
Easy
Total Repair Time:
15 - 30 mins
Tools:
Screw drivers
15 of 18 peoplefound this instruction helpful.
Was this instruction helpful to you?
Thank you for voting!
< Prev
1
2
Next >
Questions and Answers
Ask our experts a question about this part and we'll get back to you as soon as possible!
37 questions answered by our experts.
Sort by:
< Prev
1
2
3
Next >
Search filter:
Clear Filter
Your search term must have 3 or more characters.
Keep searches simple. Use keywords, e.g. "leaking", "pump", "broken" or "fit".
Sorry, we couldn't find any existing answers that matched.Try using some different or simpler keywords, or submit your new question by using the "Ask a Question" button above!
Larry
November 15, 2017
Will the dryer motor come on if the thermal fuse is bad? The dryer quit drying, although the drum will turn.I changed the element but still no heat. The drum will turn, but no heat. Thanks
For model number LEQ332DSO
Hi Larry, Thank you for the question. If the fuse has blown,the dryer will still run and everything else will work except the there will be no heat. Hope this helps!
32 people found this helpful.
Was this helpful?
Thank you for voting!
Alan
December 8, 2017
How do you test the thermal limiter
For model number FSE748GFS1
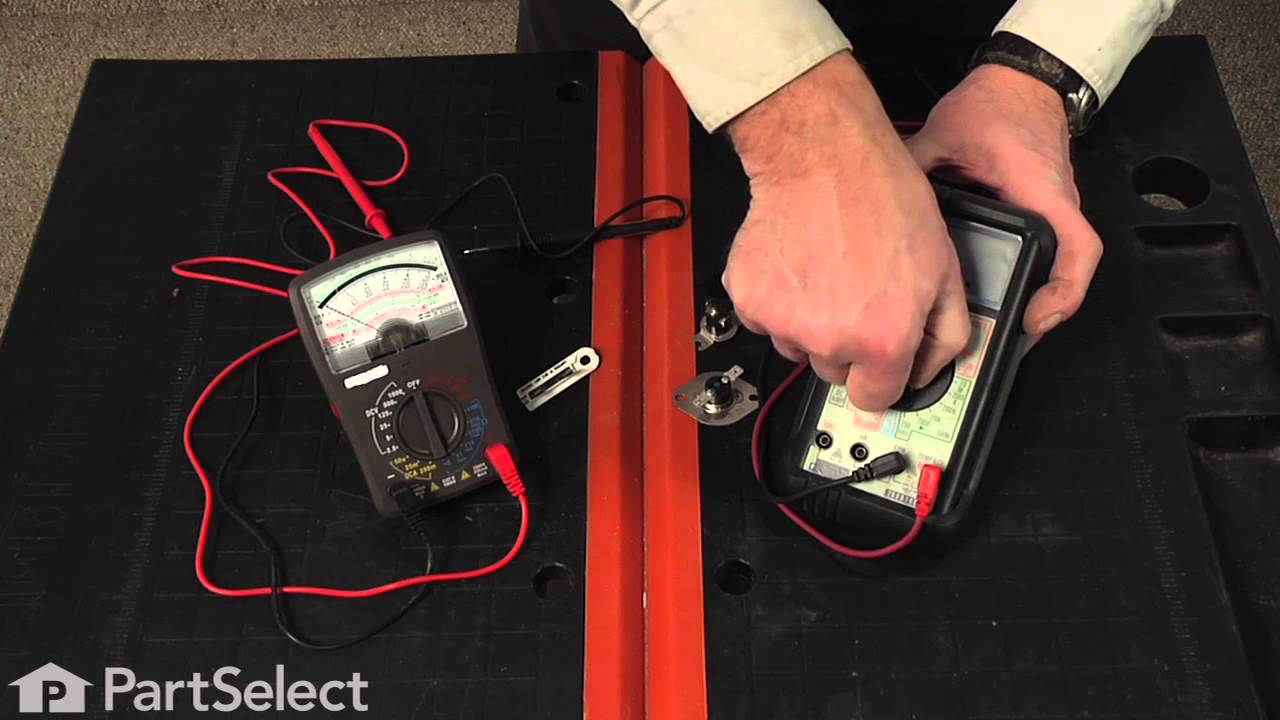
Hello Alan, Thank you for your inquiry. You can test the thermal limiter with a multimeter. The reading should be close to 0 ohms if the limiter is working properly. I have included a link to a video with more information on how to use a multimeter. Hope this helps!
https://www.youtube.com/watch?v=JvI84Qa8Jc4
13 people found this helpful.
Was this helpful?
Thank you for voting!
Adam
April 30, 2018
We are having a problem with it saying door open and the light inside dryer will not come on, so dryer will not start.
For model number FASE7073LW0
Hi Adam,
Thank you for your question. The part you may want to check is your door switch. It sounds like that might be your issue. You could also take a look at your thermostats and your thermal fuses as well. I hope that helps. Good luck with your repair.
7 people found this helpful.
Was this helpful?
Thank you for voting!
Hal
October 4, 2017
How could the circuit breaker in the house impact the thermal limiter? I think by not reinstalling it to the sheet metal to help dissipate heat and also my electrical tape both allowed heat build up to a higher level than the limit and it blew. Is there anything else inside the dryer that also needs to be checked?
For model number FDE336RES2
Hi Hal,
Thank you for your question. Your circuit breaker can blow your thermal fuse if you do not have a surge protector on your electrical box. If there is a power surge, that will blow your fuse. It does indeed seem like because of the way that you installed the part, that is why it blew so quickly. You could check all of your thermostats to see if they are malfunctioning at all. However it just seems like you would need to install the part properly and it should be alright. Good luck with your repair Hal.
6 people found this helpful.
Was this helpful?
Thank you for voting!
Golden
October 28, 2017
My dryer stops a few seconds to minutes into cycle and the "drying", "cooldown", and "extended tumble" start blinking. It can only be restarted after pressing cancel button. Does this sound like a result of a faulty thermal limiter? Sometimes, the dryer will run nearly a full cycle after it has been unplugged for an extended period of time.
For model number AEQ8700fso
Hi Golden,
Thank you for your inquiry. There are some parts that you will need to check to see which one is causing the issue. You will need to check the thermal limiter, the high limit thermostat, the control thermistor, the heating element, the rear drum bearing kit and the door catch. I hope this helps. Thank you and have a great day!
6 people found this helpful.
Was this helpful?
Thank you for voting!
Beverly
August 14, 2019
When i push start button dryer runs 2-4 secs then cut off
For model number feq1442eso
Hello Beverly, thank you for contacting us. This is most likely due to a faulty Thermal Limiter. This Thermal Limiter part number PS419402 is the correct replacement for your model. You may also want to consider the Rear Drum Bearing part number PS459829 to fix this. I hope this helps and good luck with your repair!
4 people found this helpful.
Was this helpful?
Thank you for voting!
Hal
October 3, 2017
Would not start so checked thermal list fuse... it was blown... replaced but did not reinstall to sheet metal since it was very tight space. put black tape around connections. had great air flow after reinstall and heat. after use it blew. should i have put on the sheet metal and left bare (no electrical tape) insted of the easier fix. ??
For model number FDE336RES2
Hi Hal,
Thank you for your inquiry. It would have been best if the fuse was installed the way the original fuse was. If the fuse blows again it may be an issue with the circuit breaker in your house. I hope this helps. Thank you and have a great day!
3 people found this helpful.
Was this helpful?
Thank you for voting!
Pete
October 29, 2017
The dryer will not stay on drying. It goes immediately to cool down thus no heat. Would the thermal fuse cause this? Or is it more serious?
For model number 41788042700
Hi Pete,
Thank you for your question. I would suggest testing both the high limit thermostat and your thermal cut off on your heating element to make sure that they are working correctly. It sounds like your high limit thermostat might be not working correctly. Testing the thermal cut off as well is just to cover all of your bases. You can test those parts with a multi meter. When you test them, if they are both showing zero, then those parts are fine and you may need to then test your heating element. The ohms should also be showing zero for that part as well. Good luck with your repair.
2 people found this helpful.
Was this helpful?
Thank you for voting!
Garry
November 27, 2017
Does this dryer have a heating element? If so, how do I replace it?
For model number FRE5714KW0
Hello Garry,
Thanks for your question. The heating element for your model is part number PS418120. We have a video online for how to replace the heating element. Please go to the following link:
https://www.youtube.com/watch=gxcWQuqYWr0
I hope this helps.
When i push the start button, the lights flash then it shuts off. Does not actually try to start at all. Any idea as to what could be going on?
For model number Aeq6000es2
Hi Dallas,
Thank you for your question. If the dryer is not starting, there are some parts that you will need to check to see which ones are causing the issue. You will need to check the thermal limiter, the drive motor, the switch, the drum belt, the terminal block, the rear drum bearing, the door catch and the high limit thermostat. I hope this helps. Thank you and have a great day!
1 person found this helpful.
Was this helpful?
Thank you for voting!
< Prev
1
2
3
Next >
✖
Ask a Question
Ask our experts a question on this part and we'll respond as soon as we can.