Keep searches simple. Use keywords, e.g. "leaking", "pump", "broken" or "fit".
Sorry, we couldn't find any existing reviews that matched. Try using some different or simpler keywords.
★★★★★
★★★★★
Michael S - November 3, 2021
Verified Purchase
Worked as expected, easy to install
Motor has been running great so far. Resurrected my 14 year old dryer. Hopefully will get another 10 out of it. Part came earlier than expected which is always a plus. Great video showing how to install. Overall I give parts selclect an A+ for this one.
★★★★★
★★★★★
MAUREEN M - May 2, 2020
Verified Purchase
Easy repair, worked as expected
Part was shipped quickly, very easy installation even for a girl! Laundry up and going in no time
★★★★★
★★★★★
Dawn T - October 24, 2019
Verified Purchase
Easy repair
The part came fast and fit perfectly. The dryer is now back in working order.
★★★★★
★★★★★
Dennis A - August 3, 2019
Verified Purchase
Dryer Motor
Part fit perfectly and came pretty fast. Will order from here again.
★★★★★
★★★★★
Joseph S - December 19, 2018
Verified Purchase
The part was of exacting specification.
The part was delivered as promised and my appliance is working again. I will recommend PartSelect to all my friends. Thank you PartSelect!
★★★★★
★★★★★
William P - August 24, 2018
Verified Purchase
Easy repair
Worked well easy to do
★★★★★
★★★★★
Bernard K - June 26, 2018
Verified Purchase
Dryer motor and pulley
The part worked just fine. It was a direct replacement.
★★★★★
★★★★★
BECKY N - February 15, 2018
Verified Purchase
worked very well
the motor came all set to drop in. Removing the fan was difficult .I had to buy the fan assembly because the fan blade is inside a heat welded enclosure . and the blade was not sold separately
★★★★★
★★★★★
Mary C - February 13, 2018
Verified Purchase
Great parts, easy repair, nice install videos!
Just as ordered. Good seller. We ordered the more common fix parts 1st, but it was the motor. Runs good now. Great install videos!
< Prev
1
Next >
Customer Repair Stories
Average Repair Rating: 2.8 / 5.0, 10 reviews.
What's this?
Sort by:
< Prev
1
Next >
Search filter:
Clear Filter
Your search term must have 3 or more characters.
Keep searches simple. Use keywords, e.g. "leaking", "pump", "broken" or "fit".
Sorry, we couldn't find any existing installation instruction that matched.
fan cage came undone from motor
The new motor from parts select was not correct. The new motor is a bolt on. The original motor was a press on. Had to return at a cost of 42.00 dollars. Had to buy a new dryer.
1. Plastic door handle was dry rotted. 2. Plastic blower 7/8 inch nut was cracked. 3. The bearings on the dryer motor where seized.
1. The old door handle was just easily pried out and the new one snapped right in place. Job took about one to 2 minutes. 2 and 3. Watched the video on how to take the blower wheel assembly and motor out and then back in. Just copied what the video showed. Really easy. It helps to have an assistant when taking out and installin
... Read moreg the dryer drum but not mandatory.
Vibration and Low Pitched Grinding Noise Developed as Dryer Heated Up.
**I'd already installed a new rear drum bearing assembly (very simple) and the issue continued. Further testing (running unit with the drum removed) indicated the blower assembly and/or motor was the source as the issue only occurred when the unit was under load. I ordered both parts as there was simply no way the original blower assembly
... Read more was coming off the original motor.** Disconnected Power. Removed Top and Front of Dryer. Removed Drum. Disconnected Wiring Harness at Motor. Disconnected Blower Housing Temperature Sensor. Pried Open Clip Holding Motor to Mounting Bracket. Removed All Other Mounting Hardware. Removed Original Motor and Blower Assembly. Mated New Blower Housing to New Motor. Mated Assembly to Mounting Bracket. Reinstalled Clip Holding Motor to Mounting Bracket. Reconnected Wiring Harness at Motor. Reconnected Temperature Sensor to Blower Housing. Installed All Other Mounting Hardware. Reconnected Power. Checked Assembly Alignment. No Issues Noted. Disconnected Power. Reinstalled Drum and Front of Dryer. Reconnected Power. Checked Assembly Alignment While Under Load. No Issues Noted. Reinstalled Top of Dryer. Issue is Resolved. ** Thoroughly cleaned entire unit including under the baffle located at the rear of the drum. Amazing amount of baked on lint located there. Checked heating element (no issues) and cleaned lint trap assembly in door of unit. Another area with an amazing amount of baked on lint. Total for all parts needed was $236.91. Total time needed was about 3 hours. Parts arrived within one day of order. Unit operates 'as-new'.**
my motor was making noise i tried to replace the motor but could not get the blower wheel off the motor so i had to buy a blower and housing assy. also... now it works great...
mark from clearfield, PA
Difficulty Level:
A Bit Difficult
Total Repair Time:
30 - 60 mins
Tools:
Nutdriver, Socket set
8 of 12 peoplefound this instruction helpful.
Was this instruction helpful to you?
Thank you for voting!
press start button, machine would just hum
took off back vent panel, removed belt from idler pulley. tried motor again to see if it would work under no load. motor was not seized just would not run. concluded it was the motor. I removed the 2 mounting screws from the back of motor area. from there removed top of dryer and bolts for the front door panel. propped open the door pan
... Read moreel to get to the fan housing and 2 front motor mount screws. disconnect the fan wires. pull out fan and motor assembly from front of dryer. I used a medium sized locking wrench behind the pulley and then mounted the wrench (attached behind the pulley in a vise) from there I was able to use a socket to take off the plastic nut at the end of the fan. Notice that it is a reverse thread so don't strip it. dismount motor from bracket and reasmble with new motor. all the steps in reverse. Since the motor was out it just made sense to replaced the belt at this time. took about 45 minutes to disassemble and just over an hour to get it all back together. Make sure you clean out the lint box from inside the dryer.. over the years it will accumulate a lot of nasty dust bunnies. check that all the surfaces are clear of dust and the back of the vent pipe to..
howling dryer. Wolves in the area would howl back!
Waited only 2 days for part. That was with REGULAR delivery. It usually takes weeks to get out to REMOTE northern Minnesota. Unstacked the dryer took off the top. 2 screws to open front. Pulled 3 drum mounting screws. Pulled the drum. Removed the pivot. Cleaned (blowed and vacuumed everywhere). Cleaned the pivot receptacle. Relubed
... Read morethe pivot with high temp lube. Removed 2 motor assy mounting screws. Screwed off the squirrel cage. Swapped the motor. Remounted new motor assy. Looped belt over drum. Remounted the drum. Closed the front. Closed the top. Opened the belt access plate on the rear. Looped new belt over the tensioner. Closed the access plate. Restacked dryer. Turned it on. Sounds like brand new. Less than 2 hours. Saved more than $800. More than I generally make an hour! Actually I saved a lot more than $800 because I probably would have had to buy both the washer and dryer stack so it could have been around $2500. Everything I ordered arrived in 1 box and all parts are right! Now in my spare time I need to replace the bearings on the old motor and I'll be ready for the next time, in another 10 years!
Motor would hum but not turn on when start knob was turned.
The motor bearings had stiffened up – classic planned obsolescence.
I could tell the motor was bad, because when I tried to spin the drum by hand, it wouldn't turn in any direction. (Normally it can turn fairly easily.)
(Helpful hint: As you remove screws / parts, place them in a plastic baggie, and write on the
... Read morebaggie from whence they came. This is especially helpful if you have to order parts and then wait a few days for them to arrive.)
You can replace the starter motor without removing the drum, but it is easier if you do remove the drum. Plus, I decided to also replace the drum belt, since it was 9 years old and is a wear part.
UNPLUG THE DRYER BEFORE YOU BEGIN.
1. Pop off the top cover; it has two spring clips at the front, then it hinges up. Disconnect the green grounding wire at the back, then slip the cover off the hinges and set it aside.
2. Remove the front panel:
a. Looking down into the dryer, disconnect the electrical harnesses that go between the front controls and the body. You may have to cut a nylon cable tie to access one or more. (Note that they have shapes that won't allow you to mix them up later). Also, there are two wires that attach to connectors in the top middle of the dryer, which are difficult to get at; you may need a needle nose pliers to pull them. Remember their color-coding for reinstallation.
b. Remove the two phillips screws located about 8 inches from the top, on either side, inside the body, that hold the front panel in place.
c. The front panel is now held in place by spring clips. Pry it gently to pop it loose. It will hinge out, then you can pull it up. Notice how the front piece has felt pads that serve to hold the front of the drum; you'll line it up the same way when it goes back together. Set the front panel aside.
3. Remove the rear motor vent plate. a. It is at the back, lower right of the dryer (which is lower left once you're behind it). 2 phillips screws hold it in place.
b. Now look inside to see the motor and belt. Memorize how the belt feeds around the motor pulley and the larger, white plastic tensioner pulley. Notice how the rear motor bearing sits in a half-round metal plate, held down by a spring clip. (Make a drawing if you like.)
c. Move the spring- loaded tensioner arm to take tension off the belt, then slip the belt off the motor pulley.
d. Notice that the tensioner pulley, arm and spring are all held in place by the spring. Note that the tensioner pulley can slip off its shaft. Note these things for when you put it all back together later.
e. Now undo the tensioner arm spring and remove the arm, pulley and spring. Set them aside.
4. Remove the drum:
a. There is a yellowish plastic block at the top front of the open dryer body that holds the drum. Take it out with a phillips screwdriver.
b. Slip the now un-tensioned belt off the drum, to the back, so it hangs over the heater element body. You can leave it there for now, so you don't forget to install it before you put everything back together. If you're going to replace the belt, now is a good time to do so. (Check the length of the new belt against the old one, to make sure they're the same.)
c. Now you can remove the drum. It uses a center ball in a socket joint at the back to hold it in place. Use a screwdriver to lever upward on the back of the drum. This will pop the ball up, and then you can pull the drum out from the front.
5. Clean it up. Now is a very good time to vacuum out any lint in the fan area, inside the dryer body, etc. Also consider removing the lint trap assembly from the dryer front ( 2 phillips screws) and vacuuming it out as well.
6. Remove the motor.
a. First, remove the fan that's attached to the front of the motor. Use a socket (7/8", I think) to unscrew the fan from the front of the motor shaft. IMPORTANT: The fan has a plastic hex nut sh
took 3 cycles to dry made alot of niose growling and rumbling
first turn off breaker and unplug dryer !!! popped open top of cabinet pushing in on 2 clips with butter knife then removed the front panel,2 phillips screws then pull out on top until 2 spring clips pop out, remove 2 wires from door switch move to side. remove motor access panel lower rear 2 phillips screws. unplug wire clip from motor,
... Read morepush belt tensioner to right,undo belt from motor pulley and tensioner , then undo 1 snap clip from cradle holding motor go to front of dryer remove 2 phillips screws from blower houseing to base. unscrew senser from front of houseing then carefully lift slightly on front of drum and pull blower houseing and motor out as one. hold motor shaft still and unscrew blower wheel from motor shaft, install new motor do not overtighten blower fan you will break it slide belt off drum put new belt on makeing sure grooves are against the drum. slide motor assembly back in put motor back in cradle in rear and reinstall clip, screw down blower assembly in front, reinstall belt on motor pully and tensioner and clip wires back on motor. put front panel back on making sure not to damage felt on front of drum, rotate drum by hand several full turns clockwise to make sure belt tracks properly, reinstall wires on door switch and all screws and rear cover plug in turn breaker back on and test
Motor replacement requires removing/releasing the top and front of the dryer, then removing the drum through the front of the dryer. The top is hinged at the rear and the front can be pried up. The front is held by two sheet metal screws that are accessible once the top is lifted up. Three screws hold the drum to the bearing at the rear o
... Read moref the drum. A small access door on the rear panel allows removal of the idler arm and its spring. You will need a socket drive with a short extension to remove the fan assembly from the motor at the front of the dryer, and it has a LEFT-HAND thread. The most difficult part of the replacement, once you figure out how to access everything, is getting the drum re-attached to the bearing at the rear of the drum. It can be hard to align the three screws, and once you have that done they need to be carefully tightened a few times after rotating the drum a few cycles, to get all the play out. Once the motor was replaced the dryer works like new.
Read less
Samuel M from Jamaica Plain, MA
Difficulty Level:
A Bit Difficult
Total Repair Time:
1- 2 hours
Tools:
Screw drivers, Socket set
7 of 11 peoplefound this instruction helpful.
Was this instruction helpful to you?
Thank you for voting!
Motor shaft broke
had to remove the belt and drum and then remove the motor and replace it...put the belt on and then the hard part was to get the drum in place without the belt coming off. New Motor works quieter than the old one did, so I assume the dryer came with a defective motor to begin with and then the shaft finally broke. It runs very quiet now,
... Read morebut never did before. Even a service man came when it was new but said that was normal. Now we know it was not....there was a problem from the start.
Read less
Beverly from Blairsville, GA
Difficulty Level:
A Bit Difficult
Total Repair Time:
30 - 60 mins
Tools:
Socket set
14 of 18 peoplefound this instruction helpful.
Was this instruction helpful to you?
Thank you for voting!
< Prev
1
Next >
Questions and Answers
Ask our experts a question about this part and we'll get back to you as soon as possible!
10 questions answered by our experts.
Sort by:
< Prev
1
Next >
Search filter:
Clear Filter
Your search term must have 3 or more characters.
Keep searches simple. Use keywords, e.g. "leaking", "pump", "broken" or "fit".
Sorry, we couldn't find any existing answers that matched.Try using some different or simpler keywords, or submit your new question by using the "Ask a Question" button above!
JP
May 8, 2019
1) 8 year old dryer. Do dryer motors need to be oiled or should we leave it alone ? 2) are dryer motors brushless ? 3) i know one should expect the pulley wheel and drum wheels to spin freely when spinning them by hand, which indicates they are good. On my dryer motor it does not spin freely, (this is done with belt off and everything, with only blower blade connected to motor, is this normal, also when turning the motor by hand i hear as though there is some friction (no squeaking or anything) just soft friction (the same sound it makes when you rub your hands together) is my motor still fine ? Is this normal behaviour ? Thank you.
For model number 110.C68012010
Hi JP, thank you for your question. For specifications like that on parts you will have to speak to the manufacturer directly as unfortunately they do not provide that information to us. If you are having an issue with your dryer spinning, then the parts to check would be your belt, pulley, rollers, the motor capacitor, and the motor itself. If your physical parts (the belt, pulley, etc...) are all in good condition then the parts to check would be your capacitor and your motor. You can test the capacitor with a multi meter to determine if it is working correctly. I hope that helps. Good luck with your repair.
5 people found this helpful.
Was this helpful?
Thank you for voting!
Jim
July 8, 2019
Trying to take motor out to replace it but the nut between the motor and fan is nylon, and the shaft is not threaded. How do I take it off, concerned that if I force it it may break the fan
For model number 417.84042500
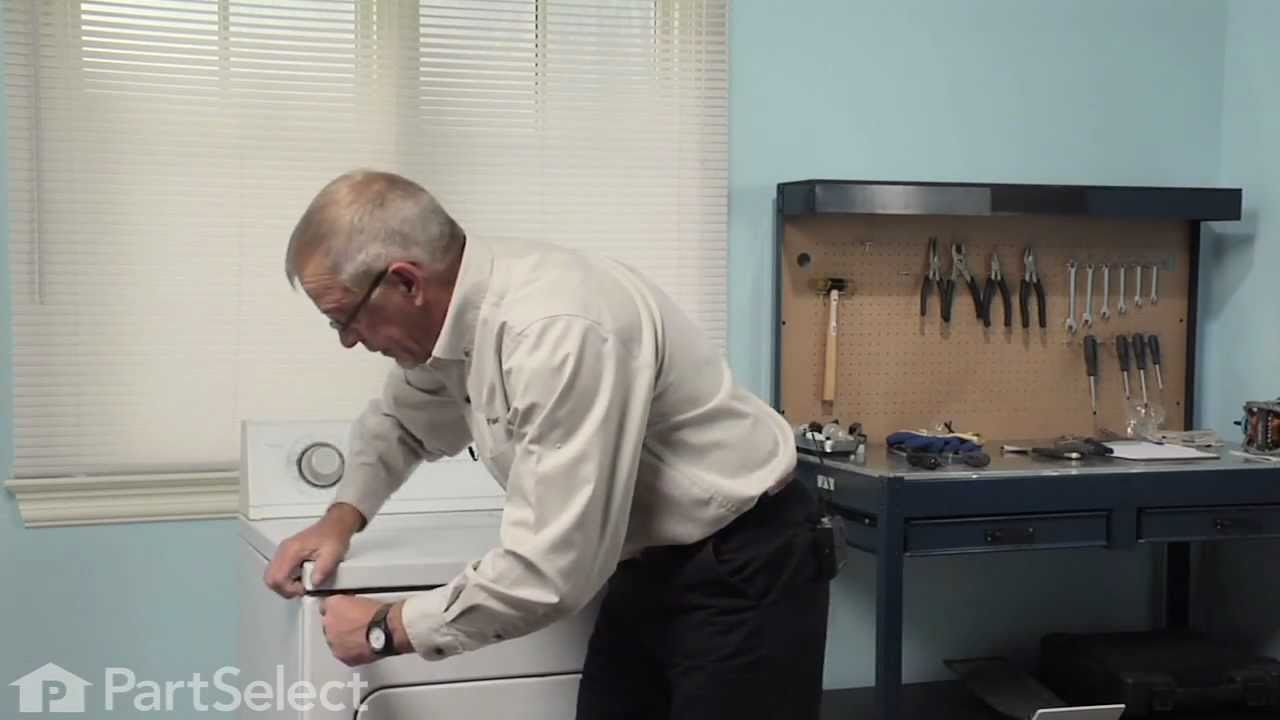
Hello Jim, Thank you for the question. Here is a how to video on how to remove and replace the motor. Hope this helps!
https://www.youtube.com/watch?v=D1jACZ9BG-g
3 people found this helpful.
Was this helpful?
Thank you for voting!
Allen
September 1, 2017
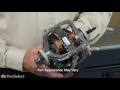
The blower housing assembly for this dryer; the picture shows the fan blade screwing on the motor shaft. My motor shaft has a tapered knurled bushing on the shaft and the fan blade appears to be pressed on the shaft. Is this a general picture of the part and not the exact picture of the replacement part?
For model number AGQ6000ES2
Hi Allen,
Thank you for your question. This is an exact picture of what the motor looks like. I hope that helps. Good luck with your repair.
2 people found this helpful.
Was this helpful?
Thank you for voting!
Don
November 9, 2017
I believe my drive motor is shot. When I hit start button I can hear a hum. So I know power is getting to motor, but it will not start. If I depress contact switch, hit start button and rotate drum a little, the motor will kick in and dry the clothes as normal. I'm thinking it's the starter winding on motor. Any idea as to how difficult it is to replace motor? Any special tools needed? Any problems connecting to blower unit?
For model number FEQ332ES0
Hi Don, Thank you for the question. Here is a link to a video showing how to replace a Dryer Motor. It is similar to the one you need and shoudl have the same basic steps for installation. hope this helps!
https://www.youtube.com/watch?v=rn8uJ_53Z_I
2 people found this helpful.
Was this helpful?
Thank you for voting!
John
January 15, 2018
My dryer was making several noises. On was like a squeaky noise and the other sounds really loud, almost like its a washing machine. I installed new bearing kit, belt, and idler arm assembly. The squeaky noise is gone but that other noise is still there. Any ideas? Thank you.
For model number CREF342AS1
Hi John,
Thank you for your question. There are some parts that you will need to check to see which one is causing the issue. You will need to check the rear drum bearing, the drum support bearing, the drum belt, the drum glide, the lower front felt seal and the bearing bracket. I hope this helps. Thank you and have a great day!
1 person found this helpful.
Was this helpful?
Thank you for voting!
Keith
March 26, 2019
What is the correct motor to order for this dryer? S/n xd41615734
For model number GLEQ332AS2
Hello Keith, Thank you for contacting us. I have researched the model you have provided and have found the part you are looking for is PartSelect Number PS418132. Hope this helps, good luck with this repair!
1 person found this helpful.
Was this helpful?
Thank you for voting!
Don
November 8, 2017
When i press start button on dryer i hear a hum but dryer will not start. If i depress the "door closed" button and give the drum a push at the same time as i hit the start knob the dryer will function. Any suggestions as to problem?
For model number feq332eso
Hi Don,
Thank you for your inquiry. There are some parts that you will need to check to see which one is causing the issue. You will need to check the start switch, the thermal limiter, the timer knob, the rotary knob, the drive motor, the door switch, the drum belt and the terminal block. I hope this helps. Thank you and have a great day!
Was this helpful?
Thank you for voting!
Chuck
December 5, 2019
Part number ps4 18132 does this come with the motor or separate capacitor
For model number Lgq332ds0
Hi Chuck, thank you for your question. This part is only the motor and the motor pulley. I hope that helps. Good luck with your repair.
Was this helpful?
Thank you for voting!
John
January 16, 2018
Hello, i asked a question yesterday but forgot to include some details. Here is my intial question.... " my dryer was making several noises. on was like a squeaky noise and the other sounds really loud, almost like its a washing machine. i installed new bearing kit, belt, and idler arm assembly. the squeaky noise is gone but that other noise is still there. any ideas? thank you." the dryer makes this other noise about after an hour and a half of use. after i unscrew back vent panel, it sounds like its coming from motor. could it be bearings in the motor that are bad, requiring a new motor? thank you... again.
For model number CREF342AS1
Hello John, Thank you for your inquiry. That does sound like a possibility. You can test the motor with a multimeter to see if it is functioning properly. Hope this helps!
Was this helpful?
Thank you for voting!
Alan
January 2, 2019
Will 131560100 replace the old 131951700?
For model number FDE336RES2
Hello Alan, thank you for your question. The replacement motor for your specific model is part number 131560100. This is an authorized replacement for the original motor. Good luck with your repair!
Was this helpful?
Thank you for voting!
< Prev
1
Next >
✖
Ask a Question
Ask our experts a question on this part and we'll respond as soon as we can.